

*Updated February 2nd, 2026
Noticing a few loose tiles in your bathroom? It might not seem like a big deal at first, but ignoring a loose tile can lead to bigger problems over time. Loose tile can signal failing adhesive, moisture issues, or even a hidden leak behind the wall or floor. Left unchecked, these issues may cause damage to the grout, mold growth, or cracked ceramic tiles.
The good news? In many cases, you can fix loose tiles yourself without a full renovation. With the right tools and a bit of DIY confidence, you can repair the problem and restore your bathroom or shower safely and effectively. Whether the tile is on a wall tile surface or the floor, this guide walks you through how to fix it step by step.
1. Gather the Materials
Before you fix loose tiles, gather the following tools and supplies:
-
Chisel or scraper
-
Hammer or rubber mallet
-
Notched trowel
-
Tile adhesive, thinset, or mastic
-
Matching grout
-
Grout sealer or sealant
-
Putty knife
-
Gloves and goggles
Having everything ready helps prevent mistakes that could break surrounding tiles.
2. Remove Grout Around the Tile
Start by carefully removing the grout from the grout lines surrounding the loose tile. Use a utility knife, scraper, or grout saw to avoid unnecessary damage to nearby tiles.
If the grout is difficult to remove, softening it with steam or heat can help. Take special care not to crack or weaken the surrounding tiles during this step.
Actual costs depend on your location, project scope, and materials. The best way to know what you'll pay is to get quotes from local contractors.
Get Your Free Estimate →3. Remove the Tile Carefully
Next, gently remove the tile using a chisel or putty knife. Work slowly to avoid breaking the tile or damaging the surface beneath the tile.
-
If the tile comes off cleanly and is not damaged, you may put it back.
-
If it’s broken or has cracked tiles, you’ll need to replace the tile.
This step applies whether the tile is on a shower wall, bathroom wall, or floor.
"We matched with a great contractor the same day. The whole process was easy and completely free."
4. Remove Old Adhesive
Scrape away the old adhesive behind the tile from both the back of the tile and the substrate. Old mortar or cement that wasn’t properly installed is a common reason tiles become loose or loosen over time.
Make sure the surface is clean and dry before continuing—this ensures the new adhesive is enough to hold the tile firmly.
5. Apply New Tile Adhesive
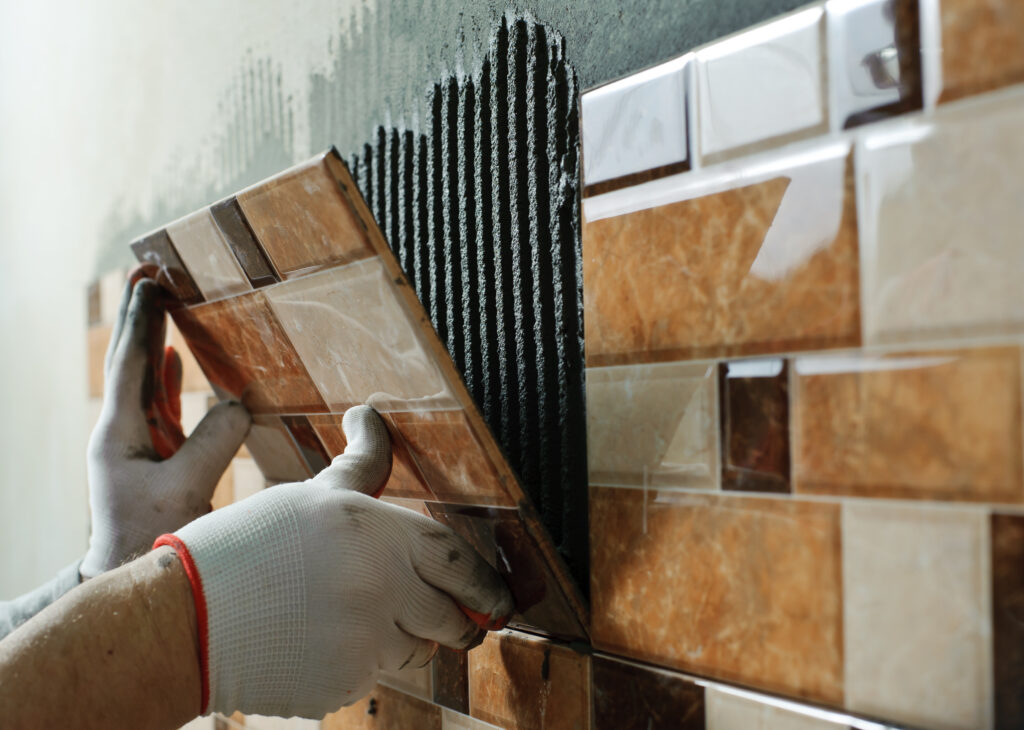
Using a notched trowel, spread a fresh layer of tile adhesive, thin set, or mastic evenly across the back of the tile.
Press the tile firmly into place, making sure it sits flush with the surrounding surface. If needed, use tile spacers to maintain even spacing and proper joint alignment.
6. Let the Adhesive Dry
Allow the adhesive to fully dry according to the manufacturer’s instruction. Keep the area wet-free and avoid placing pressure on the tile during this time, especially in showers or bathrooms and kitchens where moisture is common.
7. Apply New Grout
Once the adhesive has set, it’s time to apply new grout around the tile.
-
Mix the grout as directed
-
Apply it using a grout float
-
Press it into the joint firmly
Use a damp sponge to wipe away excess grout without disturbing the lines.
Why Hire a Licensed Professional
- Licensed & insured — protects you from liability
- Warranty coverage — manufacturers require pro installation
- Code compliance — avoids permit issues
- Faster completion — pros finish in days, not weeks
8. Let the Grout Cure
Let the grout cure completely. Rushing this step can weaken the bond and lead to loose tiles later. Keep the area undisturbed and dry during curing.
9. Seal the Grout
Finish by applying a grout sealer or waterproof sealant. This helps prevent moisture penetration, mold, and future damage, especially in shower areas.
DIY vs. Professional: At a Glance
FAQs on Fixing Loose Bathroom Tile
Spring and summer are the busiest seasons for home improvement projects — top-rated contractors book up fast. Lock in your estimate now before demand peaks.
Check Availability in Your Area →Can I fix a loose tile without removing it?
Yes. If the tile is only slightly loose, you may be able to fix loose tiles without removing them by injecting adhesive under the tile. This method works best when there’s no damage to the grout or crack in the tile.
What adhesive should I use?
For floor tile or wet areas like a shower, thinset mortar is best. For vertical wall applications in dry areas, tile mastic may work. Always check compatibility with ceramic tile.
Ready to Move Forward?
Tell us about your project and get matched with up to 3 pre-screened contractors. Compare quotes, check reviews, and hire with confidence.
What causes tiles to loosen?
Common issues like moisture intrusion, poor installation, movement in the backing, or failing cement can all cause tiles to loosen over time—especially in home improvement projects where waterproofing was skipped.
Can this be a DIY repair?
Yes. Most homeowners can handle this DIY repair. However, widespread damage, recurring leaks, or structural issues may require professional help.
Final Thoughts
Fixing a loose tile in your bathroom, floor, or shower is a manageable DIY task that can prevent bigger issues down the road. By properly removing grout, applying fresh adhesive, and resealing the area, you can complete a lasting repair without major disruption.
Regular cleaning, resealing grout lines, and addressing moisture quickly will help prevent future tile problems—keeping your space safe, solid, and looking great.
Get connected with local bathroom professionals in your area!
Connect with top-rated local contractors who can help you with siding, roofing, HVAC, windows, and more. Get free quotes from verified professionals in your area today.