
Bathtub caulking isn’t the most exciting home project, but it’s one of those small tasks that makes a big difference. When caulk starts to crack, peel, or pull away, water can sneak into places it doesn’t belong. This leads to mold, mildew, and even hidden water damage over time.
Re-caulking a bathtub is usually a simple, affordable DIY project that most homeowners can handle in an afternoon. With the right materials and gameplan, you can seal things up properly, keep moisture out, and make your tub look clean and finished again.
Why Bathtub Caulking is Important
Bathtub caulking might seem like a small detail, but it plays a big role in protecting your bathroom. That thin line of caulk around your tub is often the only thing stopping water from slipping behind the walls or under the floor. Once water gets in there, it can lead to rot, soft spots, and repairs that are significantly more expensive than a simple re-caulking job.
Caulk also helps keep mold and mildew under control. Bathrooms are already warm and humid, which makes them a perfect environment for mold to grow. When caulk cracks or pulls away, moisture gets trapped in those gaps and gives mold exactly what it needs. Fresh, properly applied caulk helps seal out moisture and makes your tub easier to clean.
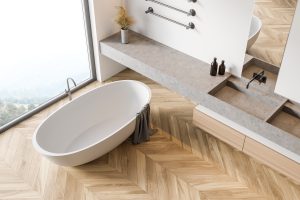
There’s also the visual side of things. Old, stained, or peeling caulk can make an otherwise clean bathroom look worn out. New caulk instantly freshens up the space and gives your tub that clean, finished look without the cost of a full remodel.
Finally, good caulking helps extend the life of your entire bathroom. By keeping water where it belongs, you’re protecting not just the tub, but the walls, floors, and framing around it.
Signs Your Bathtub Needs New Caulk
It’s not always obvious when bathtub caulk has reached the end of its life, but there are a few clear signs that it’s time for a refresh. One of the most common is caulk that’s cracked, peeling, or shrinking away from the tub or wall. Caulk naturally dries out over time, and once it loses flexibility, it can’t seal properly anymore.
Another red flag is mold or mildew that just won’t go away, no matter how much you scrub. If dark spots keep coming back in the same areas, it usually means moisture is getting behind the caulk. At that point, cleaning alone won’t fix the problem. New caulk is the real solution.
Pay attention to how water behaves when you shower. If you notice water pooling or sitting along the edges of the tub instead of draining away, that’s a sign the seal isn’t doing its job. Even small amounts of standing water can slowly work their way into gaps and cause damage over time.
Finally, take a close look for any visible gaps between the tub and the wall. Even thin openings are enough for water to sneak through. If you can see daylight, feel a draft, or run your finger along the edge and notice uneven spots, it’s probably time to re-caulk. Catching these issues early makes the fix quicker, easier, and much less expensive.
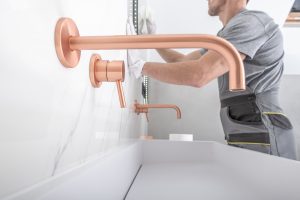
Tools and Materials You’ll Need to Caulk a Bathtub
Before you get started, it helps to have everything ready so you’re not scrambling mid-project. The good news is that caulking a bathtub doesn’t require a long list of tools, and most of them are inexpensive or things you may already have at home.
First, you’ll need bathroom caulk, either silicone or silicone-latex. Look for a product specifically labeled for tubs and showers, since these are designed to resist moisture and mold. Silicone tends to last longer and hold up better in wet areas, while silicone-latex is a bit easier to work with and clean up.
A caulk gun is what lets you apply the caulk smoothly and with control. Basic models work just fine for a small job like this, so there’s no need to buy anything fancy.
To remove the old caulk, grab a utility knife or a caulk removal tool. This step is important because new caulk won’t stick well to old, dried material. Taking the time to remove as much of the old caulk as possible will give you better results.
Painter’s tape is optional but highly recommended, especially if you want clean, straight lines. Running tape along the tub and wall edges helps keep caulk exactly where it belongs and makes the finished job look much more professional.
Before applying new caulk, you’ll want to clean the area thoroughly. Rubbing alcohol or a good bathroom cleaner works well to remove soap scum, residue, and moisture so the caulk can properly adhere.
Keep paper towels or rags nearby for quick cleanups. Caulk can get messy fast, and wiping as you go makes the whole process less stressful.
Finally, you’ll need a way to smooth the caulk. A caulk smoothing tool gives you a nice, even finish, but a gloved finger works just as well for most DIYers. The key is to smooth the bead before the caulk starts to set so it seals properly and looks clean.
With these tools and materials on hand, you’ll be set up for a smoother, easier caulking job from start to finish.
Choosing the Right Caulk for a Bathtub
Picking the right type of caulk from the start makes the job easier and helps your caulk last longer without cracking, peeling, or growing mold.
Silicone vs. Acrylic Latex Caulk
Silicone caulk is usually the go-to choice for bathtubs and showers. It’s extremely water-resistant, flexible, and holds up well in humid environments. Once it cures, it forms a strong, rubbery seal that doesn’t shrink much over time. The downside is that silicone can be a little harder to work with. It’s stickier, harder to smooth, and cleanup takes more effort. It also can’t be painted, which usually isn’t a big deal around tubs.
Acrylic latex caulk (sometimes labeled as “siliconized latex”) is easier to apply and clean up, especially for beginners. It smooths nicely, cleans up with water, and can be painted if needed. However, it’s not as durable in constantly wet areas. Over time, it may shrink or crack faster than silicone, especially around tubs that get used daily.
Which is best? For bathtubs and showers, 100% silicone caulk is usually the better long-term option. It lasts longer and handles moisture better. If ease of application is your top priority and the area doesn’t stay wet for long periods, silicone-latex can still work, but you may need to re-caulk sooner.
Mold- and Mildew-Resistant Caulk
Bathrooms are prime real estate for mold and mildew, so using caulk designed to fight them is a smart move. Mold-resistant caulk contains additives that slow down or prevent mold growth, helping your tub stay cleaner and fresher longer.
This matters because even perfectly applied caulk can develop mold if moisture gets trapped on the surface. Mold-resistant formulas don’t eliminate the need for cleaning, but they do make maintenance much easier and reduce how quickly stains show up.
When shopping, look for labels that say “mold-resistant,” “mildew-resistant,” or “bathroom and kitchen use.” Some products even list how long they’re guaranteed to resist mold, like 5 or 10 years. These features are especially helpful if your bathroom doesn’t have great ventilation or gets used frequently.
How to Remove Old Bathtub Caulk
Removing old caulk might not be the most fun part of the job, but it’s one of the most important. New caulk won’t stick well to old, dried, or moldy caulk, so taking your time here pays off.
Start by using a utility knife or caulk removal tool to carefully cut along both edges of the old caulk. Once it’s loosened, gently pull it away in strips if possible. Work slowly to avoid scratching the tub or wall surface.
For stubborn or moldy caulk, a caulk softener or remover can help. These products break down old caulk and make it easier to scrape off. Let the remover sit for the recommended time, then try again with your tool. If mold is present, wear gloves and make sure the area is well ventilated.
After the caulk is removed, it’s time to clean and prep the surface. Scrub the area with a bathroom cleaner to remove soap scum, residue, and any remaining mold. Then wipe everything down with rubbing alcohol to remove oils and help the surface dry completely. Make sure the area is fully dry before applying new caulk. Moisture can prevent proper adhesion.
Once the old caulk is gone and the surface is clean and dry, you’re set up for a smoother application and a longer-lasting seal.
Step-by-Step: How to Caulk a Bathtub
Caulking a bathtub is all about prep, patience, and taking it one step at a time. You don’t need professional skills to do a good job.
Step 1: Clean and Dry the Area
Before you even think about applying new caulk, make sure the area is completely clean and dry. Any leftover soap residue, oils, or moisture can keep caulk from sticking properly. Even a small amount of dampness can cause the caulk to peel or fail later on.
After cleaning, give the area time to fully dry. You can speed things up with a towel or a fan, but don’t rush this step. Dry surfaces are key to good adhesion and long-lasting results.
Step 2: Apply Painter’s Tape
Painter’s tape is your secret weapon for a clean, professional-looking caulk line. Run tape along both sides of the seam where the tub meets the wall, leaving a small gap where the caulk will go.
The tape acts as a guide, helping you keep the caulk straight and even. It also catches any excess, so you’re not stuck scraping off messy edges later. When the tape comes off, you’re left with crisp, clean lines that instantly make the job look polished.
Step 3: Cut the Caulk Tube Tip Correctly
Cutting the caulk tube tip the right way makes a huge difference in how easy the job is. Cut the tip at a 45-degree angle, starting small. A smaller opening gives you more control and helps prevent over-applying caulk.
Aim for a bead that’s just wide enough to fill the gap between the tub and wall. You can always cut a little more off if needed, but starting too big usually leads to messy results.
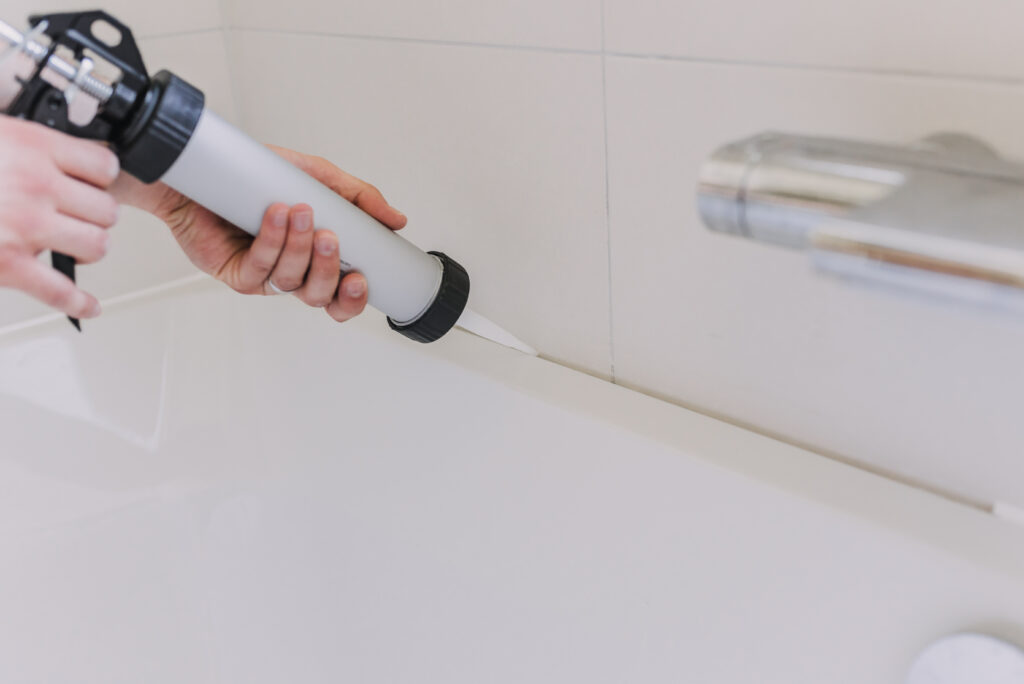
Step 4: Apply the Caulk Evenly
When applying caulk, slow and steady wins. Hold the caulk gun at a consistent angle and gently squeeze the trigger as you move along the seam in one smooth motion.
Try to keep your speed even so the bead stays consistent. It’s usually easier to pull the caulk gun toward you rather than push it. Don’t worry if it’s not perfect. This step is about getting caulk into the gap.
Step 5: Smooth the Caulk
Smoothing the caulk helps push it into the seam and creates a clean, finished look. You can use a caulk smoothing tool or simply a gloved finger.
Lightly run the tool or your finger along the bead in one smooth pass. Avoid going over it too many times, since that can pull caulk back out of the joint. Timing matters here: smooth the caulk within a few minutes of applying it, before it starts to skin over.
Step 6: Remove Tape and Let Caulk Cure
Once the caulk is smooth, carefully remove the painter’s tape while the caulk is still wet. Pull it away slowly at an angle to avoid smearing the fresh caulk.
Now comes the waiting part. Most bathtub caulk needs at least 24 hours to cure before the tub or shower is used, but always check the manufacturer’s instructions. Using the tub too soon can ruin all your hard work. Let it fully cure, and you’ll have a clean, watertight seal that’s ready to handle daily use.
Common Bathtub Caulking Mistakes to Avoid
One of the biggest mistakes homeowners make is applying new caulk over old caulk. Even if the old caulk looks mostly intact, new caulk won’t stick well to it. The result is usually peeling, gaps, or mold showing up again way sooner than it should. Taking the time to remove the old caulk first makes a huge difference.
Another common issue is using the wrong type of caulk. Not all caulk is meant for wet areas. If it’s not labeled for tubs or showers, it may crack, shrink, or grow mold quickly. For most bathrooms, a mold-resistant silicone caulk is the safest bet.
Skipping surface prep is another easy way to sabotage your hard work. Caulk needs a clean, dry surface to adhere properly. Soap residue, moisture, or oils left behind can cause the caulk to fail even if everything else is done right.
It’s also easy to apply too much or too little caulk. Too much can look messy and take longer to cure, while too little may not fully seal the gap. Aim for a smooth, consistent bead that fills the joint without overflowing.
Finally, don’t make the mistake of using the tub before the caulk has fully cured. Even if it feels dry to the touch, it may not be ready for water yet. Using the tub too soon can weaken the seal and undo all your effort.
How Long Does Bathtub Caulk Take to Dry?
Caulk drying times can be confusing because there’s a difference between being dry on the surface and being fully cured. Dry time usually refers to when the caulk skins over and feels dry to the touch, which can happen in as little as 30 minutes to a few hours.
Full cure time is how long it takes for the caulk to completely harden and reach maximum strength. For most bathtub caulks, this takes about 24 hours, but some products may need up to 48 hours. Always check the instructions on the tube to be sure.
As a general rule, it’s safest to wait at least 24 hours before using the tub or shower. Turning the water on too soon can cause the caulk to wash out, weaken, or pull away from the surface.
Humidity also plays a role in curing. High humidity can slow down the curing process, while good airflow helps caulk dry more evenly. If your bathroom stays damp, consider using a fan or opening a window to help things along.
How Often Should You Re-Caulk a Bathtub?
Most bathtub caulk lasts about 5 to 10 years, depending on the type of caulk used, how often the tub is used, and how well the bathroom is ventilated. Silicone caulk usually lasts longer than acrylic latex, especially in high-moisture areas.
You’ll know it’s time to re-caulk if you start seeing cracks, peeling, shrinking, or gaps along the tub edge. Persistent mold or mildew that won’t clean off is another sign that the caulk has reached the end of its life.
To extend the life of your caulk, keep the area clean and dry when possible. Run the bathroom fan during and after showers, wipe down wet surfaces occasionally, and address small cracks early before they turn into bigger problems. With a little maintenance, you can keep your caulk looking good and doing its job for years.
DIY vs. Hiring a Professional to Caulk a Bathtub
For most homeowners, caulking a bathtub is very doable as a DIY project. DIY makes sense when the job is straightforward. If you’re comfortable using basic tools and don’t mind taking your time, you can usually knock this out in an afternoon and save some money in the process.
That said, there are times when professional help is worth it. If the caulk lines are in hard-to-reach areas, the tub is part of a larger remodel, or you’re seeing signs of ongoing water damage or mold behind the walls, a pro can help make sure everything is sealed correctly. Professionals also make sense if you want a flawless finish or simply don’t want to deal with the mess.
When it comes to cost, DIY is clearly cheaper. Most homeowners spend $10 to $30 on caulk and supplies. Hiring a professional typically runs $100 to $300, depending on your location and the scope of the job. For a small, simple project, DIY usually wins. For complicated or high-risk situations, the extra cost of a pro can buy peace of mind.
Bathtub Caulking FAQs
Can you caulk over old caulk?
It’s not recommended. New caulk doesn’t adhere well to old caulk, even if it looks fine. Removing the old caulk first gives you a cleaner finish and a longer-lasting seal.
Should you fill the tub with water before caulking?
Some people do this to account for slight movement in the tub once it’s filled. It’s not always necessary, but it can help in certain situations—especially with heavier tubs or flexible materials. If you choose to do it, leave the tub filled until the caulk has cured.
What’s the best caulk color for bathtubs?
White is the most common and works well with most tubs and surrounds. Clear caulk is another popular option if you want a more subtle look or have decorative tile. Some brands also offer off-white or almond to better match older fixtures.
Can caulking prevent mold completely?
Caulking helps prevent mold by sealing out moisture, but it’s not a guarantee. Good ventilation, regular cleaning, and mold-resistant caulk all work together to keep mold from becoming a problem.
Final Thoughts: Is Caulking a Bathtub a DIY Project?
For most homeowners caulking a bathtub is absolutely a DIY-friendly project. It doesn’t require special skills or expensive tools, just good prep, the right materials, and a bit of patience. Taking the time to clean thoroughly, choose the right caulk, and let it cure properly makes all the difference.
If you go slow and follow the steps, you’ll end up with a clean, watertight seal that protects your bathroom and instantly makes your tub look better. And if the job ever feels bigger than expected, there’s no harm in calling a professional. Either way, keeping your bathtub properly caulked is a small effort that pays off in a big way.

Anna has over six years of experience in the home services and journalism industries and serves as the Content Manager at MyHomePros.com, specializing in making complex home improvement topics like HVAC, roofing, and plumbing accessible to all. With a bachelor’s degree in journalism from Auburn University, she excels in crafting localized, comprehensive guides that cater to homeowners’ unique needs. Living on both coasts of the United States has equipped her with a distinctive perspective, fueling her passion for turning any house into a cherished home through informed, personalized decision-making.
Connect with top-rated local contractors who can help you with siding, roofing, HVAC, windows, and more. Get free quotes from verified professionals in your area today.