How to Fix a Running Toilet

A running toilet might not seem like a big deal—until you realize it’s wasting gallons of water and driving up your utility bill. That constant trickling sound?
It’s money literally going down the drain. The good news is that fixing a running toilet is usually a quick and inexpensive DIY job.
In this guide, we’ll walk you through the common causes, the tools you’ll need, and step-by-step instructions to stop the flow and get your toilet back in working order. Let’s get started!
Table of Contents
Common Causes of a Running Toilet
A running toilet isn’t just annoying—it’s a sign that something inside the tank isn’t working the way it should. The good news? Most of the culprits are easy to fix. Let’s break down the most common reasons your toilet won’t stop running.
1. Faulty Flapper
The flapper is a rubber valve at the bottom of the tank that lifts when you flush, allowing water to rush into the bowl. Over time, flappers can wear out, crack, or lose their seal, causing water to continuously leak from the tank into the bowl.
If your toilet runs non-stop, try pressing down on the flapper. If the running stops, you likely need a new flapper—a cheap and easy fix.
2. Fill Valve Issues
The fill valve controls how much water enters the tank after each flush. If it’s malfunctioning or set too high, water will keep flowing, never fully shutting off. If you hear a constant hissing or see water continuously trickling into the overflow tube, your fill valve might need an adjustment or replacement.
3. Float Height Misalignment
The float is what tells your toilet when to stop filling up. If it’s set too high, the tank overfills, and excess water spills into the overflow tube, keeping your toilet running. If it’s too low, you won’t get enough water for a proper flush. Adjusting the float is usually as simple as turning a screw or bending the float arm slightly to get the right water level.
4. Chain Problems
The chain connects the flush handle to the flapper, allowing you to lift the flapper when you flush. If the chain is too short, the flapper won’t close properly, and water will keep running. If it’s too long, it might get tangled or caught under the flapper, preventing it from sealing completely. A quick adjustment to the chain length can often solve the issue.
5. Overflow Tube Malfunctions
The overflow tube is a vertical pipe inside the tank that prevents water from spilling over if the fill valve doesn’t shut off in time. If it’s cracked, broken, or set too high, water will keep running into it, leading to constant refilling. Checking the height and condition of the tube can help prevent unnecessary water waste.
How to Tell Which One Is the Problem
A simple way to diagnose a running toilet is by performing a food coloring test—drop a few drops of food coloring into the tank and wait 10-15 minutes without flushing. If the color seeps into the bowl, your flapper is likely the problem.
If you hear hissing or notice water overflowing into the tube, it’s probably the fill valve or float height. With a little troubleshooting, you’ll have your toilet back in no time.
Tools and Materials You’ll Need
Before you roll up your sleeves and dive into fixing your running toilet, it’s a good idea to gather everything you’ll need. Luckily, most of these tools are basic household items, and the replacement parts are easy to find at any hardware store.
Here’s what you should have on hand:
1. Adjustable Wrench
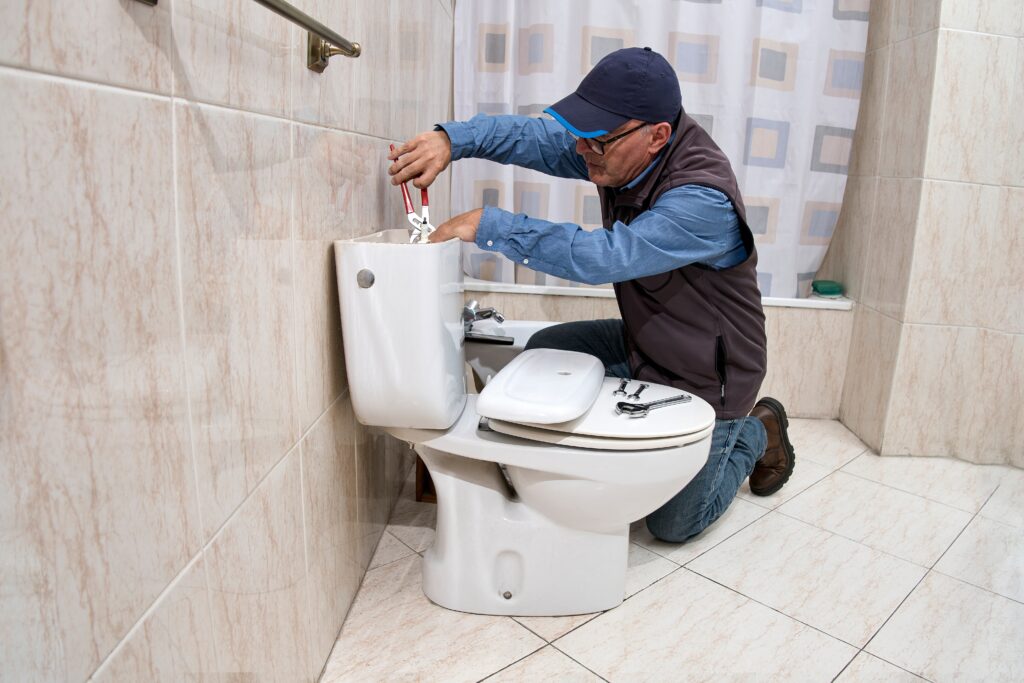
An adjustable wrench is your go-to tool for loosening and tightening bolts, which comes in handy if you need to replace the fill valve or adjust any of the internal components in the tank. If you don’t have one, a pair of pliers might work in a pinch.
2. Replacement Flapper
Since a worn-out or damaged flapper is one of the most common causes of a running toilet, it’s a good idea to have a replacement ready. Flappers come in different sizes, so check the shape and size of your old one before buying a new one. Many universal flappers work with most toilets, but double-check to be sure.
3. Screwdriver
Some toilet components, like the fill valve or float, may have screws that need adjusting. A simple flathead or Phillips-head screwdriver (depending on your toilet model) can make minor tweaks quick and easy.
4. Food Coloring
This one might seem surprising, but food coloring is an easy and effective way to check for leaks in your toilet tank. Just add a few drops to the water in the tank, wait about 10–15 minutes, and see if the color appears in the bowl. If it does, your flapper is likely the culprit.
5. Plumber’s Tape
If you need to replace the fill valve or make any plumbing connections, plumber’s tape (also called Teflon tape) helps create a watertight seal. It’s inexpensive and prevents leaks, making it a great tool to have for any plumbing project.
Step-by-Step Guide to Fixing a Running Toilet
Now that you know what might be causing your toilet to keep running, it’s time to get hands-on and fix the issue. Follow these simple steps, and you’ll have your toilet working properly again in no time.
Step 1: Identify the Problem
Before you start replacing parts, let’s figure out exactly what’s causing the issue. Here’s how:
- Perform a Food Coloring Test – Add a few drops of food coloring into the toilet tank and wait about 10–15 minutes without flushing. If the color seeps into the bowl, your flapper is leaking and likely needs to be replaced.
- Listen for Hissing or Trickling Sounds – A constant hissing noise could mean your fill valve isn’t sealing properly, while water trickling into the overflow tube points to an issue with the float or fill valve.
- Inspect the Flapper, Fill Valve, and Float – Open the tank and check each component. Look for a worn-out flapper, a misaligned float, or a faulty fill valve.
Once you’ve identified the issue, move on to the corresponding fix below.
Step 2: Replace or Adjust the Flapper
If your food coloring test confirmed a leaky flapper, it’s time to swap it out.
- Turn off the water supply – Locate the shut-off valve near the base of the toilet and turn it clockwise until it stops.
- Flush the toilet – This drains the tank so you can work on the flapper.
- Remove the old flapper – Unhook the chain from the flush handle and detach the flapper from the flush valve. If the flapper looks cracked, stiff, or misshapen, it’s time for a replacement.
- Install the new flapper – Attach the new flapper to the flush valve, ensuring a snug fit, and reattach the chain, leaving a little slack.
- Turn the water back on and test – Flush the toilet a few times to make sure the new flapper seals properly and stops the water from running.
If the toilet still runs, move on to checking the float.
Step 3: Adjust the Float
The float controls how much water refills the tank after a flush. If it’s too high, water will keep flowing into the overflow tube, preventing the toilet from shutting off. If it’s too low, your flushes might be weak. Here’s how to fix it:
- Locate the float – It will either be a ball float (attached to an arm) or a cup-style float that slides along the fill valve.
- Adjust the float height –
- If you have a ball float, gently bend the metal arm downward to lower the water level.
- If you have a cup float, find the adjustment screw on the fill valve and turn it clockwise to lower the water level or counterclockwise to raise it.
- Test the water level – Flush the toilet and let the tank refill. The water should stop about an inch below the top of the overflow tube.
Still running? The fill valve might be the problem.
Step 4: Fix or Replace the Fill Valve
If adjusting the float doesn’t solve the problem, your fill valve might need a tune-up or a full replacement.
To Adjust the Fill Valve:
- Turn off the water supply and flush the toilet to empty the tank.
- Find the adjustment screw on top of the fill valve and turn it slightly to regulate water flow.
- Turn the water back on and test the flush.
If that doesn’t fix it, you’ll need to replace the fill valve.
To Replace the Fill Valve:
- Turn off the water supply and drain the tank.
- Disconnect the water supply line from the bottom of the tank using an adjustable wrench.
- Remove the old fill valve by unscrewing the locknut underneath the tank and lifting it out.
- Install the new fill valve, securing it with the locknut and reconnecting the water supply line.
- Turn the water back on and test the flush.
If the toilet still runs, let’s check the chain.
Step 5: Check and Adjust the Chain
The chain inside your toilet tank connects the flush handle to the flapper. If it’s too long, it can get tangled or caught under the flapper, preventing a good seal. If it’s too short, it might not allow the flapper to close completely.
- Open the tank and examine the chain.
- Adjust the length – There should be just a little slack when the flapper is closed. If needed, unhook the chain and reattach it a few links higher.
- Test the flush – Make sure the chain moves freely without getting stuck.
If the problem persists, the overflow tube could be the culprit.
Step 6: Inspect and Adjust the Overflow Tube
The overflow tube prevents the tank from overfilling. If it’s too high or cracked, water will constantly run into it, keeping your toilet running.
- Check the height – The top of the overflow tube should be about an inch below the flush handle hole.
- Lower the tube if necessary – If it’s too high, you may need to trim it with a hacksaw or replace it with a shorter one.
- Inspect for cracks – If water is leaking through a crack in the tube, replace it to prevent constant refilling.
Final Test
Once you’ve gone through these steps, turn the water back on and do a few test flushes. If your toilet no longer runs continuously, congratulations—you’ve fixed it! If it’s still running, double-check each component or consider calling a plumber for a deeper issue.
With these fixes, you’ll not only stop that annoying running water but also save money on your water bill.
Preventative Maintenance Tips
Fixing a running toilet is great, but preventing the problem in the first place is even better! A little routine maintenance can save you time, water, and money down the road. Here are some easy ways to keep your toilet in top shape.
1. Regularly Check for Leaks and Worn Parts
Toilets don’t last forever, and over time, parts like the flapper, fill valve, and seals can wear out. The sooner you catch a minor issue, the easier (and cheaper) it is to fix.
- Do the food coloring test every few months to check for slow leaks. Just add a few drops to the tank, wait 10–15 minutes, and see if the color appears in the bowl.
- Listen for strange sounds like continuous running water or hissing, which could indicate a leak or fill valve problem.
- Inspect the flapper and seals—if they look worn, stiff, or cracked, swap them out before they cause bigger issues.
2. Keep Toilet Components Clean and Free of Buildup
Hard water, minerals, and debris can cause buildup inside your toilet tank, leading to poor performance and even damage over time. Keeping everything clean will help prevent malfunctions.
- Scrub the inside of the tank occasionally to remove sediment and mineral deposits. (Just be gentle—some parts are delicate!)
- Avoid harsh chemical cleaners inside the tank, as they can break down rubber and plastic components faster. Vinegar is a great natural alternative.
- Clean the flapper and fill the valve every few months to prevent grime from interfering with their function.
3. Test Water Levels Periodically to Ensure Proper Function
Your toilet’s water level plays a huge role in how well it flushes and refills. If the water is too high, it can waste water. If it’s too low, you might not get a strong enough flush.
- Check the water level in the tank—it should sit about an inch below the overflow tube.
- Adjust the float if needed to make sure the water shuts off at the right level.
- Watch for signs of overfilling, like water spilling into the overflow tube, which indicates the fill valve or float needs an adjustment.
By doing these simple checks every few months, you can avoid common toilet problems and keep everything running efficiently.
When to Call a Plumber
DIY fixes are great, but sometimes, a running toilet is just a symptom of a bigger plumbing issue. If you’ve tried all the common fixes and your toilet still won’t stop running, it might be time to bring in a pro.
Here’s how to know when it’s time to call a plumber.
1. Persistent Leaks Despite Repairs
If you’ve replaced the flapper, adjusted the float, checked the fill valve, and your toilet still keeps running, there could be a deeper issue at play.
- Leaking water supply line – If you notice water pooling around the base of the toilet or behind the tank, the supply line might be damaged or loose.
- Cracks in the toilet tank or bowl – Even small cracks can cause slow, hidden leaks. If your toilet is leaking from somewhere you can’t pinpoint, a plumber can help diagnose the problem.
- Drainage issues – If your toilet isn’t flushing properly or seems sluggish even after fixing the running issue, there could be a clog in the pipes that requires professional tools to remove.
2. The Fill Valve or Overflow Tube Keeps Failing
If you’ve replaced the fill valve or overflow tube and the toilet is still running, it might be due to:
- Low water pressure or fluctuating water flow – If your home’s water pressure isn’t stable, it can cause inconsistent refilling that a plumber can diagnose.
- A faulty shut-off valve – If the water won’t stop running even when you turn off the shut-off valve, you may need to replace it.
3. Your Water Bill is Skyrocketing
A running toilet can waste hundreds of gallons of water per day. If your water bill has mysteriously spiked and you can’t seem to stop the running, it’s worth having a plumber check for hidden leaks or more complex issues in your plumbing system.
4. Multiple Toilets or Fixtures Are Acting Up
If more than one toilet in your home is having problems—or if your sinks and showers are also draining slowly—this could indicate a larger plumbing issue, like:
- A main sewer line problem – A blockage or break in the sewer line can affect multiple drains in your home.
- Issues with your home’s water pressure – If all your toilets and faucets seem off, there may be an issue with the water supply or pressure regulator.
If your toilet keeps running despite your best efforts, or if you’re noticing other plumbing problems around the house, it’s worth calling a plumber to prevent bigger issues down the line.
Conclusion
A running toilet might seem like a minor annoyance, but as you’ve learned, it can waste a surprising amount of water—and drive up your utility bill. The good news? Fixing it is easier than you might think!
To recap, here’s what to do:
- Identify the problem – Use the food coloring test and check the flapper, fill valve, float, and chain.
- Make the necessary repairs – Replace a worn-out flapper, adjust the float, fix or swap out the fill valve, and make sure the chain isn’t too tight or tangled.
- Keep up with regular maintenance – Check for leaks, clean the tank components, and test your water levels every few months to prevent future issues.
By staying on top of small fixes, you can avoid bigger plumbing headaches down the road. Plus, a well-maintained toilet means no wasted water and no surprise spikes in your water bill.
Additional Bathroom Resources

Anna has over six years of experience in the home services and journalism industries and serves as the Content Manager at MyHomePros.com, specializing in making complex home improvement topics like HVAC, roofing, and plumbing accessible to all. With a bachelor’s degree in journalism from Auburn University, she excels in crafting localized, comprehensive guides that cater to homeowners’ unique needs. Living on both coasts of the United States has equipped her with a distinctive perspective, fueling her passion for turning any house into a cherished home through informed, personalized decision-making.