*Updated March 21st, 2025
1. Choose the Right Paint
For a long-lasting interior door that stands out, go for the highest quality latex/acrylic semi-gloss paint. Unlike other finishes, this type of paint will stand up to everyday wear and tear as well as frequent scrubbing while still retaining a shine. If you invest in quality products for this type of purchase, you won’t regret it. Your freshly painted door will have superior protection plus quality aesthetics.
Actual costs depend on your location, project scope, and materials. The best way to know what you'll pay is to get quotes from local contractors.
Get Your Free Estimate →Need professional help with your project?
Get quotes from top-rated pros.
Find Local Pros"We matched with a great contractor the same day. The whole process was easy and completely free."
2. Invest in Quality Tools and Materials
- Bucket
- Paint brush
- Paint roller
- Paint scraper
- Putty knife
- Rags
- Sanding block
- Utility knife
- Paint
- Primer
- Sanding sponges
- Sandpaper
- Paint tray
- Painter’s tape
3. Prepare the Area
For a successful painting job, it’s critical to start with clean surfaces. Make sure to give door frames, grooves and corners a thorough wash with a damp sponge – soap can be added for extra cleaning power. Don’t forget the floor surrounding the area either, any dust that gets trapped in your coat of paint will show up immediately.
Next, you’ll want to remove the door from the wall in order to create an even finish. You can lay it flat on supports and cover with plastic or tarp for protection. If that’s not possible in your case, use painters tape and plastic to protect nearby areas of your home while keeping the door in place for completion of the project.
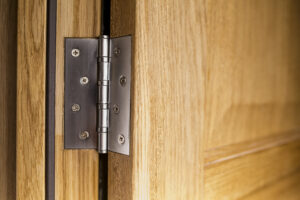
An additional step which might be beneficial is removing any handles to avoid awkward brush stroke patterns around them. If you choose to keep your handles in place, painters tape on all visible surfaces will add another layer of protection.
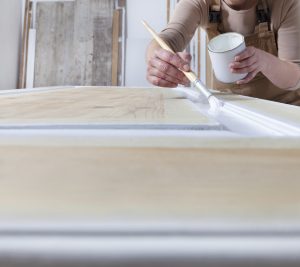
4. Sand and Prime
If the door has any gouges in it, they should be patched before the painting process begins. Wood filler or spackle can handle most of these blemishes. Just apply it with a putty knife, and once it dries use sandpaper to smooth out the specific spots and blend it as much as you can.
After any holes or cracks are filled, cured and sanded, it’s time to sand the entire door surface either manually or with a power sander. If you have oil-based paint and wish to switch over to latex for your next coat, prepping the surface is key. Start by applying primer and leave it overnight if possible. Once everything has dried out, make sure to gently sand the surface again before getting started with painting.
Why Hire a Licensed Professional
- Licensed & insured — protects you from liability
- Warranty coverage — manufacturers require pro installation
- Code compliance — avoids permit issues
- Faster completion — pros finish in days, not weeks
5. Painting Technique
Once you’ve prepped your door and gathered your supplies, it’s time for the fun part—painting! But before you dive in, it’s important to have a game plan. The right technique can make all the difference between a smooth, clean finish and a streaky, uneven one. Taking your time and following a few simple tips will help you get good results. Keep these key pointers in mind as you start painting:
- Paint the edges first. This helps provide an even coverage and prevents excess paint from dripping down. Once those areas are dry, you can move on to completing the full surface.
- Paint in thin layers. Achieve smooth, even coverage by layering paint lightly – skipping thick coats to prevent drips.
- Paint without a break. Once you’re ready to take on the painting portion of your project, do it all at once. If you pause for even just a few minutes, paint can dry unevenly and create a patchy end result.
- Use a roller for flat surfaces. If your door has a flat surface, such as a panel or slab, use a roller to apply the paint. This will help you create a smoother finish and reduce brush marks.
DIY vs. Professional: At a Glance
6. Allow Plenty of Time for Drying
Before a second coat can be applied to the surface, oil-based paints need at least 24 hours to dry. It’s crucial to allow the primer and paint to dry completely before applying additional coats. Following this practice will help you achieve the most professional finish. Painting in light coats as mentioned above also speeds up the necessary drying time. If painting a detached door, 36 hours is the suggested drying time before attempting to rehang.
Spring and summer are the busiest seasons for home improvement projects — top-rated contractors book up fast. Lock in your estimate now before demand peaks.
Check Availability in Your Area →7. Install New Hardware
To complete your fresh look, invest in new hardware for your door. When narrowing down the type of doorknob that best suits your needs, think about the practicality of both twist knobs and handles. If you’re looking for something more timeless, antique reproductions bring out an older home’s character.
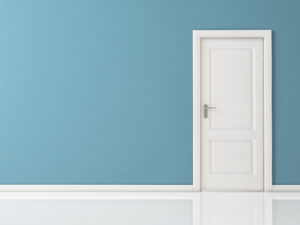
Painting your doors with a fresh coat of paint can transform the look and feel of your home. A successful painting project results in clean lines, crisp edges and an overall unified look for your door.
With these few simple tricks and tops, you’ll be able to create a beautiful freshly painted door look without hiring a professional. With patience and attention to detail with each step painting doors can be a rewarding project for any homeowner.
Ready to Move Forward?
Tell us about your project and get matched with up to 3 pre-screened contractors. Compare quotes, check reviews, and hire with confidence.
Final Thoughts
Additional Door Resources
- Guide to Installing Pet Doors
- Get to Know the Different Types of Door Hinges
- Why Your Garage Door Won’t Close and What to Do
Connect with top-rated local contractors who can help you with siding, roofing, HVAC, windows, and more. Get free quotes from verified professionals in your area today.