A small leak in your gutter might not seem like a big deal—but ignore it, and you could be dealing with some serious (and expensive) damage down the line. Leaky gutters can lead to water pooling around your foundation, ruining your landscaping, staining your siding, and even seeping into your basement.
Most gutter leaks are totally fixable with a few basic tools and a little DIY effort. In this guide, we’ll walk you through the most common signs of a gutter leak, the tools you’ll need to fix it, step-by-step repair techniques, and a few tips to help prevent future problems.
Table of Contents
Common Causes of Gutter Leaks
Before you can fix a leaky gutter, it helps to know why it’s leaking in the first place. Gutters are built to last, but like anything else, they take a beating over time—especially from rain, leaves, and seasonal changes.
Here are some of the most common reasons gutters start leaking:
Clogged Gutters Causing Overflow
This one’s a classic. Leaves, twigs, and gunk build up over time, especially in fall or if you have trees near your house. When water can’t flow through the gutter freely, it spills over the sides or backs up and finds its way through tiny seams and cracks. What looks like a leak is sometimes just a clog in disguise.
Cracks or Holes from Corrosion or Wear
Over time, metal gutters can rust or develop pinhole leaks, especially if they’ve been neglected or exposed to harsh weather. Even small cracks can let water drip out, and those leaks tend to get worse with time. For vinyl gutters, cracking often happens due to temperature swings—hot sun during the day, freezing temps at night.
Separated or Loose Joints
Gutter sections are often joined together with sealant, screws, or rivets—but those connections can loosen or fail as the materials expand, contract, or get pulled apart by heavy debris. Once the seams open up, water starts escaping right where the sections meet.
Improper Installation or Slope Issues
Gutters need the right slope—usually about a quarter inch per 10 feet—to keep water moving toward the downspouts. If the slope is off, water can pool in one spot and eventually seep through seams or spill over the edge. In some cases, gutters were just installed incorrectly from the start, setting you up for leaks and sagging down the road.
Tools and Materials You’ll Need
Before you get started on fixing that leaky gutter, you’ll want to make sure you’ve got everything you need on hand. Thankfully, most gutter repairs are pretty straightforward and don’t require a ton of fancy tools.
Here’s a quick list of what to gather up—and a few tips on how each item comes in handy:
Ladder and Safety Gear
You’ll need a sturdy ladder to reach your gutters. Make sure it’s placed on solid, level ground, and consider having a buddy nearby for extra safety. Don’t forget your gloves and safety glasses if you’re doing any scrubbing or cutting.
Garden Hose
A hose is your best friend when it comes to spotting leaks. After you’ve made your repairs, run water through the gutter to see if it still leaks or if the fix held up. You can also use it beforehand to help pinpoint the exact source of the problem.
Gutter Sealant or Caulk
This is your go-to for sealing small cracks and leaky seams. Look for outdoor-grade sealant specifically designed for gutters—it’ll hold up better against the elements. Apply it generously and let it dry according to the instructions for a watertight seal.
Gutter Patch Kit or Aluminum Flashing
For larger holes, sealant alone won’t cut it. A patch kit or a piece of aluminum flashing does the trick. You’ll apply sealant around the hole, press the patch over it, then seal the edges to keep water from sneaking through.
Sandpaper or Wire Brush
You’ll want to clean the area before sealing or patching—no one wants to stick sealant to a bunch of gunk or rust. A wire brush or some medium-grit sandpaper will help you smooth the surface and remove any dirt, debris, or old sealant so your repair actually lasts.
Screws or Rivets for Re-Securing Joints
If your gutters are leaking at the seams or starting to come apart, you’ll need to re-secure them. Screws or rivets will tighten up those loose joints. Just be sure to seal around them once they’re in to keep things watertight.
With these tools and materials in your toolkit, you’ll be all set to track down the leak, seal it up, and get your gutters flowing properly again.
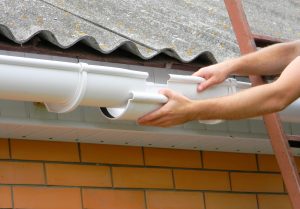
Step-by-Step: How to Fix a Gutter Leak
Fixing a leaky gutter might sound intimidating, but it’s actually pretty manageable—especially if you follow a step-by-step approach.
1. Inspect and Locate the Leak
Start by grabbing your ladder and climbing up safely to get a good look at the problem area. You might spot visible damage like cracks, rust spots, or separation at the seams. Not sure where the leak is? Grab a garden hose and run water through the gutter system. Watch carefully to see where water starts dripping—this will help pinpoint the exact trouble spots.
2. Clean and Prep the Area
Once you’ve found the leak, it’s time to prep. Use gloves to clear out any leaves, dirt, or debris from around the damaged section. If there’s old sealant or rust, grab some sandpaper or a wire brush and clean the area until it’s smooth. The surface needs to be totally clean and dry before you apply any new sealant or patch, or it won’t stick properly.
3. Seal Small Cracks and Holes
If the damage is minor, gutter sealant is all you need. Squeeze the sealant directly into the crack, then use a gloved finger or putty knife to smooth it out and make sure it’s well covered. Give it time to cure as directed on the label. Once it’s dry, run the hose again to check that the leak’s gone.
4. Patch Larger Holes
For anything bigger than a nail hole, you’ll need a patch. Cut a piece of aluminum flashing slightly larger than the damaged area. Apply a generous bead of sealant around the hole, then press the patch into place and hold it for a few seconds. Seal all around the edges of the patch to lock out water. Let it dry completely before testing.
5. Repair Leaky Seams or Joints
Leaky seams are pretty common—especially if the sections have shifted or the sealant has worn out. Carefully pull the joint apart just enough to clean out any old caulk or debris. Then reapply a fresh bead of seam sealant, press the pieces back together, and secure them with screws or rivets. Don’t forget to seal around the hardware to keep it watertight.
When to Replace vs. Repair Gutters
Not every gutter problem needs a full replacement—sometimes a quick patch or seal job is all it takes. But other times, you’re better off cutting your losses and upgrading the whole system. So how do you know when it’s time to say goodbye to your gutters and start fresh? Here are a few signs to help you decide:
Age and Overall Condition of the Gutter System
Most gutters last around 20 years—sometimes longer if they’ve been well maintained. But if your gutters are getting up there in age and you’re starting to notice multiple problem spots, repairs might just be putting a Band-Aid on a bigger issue. At that point, replacing them could actually save you money in the long run.
Persistent Leaks Despite Repairs
If you’ve sealed the same seam three times and it’s still dripping every time it rains, that’s a red flag. Constant leaks—even after you’ve done all the right fixes—usually mean there’s a bigger problem at play, like warped metal, worn-out joints, or underlying damage.
When your patch jobs just don’t hold, it’s probably time for a full replacement.
Visible Rust, Sagging, or Structural Damage
If your gutters look like they’ve been through a few too many storms, trust your instincts. Rusty sections, bent or sagging spots, and gutters pulling away from the house aren’t just cosmetic issues—they’re signs that your system is no longer doing its job. Once the structural integrity is compromised, patching won’t cut it. A new system will not only work better but also protect your home’s foundation, siding, and landscaping more effectively.
If your gutters are generally in good shape with just one or two trouble areas, repairs make total sense. But if you’re chasing leaks all over or dealing with rusted, sagging sections, replacing the system might be the smarter move.
How to Prevent Future Gutter Leaks
Once you’ve patched up a leaky gutter, the next step is making sure it stays leak-free. A little regular maintenance goes a long way when it comes to protecting your home and saving you from repeat repairs.
Here are a few easy things you can do to keep your gutters in good shape and prevent future leaks.
Clean Gutters Regularly
This one’s simple but super important. Leaves, twigs, and roof grit pile up fast—especially in the fall or if you’ve got trees nearby. When gutters get clogged, water backs up and can start seeping through seams, overflows, or even cause your gutters to pull away from the house.
Aim to clean them at least twice a year (spring and fall are ideal). If you have a lot of overhanging trees, you might want to increase that up to every few months.
Install Gutter Guards
If you’re tired of climbing the ladder all the time, gutter guards can be a game-changer. These handy covers help keep out leaves and debris while still letting water flow through. They’re not completely maintenance-free, but they drastically cut down on the amount of gunk that ends up in your gutters—and that means fewer chances for leaks to develop.
Check for Loose Fasteners and Slope Issues
Every now and then, take a quick look at your gutters to make sure they’re securely fastened to the fascia and properly sloped. If they’re sagging or pulling away from the house, water can start pooling or spilling over the edges. Gutters should have a slight downward slope toward the downspouts so water flows where it’s supposed to. Adjust hangers or brackets if needed to get things back on track.
Schedule Seasonal Inspections
Even if you’re keeping up with the basics, it’s still a good idea to have a pro take a look once or twice a year—especially before or after heavy weather seasons. A quick inspection can catch small problems before they turn into big ones, like early signs of rust, seam separation, or hidden clogs in hard-to-see areas.
By staying on top of these simple tasks, you’ll extend the life of your gutters and keep your home protected from water damage.
FAQs
How long does gutter sealant take to dry?
Most gutter sealants take about 24 hours to fully cure, but it can vary depending on the product and weather conditions. Some quick-dry options may be water-ready in as little as 30 minutes to an hour, but it’s always best to check the label. For the best results, apply sealant on a dry day and give it plenty of time to set before the next rain.
Can I repair a gutter leak myself or should I hire a pro?
Absolutely—you can repair many gutter leaks yourself with just a few basic tools and a little time. Sealing cracks, patching holes, and re-securing joints are all pretty straightforward DIY tasks. However, if your gutters are high up, severely damaged, or leaking in multiple spots, it might be safer and more efficient to bring in a pro.
What is the best sealant for aluminum gutters?
Look for a weatherproof, flexible sealant that’s specifically designed for use on gutters and aluminum surfaces. Products labeled as “gutter and flashing sealant” or “polyurethane-based sealant” tend to work well. They offer strong adhesion, resist cracking, and hold up against temperature changes and heavy rain.
Conclusion
Gutter leaks might seem like a small problem, but if you catch them early, they’re usually a pretty easy fix. A little sealant here, a patch there, and your gutters are back in business. But if you ignore those drips, they can turn into serious water damage that costs way more to fix than a Saturday afternoon DIY project.
Keeping up with regular gutter maintenance—like cleaning, checking for loose parts, and inspecting after heavy storms—can help you avoid major issues down the line. And if the damage is more than you’re comfortable handling, call in a local gutter repair pro.
Additional Gutter Resources

Anna has over six years of experience in the home services and journalism industries and serves as the Content Manager at MyHomePros.com, specializing in making complex home improvement topics like HVAC, roofing, and plumbing accessible to all. With a bachelor’s degree in journalism from Auburn University, she excels in crafting localized, comprehensive guides that cater to homeowners’ unique needs. Living on both coasts of the United States has equipped her with a distinctive perspective, fueling her passion for turning any house into a cherished home through informed, personalized decision-making.
Connect with top-rated local contractors who can help you with siding, roofing, HVAC, windows, and more. Get free quotes from verified professionals in your area today.