Cleaning your dryer vent might not be at the top of your to-do list, but it’s more important than you think. Over time, lint and dust can build up, blocking airflow and making your dryer work harder than it should.
Not only does this lead to higher energy bills and longer drying times, but it can also be a serious fire hazard. The good news? Keeping your dryer vent clean is easy and can save you a lot of hassle down the road.
Most experts recommend giving it a good clean at least once a year—or more often if you’re noticing signs like clothes taking forever to dry. A little maintenance goes a long way in keeping your dryer running smoothly and your home safe.
Table of Contents
Signs Your Dryer Vent Needs Cleaning
Not sure if your dryer vent needs a good cleaning? There are a few telltale signs that it’s time to tackle that lint buildup. Ignoring these signs can lead to bigger problems like higher energy bills—or worse, a potential fire hazard. Here’s what to watch for:
Clothes Take Longer to Dry
If your clothes are coming out damp even after a full drying cycle, it’s a clear sign something’s off. A clogged vent restricts airflow, making it harder for your dryer to do its job efficiently. Instead of running multiple cycles, cleaning out the vent can help your dryer work like new again.
Burning Smell When Dryer is Running
A burning smell while your dryer is on is a red flag you shouldn’t ignore. Lint is highly flammable, and when it builds up in the vent, it can overheat and create a potential fire hazard. If you ever notice this smell, turn off your dryer immediately and check the vent.
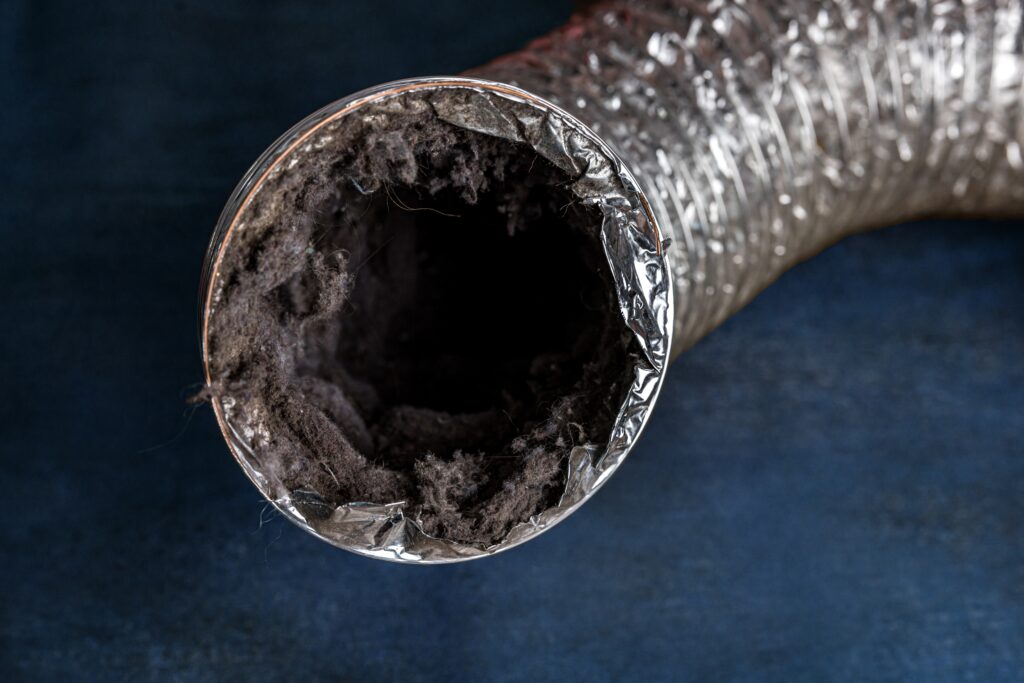
Excess Lint Around Dryer or Outside Vent
Finding lint around the dryer or near the exterior vent is another sign it’s time for a cleanup. When lint starts escaping where it shouldn’t, it means the vent is likely clogged and can’t push air through properly. Regular cleaning helps prevent this messy buildup.
Dryer Feels Hotter Than Usual
Does your dryer feel unusually hot to the touch? That extra heat is a warning sign that air isn’t circulating the way it should. When heat gets trapped due to a blockage, it can cause your dryer to overwork and wear out faster.
Increase in Energy Bills
A sudden spike in your energy bills might have something to do with your dryer working overtime. When vents are clogged, the dryer needs to run longer and harder to dry clothes, using up more electricity in the process. Keeping the vent clear can help keep your bills in check.
Tools and Materials Needed for Dyer Vent Cleaning
Before you get started, having the right tools on hand can make cleaning your dryer vent a whole lot easier—and safer. Luckily, you don’t need anything too fancy. Here’s what you’ll need to get the job done:
Dryer Vent Brush Kit
A good dryer vent brush kit is a must-have. These brushes are designed to reach deep into the vent and grab all the built-up lint and debris. They’re flexible, so they can snake through the vent with ease and help you give it a thorough clean.
Vacuum with Hose Attachment
A regular vacuum won’t cut it, but one with a hose attachment works wonders for sucking up all that loose lint. Once you’ve loosened everything with the brush, the vacuum helps get rid of the mess without spreading lint all over the place.
Screwdriver
You’ll likely need a screwdriver to remove the vent cover and access those hard-to-reach spots. Whether it’s a Phillips or flathead depends on your dryer model, so check ahead of time to avoid scrambling for the right tool.
Microfiber Cloths
Lint tends to stick to everything, so having some microfiber cloths handy can help you wipe down surfaces and catch any stray dust. They’re great for giving your dryer a quick clean inside and out once you’re done with the vent.
Mask and Gloves
Dryer lint can be pretty nasty stuff, especially if it’s been sitting for a while. Wearing a mask helps keep you from breathing in dust, and gloves protect your hands from sharp edges or grime buildup.
Step-by-Step Guide to Cleaning Your Dryer Vent
Now that you’ve got your tools ready, it’s time to tackle the job step by step. Cleaning your dryer vent might seem like a hassle, but breaking it down into simple steps makes it much easier. Follow this guide to safely and effectively remove lint buildup, improve your dryer’s performance, and reduce fire risks.
Step 1: Unplug the Dryer and Disconnect the Vent
Before you do anything, unplug your dryer from the power source to avoid any electrical hazards. If you have a gas dryer, be sure to turn off the gas supply as well. Once that’s done, carefully pull the dryer away from the wall to access the vent hose. You’ll likely need a screwdriver to loosen the vent clamp and detach the hose. Take your time—rushing can cause damage to the hose or connections.
Step 2: Remove Lint from the Dryer Vent Hose
Grab your vent brush or vacuum with a hose attachment and start clearing out the lint inside the vent hose. Work the brush in and out to loosen any stubborn debris, and use the vacuum to suck it all up. Be sure to check for any blockages along the way—if air can’t move freely through the hose, your dryer won’t work efficiently.
Step 3: Clean the Vent Opening Outside
Head outside to where your dryer vent lets air out and remove any visible lint or debris. You might find leaves, dirt, or even small critters blocking the airflow. Use your brush or vacuum to clear it out completely, and make sure the vent flap opens and closes easily. Proper airflow here is crucial to keeping your dryer running smoothly.
Step 4: Reassemble and Test the Dryer
Once everything is clean, it’s time to put it all back together. Reattach the vent hose securely, making sure it’s properly fastened with the clamp. Then, push the dryer back into place without kinking the hose. Plug it back in (or turn on the gas if applicable), and run a short test cycle to ensure everything is working as it should. If your clothes are drying faster and there’s no excess heat, you’re good to go!
DIY vs. Professional Dryer Vent Cleaning
Cleaning your dryer vent might seem like an easy DIY task, but in some cases, calling in the pros is the better choice. Whether you tackle it yourself or hire a professional depends on a few factors like how accessible your vent is, how long it’s been since the last cleaning, and whether you’re noticing any serious issues. Let’s break it down.
When DIY Is Sufficient
If your dryer vent is short, straight, and easy to access, a DIY clean should do the trick. With a good vent brush and a vacuum, you can usually clear out most lint buildup without much trouble. DIY is a great option if you clean your vent regularly (at least once a year) and haven’t noticed any warning signs like overheating or clothes taking too long to dry. Plus, doing it yourself saves money and gives you peace of mind knowing your dryer is running efficiently.
Situations Where Professional Cleaning Is Recommended
Sometimes, DIY just isn’t enough. If your dryer vent has long, complicated ductwork—especially if it winds through walls or floors—a professional cleaning is a smart move. Pros have specialized tools that can reach areas you can’t, and they know how to handle tough clogs safely. If you’re dealing with excessive lint buildup, a burning smell, or it’s been years since the last cleaning, hiring a professional can help prevent potential fire hazards and extend the life of your dryer.
Cost Comparison Between DIY and Professional Services
DIY dryer vent cleaning is definitely the budget-friendly option. A vent cleaning kit usually costs around $20 to $50, and you might already have a vacuum with a hose attachment at home. On the other hand, professional cleaning services typically range from $100 to $200, depending on the complexity of your vent system and where you live. While it’s a bigger upfront cost, professional cleaning can be worth it if you have a tricky setup or haven’t cleaned your vent in a long time.
Preventative Maintenance Tips
Keeping your dryer vent clean doesn’t have to be a hassle if you stay on top of it with a little regular maintenance. Taking a few simple steps can help reduce lint buildup, improve your dryer’s efficiency, and lower the risk of potential fire hazards. Here’s how to keep things running smoothly.
How to Reduce Lint Buildup
The easiest way to prevent lint from piling up in your vent is by cleaning the lint trap after every load. It only takes a few seconds but makes a big difference in keeping lint from getting into the vent system. Also, try drying smaller loads and avoiding fabric softeners, which can leave a residue that traps more lint. If you can, switch to dryer balls—they help clothes dry faster and reduce static without clogging things up.
Best Practices for Keeping the Dryer Vent Clean
Beyond emptying the lint trap, give your dryer a little extra attention every few months. Use a vacuum or a lint brush to clean inside the lint trap slot and around the back of the dryer where lint tends to collect. Make sure the vent hose is properly connected and not crushed or kinked, which can trap lint and restrict airflow. Also, keep the area around your dryer clear of dust and lint to prevent it from getting sucked into the vent system.
Scheduling Regular Inspections
Even if you’re diligent with cleaning, it’s a good idea to schedule a thorough inspection at least once a year. This can be a DIY task if you’re comfortable checking the vent hose and exterior vent for blockages, but having a professional inspect your system every couple of years can catch any hidden issues you might miss. If you start noticing signs like longer drying times or a musty smell, it’s probably time for a deeper clean.
Benefits of Regular Dryer Vent Cleaning
Taking the time to clean your dryer vent regularly comes with some pretty great benefits. First off, it helps your dryer run more efficiently and last longer. When lint isn’t clogging up the vent, your dryer doesn’t have to work as hard, which means fewer breakdowns and a longer lifespan for your appliance.
Another big perk? Lower energy bills. A clogged vent forces your dryer to run longer to get clothes dry, which uses more electricity and can add up fast. Keeping the vent clear helps your dryer do its job faster and more efficiently, saving you money in the long run.
Most importantly, regular cleaning helps reduce the risk of dryer fires. Lint is highly flammable, and when it builds up in the vent, it creates a serious fire hazard. By keeping things clean, you’re not only protecting your dryer but also keeping your home and family safe.
Conclusion
Regular dryer vent cleaning might not be the most exciting task, but it’s definitely one worth keeping up with. A clean vent means your dryer runs better, lasts longer, and saves you money on energy bills—not to mention it helps prevent dangerous fire hazards. By cleaning the lint trap after every load, doing regular deep cleans, and scheduling inspections when needed, you can keep things running smoothly and safely.
Taking a little time now can save you a lot of trouble down the road, so make dryer vent maintenance a priority. And if you’re not sure when it was last cleaned or if you’re dealing with a tricky setup, don’t hesitate to call in a professional for a thorough inspection.
Additional Home Improvement Resources
- Why Is My Sink Disposal Not Working?
- 2025 Home Improvement Trends
- Essential Home Maintenance Tasks for Every Season

Anna has over six years of experience in the home services and journalism industries and serves as the Content Manager at MyHomePros.com, specializing in making complex home improvement topics like HVAC, roofing, and plumbing accessible to all. With a bachelor’s degree in journalism from Auburn University, she excels in crafting localized, comprehensive guides that cater to homeowners’ unique needs. Living on both coasts of the United States has equipped her with a distinctive perspective, fueling her passion for turning any house into a cherished home through informed, personalized decision-making.
Connect with top-rated local contractors who can help you with siding, roofing, HVAC, windows, and more. Get free quotes from verified professionals in your area today.