*November 17th, 2025
If you’ve ever spotted a ceiling stain or heard water dripping during a storm, it’s natural to fear the worst. While major roof problems can be expensive, not every leak calls for a full replacement. In many situations, a simple roof patch using tar, asphalt roof cement, or a liquid roof patch is enough to stop the damage, seal the area, and restore your roof’s protection. With the right approach, this quick roof repair can save you money and add years to your roof’s life.
Knowing how and when to use roof tar can help you take care of minor leaks before they become expensive problems. This guide covers the basics, including what roof tar does, when to use it, and how to apply a patch that lasts.
What Is Roof Tar?
If you’re unfamiliar with roof tar, think of it as your emergency go-to material for sealing up leaks fast. It’s thick, sticky, and strong—perfect for creating a moisture-resistant seal right where you need it.
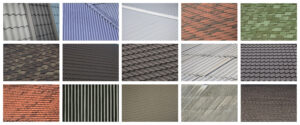
Roof tar is a heavy-duty compound designed to repair and seal leaks and keep moisture out. Once applied, it bonds to your roof surface and forms a durable layer that expands and contracts with your roof through changing weather conditions. It works with many materials, including asphalt shingles, built-up roofing, and even metal.
Some products are marketed as liquid roof patch or liquid asphalt solution, and brands like Black Jack offer asphalt-based coatings that can be brushed or troweled on to quickly stop a roof leak on wet or dry surfaces.
Types of Roof Tar
- Coal Tar Pitch: Great for flat commercial roofs. It’s highly durable but gives off strong fumes and requires experienced handling.
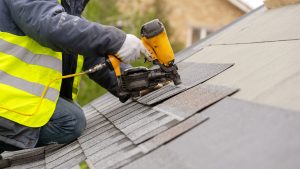
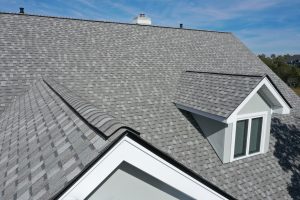
- Asphalt-Based Tar: A go-to for most homeowners. It’s affordable, easy to apply, and works well on standard asphalt shingle roofs as a quick roof patch or emergency repair.
- Modified Bitumen: Blends tar with polymers for extra flexibility in climates with big temperature swings.
When and Where to Use It
Roof tar isn’t a fix-all, but it works incredibly well when used under the right conditions and in the right spots as a targeted roof repair solution. Here’s how to know when it’s the right move.
Need professional help with your project?
Get quotes from top-rated pros.
Find Local Pros
Ideal Conditions
Roof tar works best in mild weather. Try to apply it when temperatures are between 40°F and 70°F, and only when the forecast is dry for the next 24 hours. Rain, snow, or even high humidity can prevent it from curing properly and can weaken the seal of your roof patch.
Signs Your Roof Needs a Tar Patch
Sometimes leaks are obvious. Other times, they sneak in quietly. Watch for these early red flags:
- Cracked or blistered shingles: These let water through the outer layer and may need a tar patch or cement repair.
- Interior water stains: If you see brown spots on the ceiling, moisture is getting in and a small roof leak may already be present.
- Soft spots or sagging: A sign of deeper water damage below the surface.
Check around chimneys, vents, and flashing—these are common areas where a small tar roof patch can make a big difference.
What You’ll Need
Before climbing the ladder, gather the right materials and tools. Preparation is half the battle when it comes to roof repairs.
Materials
- Roofing tar or asphalt roof cement (make sure it matches your roof type; a premixed roof patch or Black Jack–style product works well)
- Roofing fabric or patching mesh (for areas larger than 6 inches)
- Primer (optional, but helpful for metal or previously coated surfaces)
Tools
- Putty knife or trowel for application
- Work gloves and eye protection
- Ladder or safety harness
How to Apply a Roof Tar Patch
Patching a roof might sound intimidating, but if you break it down into steps, it becomes a manageable weekend project. Here’s how to apply a roof patch that actually stops the leak.
Step 1: Locate and Clean the Area
Leaks don’t always show up directly under the source. Water can travel before it drips inside. Look upstream from stains, and clean the area thoroughly. Remove dirt, debris, and old tar or cement so the new patch sticks well.
For metal roofs, scrape away any rust and allow surfaces to fully dry. The cleaner the area, the better the bond and the longer your roof repair will last.
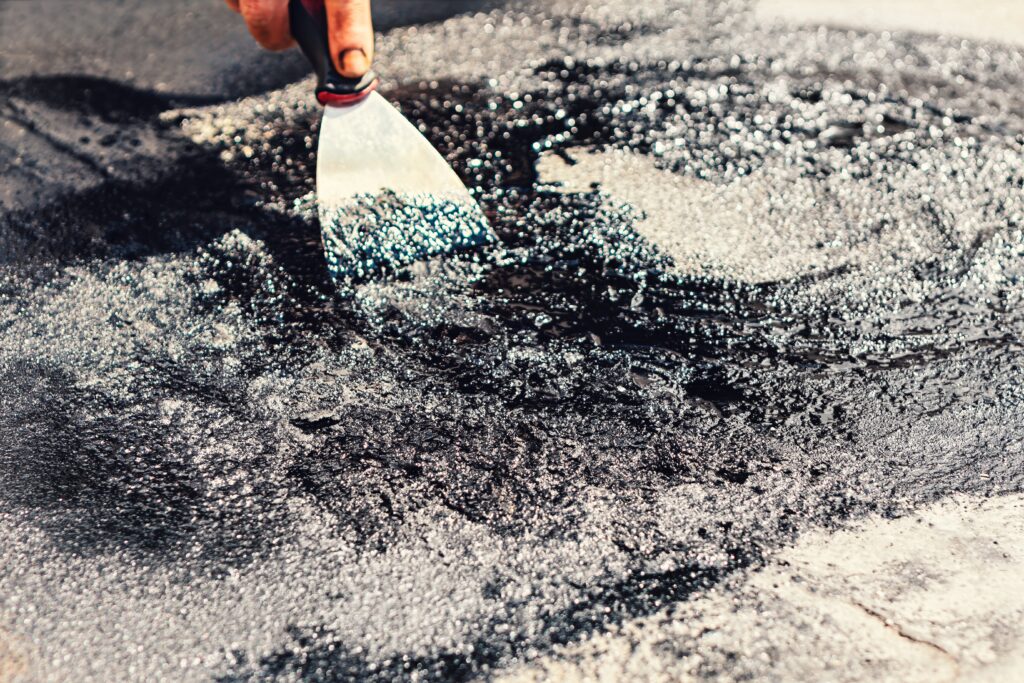
Step 2: Apply Roofing Tar
Spread a thin, even layer of roof tar or asphalt roof patch over the damaged area. Work from the bottom upward so water can shed properly. Push tar into every crack and gap and feather the edges for a smooth finish.
Use a putty knife for small repairs or a trowel for larger areas. Always apply enough liquid tar or cement to create a watertight seal without making it too thick to cure.
Step 3: Add Roofing Fabric (if needed)
For larger patches, press fabric into a fresh coat of tar while it’s still tacky. Smooth out air bubbles and apply another layer on top. Overlap seams by at least 3 inches for full coverage.
This reinforcement adds durability and prevents the roof patch from cracking or peeling over time.
Step 4: Seal and Let It Cure
Apply a final layer of tar to seal everything in. Let the patch cure for at least 24 hours before exposing it to rain or foot traffic. Full curing can take several days, depending on humidity and weather.
Avoid walking on the patched surface until it has completely hardened.
Safety Tips for DIY Roof Work
Working on a roof involves real risks. Make sure safety is part of your plan from the start.
- Never work on a wet or icy roof.
- Use ladders on firm, level ground and wear shoes with good grip.
- If your roof is steep, high, or heavily damaged, consider calling a pro instead of attempting your own roof repair.
- Always have someone nearby if you’re working at heights.
- Use a safety harness on multi-story homes or sloped surfaces.
Remember, liquid tar can be messy and slippery—keep tools and application areas under control.
When to Call a Roofing Contractor
There’s no shame in calling a pro. Some roof issues are just too risky or complicated to handle on your own, even with a good roof patch product on hand.
- Structural sagging or rot
- Widespread leaks
- Roofs with complicated angles or multiple layers
- Insurance claim repairs
A licensed roofer can spot hidden problems, offer permanent repair solutions beyond simple tar patches, and do the work safely. They also ensure the roof repair meets local building codes and warranty requirements.
How Tar Patches Extend Roof Life
Tar patches do more than just stop leaks. When used as part of a roof maintenance plan, a roof patch can help your roof last longer and perform better.
- Stops small leaks from getting worse: Catching issues early prevents interior water damage.
- Adds weatherproofing to vulnerable areas: A bit of tar and asphalt cement now can prevent big problems later.
- Delays full roof replacement by years: Patch and maintain instead of replacing too soon.
- Improves insulation by sealing gaps: Keeps your heating and cooling costs in check by tightening up the surface.
Consider walking your roof (or having it inspected) once or twice a year. Look for early wear and use roof patch products as preventive maintenance where needed.
FAQs About Roof Tar Patching
How long does a tar patch last?
If applied properly, a tar roof patch can last 1 to 3 years or more depending on weather exposure, the asphalt shingles underneath, and overall roof conditions.
Can I apply tar in the rain?
No. Wet conditions will prevent proper adhesion. Always apply tar during dry weather and avoid wet or dry surfaces that aren’t clean or prepared.
Will it work on any type of roof?
Tar works on many roof types, but not all. It’s ideal for asphalt and metal but may not suit rubber or certain synthetic materials.
Is tar the same as roof cement?
They’re similar, but roof cement is usually thicker and easier to apply in heavy patches. Many “all-purpose” roof patch products blend tar and asphalt in a ready-to-use solution.
How much does a tar patch cost?
Materials usually cost $15 to $50 depending on the product. It’s one of the most affordable ways to stop a roof leak quickly.
Final Thoughts
A roof tar patch is a quick, low-cost fix that can stop a small leak before it turns into a big headache. With the right materials and a little preparation, it’s a smart roof repair you can do yourself in a single afternoon.
That said, it’s not a permanent solution. Use it as part of a broader maintenance plan that includes annual inspections and regular cleaning. And when in doubt, don’t hesitate to bring in a professional. Staying proactive with simple roof patch work can save thousands in repairs and help your roof last as long as possible.

Anna has over six years of experience in the home services and journalism industries and serves as the Content Manager at MyHomePros.com, specializing in making complex home improvement topics like HVAC, roofing, and plumbing accessible to all. With a bachelor’s degree in journalism from Auburn University, she excels in crafting localized, comprehensive guides that cater to homeowners’ unique needs. Living on both coasts of the United States has equipped her with a distinctive perspective, fueling her passion for turning any house into a cherished home through informed, personalized decision-making.
Connect with top-rated local contractors who can help you with siding, roofing, HVAC, windows, and more. Get free quotes from verified professionals in your area today.