
Flashing is a key part of a durable siding system. It is a thin, water-resistant material made from metal, vinyl, or rubberized asphalt, placed at vulnerable points of a home’s exterior to stop moisture from reaching the wall system. Its main purpose is to guide water away from areas like windows, doors, roof valleys, and wall joints, directing it toward a safe drainage path and preventing it from getting trapped inside the walls.
Without proper flashing, water can slip into small gaps and become trapped inside the wall cavity, leading to rot, mold, and structural damage. By reinforcing siding and house wrap at these critical points, flashing helps maintain a dry, long-lasting wall system. Understanding its role, along with the different types and proper installation methods, is essential for protecting your home.
What Is Flashing In Siding And Why It’s Crucial?
While siding and housewrap serve as the first line of defense, water can still sneak behind them, especially at joints, openings, and transitions. Flashing acts as the final safeguard, redirecting water away from vulnerable spots before it can enter the wall system.
Where Flashing Is Needed
Flashing is placed wherever water intrusion is most likely. These include:
- Windows and doors where frames meet the wall
- Roof-to-wall intersections where runoff collects
- Horizontal and vertical siding joints that create seams
- Deck connections where the structure attaches to the house
- Corners, chimneys, and wall transitions where materials meet or shift
Common Flashing Materials
Flashing materials vary in price, performance, and visual appeal.
- Aluminum: Lightweight, easy to bend and cut, and affordable.
- Galvanized Steel: Strong and economical, with a zinc coating that resists rust.
- Vinyl: Flexible and corrosion resistant, often paired with vinyl siding. It can become brittle in extreme temperatures.
- Copper: A high-end choice that is both durable and naturally corrosion resistant. It develops a protective patina over time that many homeowners find appealing.
- Flashing Tape: A peel-and-stick material made from rubberized asphalt or butyl, commonly used around windows, doors, and seams.
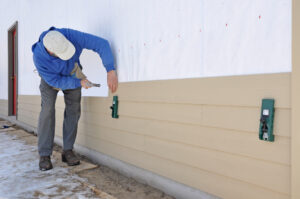
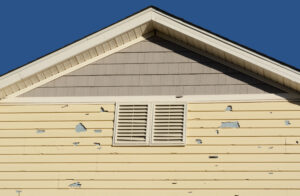
The Consequences Of Skipping Flashing
Ignoring flashing can lead to severe and expensive problems down the road. These issues are often hidden from view until significant damage has occurred.
- Rot And Structural Damage: Water trapped inside wall assemblies can cause wood sheathing and framing to rot, compromising the structural integrity of the home.
- Mold And Mildew Growth: Moisture buildup creates a breeding ground for mold and mildew, posing health risks to occupants.
- Compromised Insulation: Wet insulation loses its effectiveness, leading to higher energy bills.
- Interior Damage: As a problem progresses, it can manifest as water stains, peeling paint, or damaged drywall inside the home.
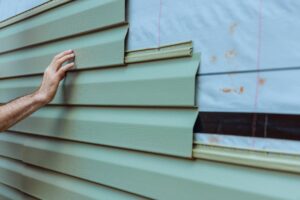
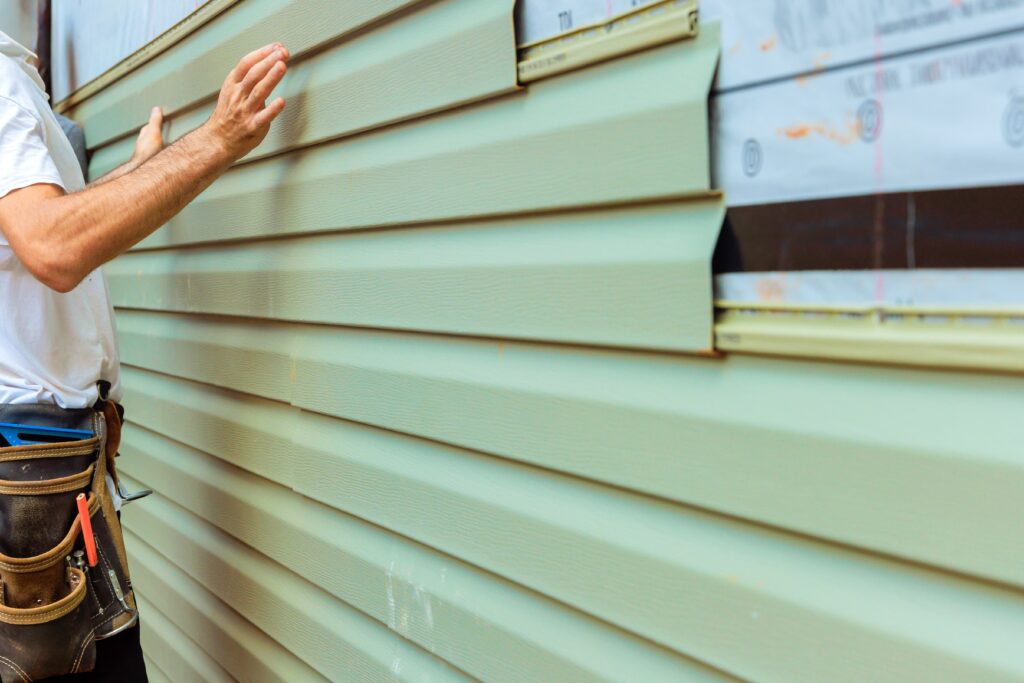
How Flashing Works with Housewrap and Siding
Flashing is part of the overall water-resistive barrier system that also includes sheathing, housewrap, and siding.
The Layering System
- Sheathing is covered first with housewrap.
- Flashing is installed next around openings and at vulnerable spots.
- Siding is applied last, covering the flashing while still allowing water to drain outward.
Correct Placement Techniques
- Windows: Install a sill pan flashing at the bottom, seal the sides and top with flashing tape, and fold the housewrap flap over the top after the head flashing is in place.
- Roof-to-wall intersections: Use step flashing layered with shingles to carry water away.
- Horizontal joints: Apply Z-flashing between siding panels so the upper flange sits behind the panel above it.
Creating a Drainage Plane
When installed properly, flashing and housewrap form a layered system that directs water downward and out. Any moisture that slips behind the siding moves along the drainage plane rather than seeping into the wall.
Flashing Vs. Caulking: Understanding The Difference
Many homeowners assume that caulk can perform the same job as flashing, but the two materials serve very different purposes.
Caulk is designed as a flexible filler for small gaps and seams. It works well for sealing trim joints or minor cracks, but it is not a structural moisture barrier. Over time, caulk inevitably shrinks, cracks, and peels, which means it cannot provide lasting protection. In some cases, applying caulk in the wrong place can actually trap water where it should be allowed to drain, worsening the problem instead of solving it.
While caulk can complement flashing by sealing minor gaps, it should never be relied upon as the primary defense. Flashing is the long-term safeguard that ensures water is directed out and away, protecting the structure beneath.
Common Types Of Siding Flashing
To effectively protect your home, it’s important to use the correct type of flashing for each specific application. Different areas of your home’s exterior require unique flashing solutions to manage water flow properly.
Window And Door Flashing
- Sill Pan Flashing: This forms a waterproof sill for windows and doors, directing any water that penetrates the opening back to the outside.
- Drip Cap Flashing: An L-shaped metal or vinyl piece that is installed over the top of a window or door to divert water away from the opening.
- Flashing Tape: Self-adhering membranes used to seal the flanges of windows and doors, providing a waterproof and airtight seal.
Roof-To-Siding Flashing:
- Step Flashing: Consists of individual L-shaped metal or plastic pieces interwoven with roof shingles where a sloped roof meets a wall.
- Headwall (Apron) Flashing: A continuous piece of L-shaped flashing used where the top, horizontal edge of a roof intersects with a vertical wall.
- Kickout Flashing: An angled piece of flashing installed at the end of a roof-wall intersection to divert a high volume of water away from the siding and into the gutter.
Siding Joint Flashing:
- Z-Flashing: A Z-shaped flashing piece used at horizontal joints between siding panels, such as fiber cement, to direct water away from the seam.
- Butt Joint Flashing: A strip of housewrap or special flashing installed behind the vertical seam where two pieces of siding meet.
Deck Ledger Flashing
To protect the connection point where a deck’s ledger board attaches to the house, specialized flashing is required. A self-adhering membrane is applied to the sheathing before the ledger is installed, and a metal or vinyl Z-flashing is installed over the top of the ledger and under the siding.
Base Flashing For Exterior Walls
This flashing is installed at the bottom of exterior walls to direct any water that travels down the drainage plane away from the foundation. It is crucial to maintain a gap at the bottom for proper drainage.
Best Practices For Installing Siding Flashing
Beyond simply placing flashing, there are specific techniques that ensure its long-term effectiveness. Following these best practices will maximize your home’s protection from water damage.
The “Shingle Principle” And Proper Overlap
Always install materials from the bottom up, with each layer overlapping the one below it. This ensures that any water that gets behind the siding is directed downward and outward, never trapping moisture inside the wall. A minimum overlap of 2 inches is recommended for vertical seams, and 6 inches for horizontal.
Using Corrosion-Resistant Materials
Use durable, corrosion-resistant materials like aluminum, copper, or galvanized steel. Copper is a high-end option, while galvanized steel is a budget-friendly choice. Consider your climate and aesthetic goals when choosing.
When And Where To Seal With Tapes And Caulk
- Tapes: Use high-quality, self-adhering flashing tapes around openings to create a robust seal.
- Caulk: Use exterior-grade caulk only for small gaps as a secondary sealant, never as a substitute for flashing. Crucially, do not caulk drainage gaps, as this will trap water.
Manufacturer And Local Code Requirements
Always consult the specific installation instructions from your siding, housewrap, and flashing manufacturers. Adhere to all local building codes, as requirements can vary based on climate and regional regulations.
Common Flashing Installation Mistakes
Improper flashing installation is one of the leading causes of water damage in homes. Mistakes often result in rot, mold, and weakened structural integrity. Paying attention to detail and avoiding the following errors is essential for a siding project that lasts.
Skipping Flashing in Critical Areas
Every point of potential water entry needs protection, yet installers sometimes skip flashing where it matters most.
Windows and Doors
Flashing must be installed at the head, jambs, and sill of every opening. A common mistake is using caulk as a substitute. Caulk is temporary and cannot replace the function of proper flashing.
Roof-to-Wall Intersections
Wherever a roof meets a vertical wall, flashing is necessary to channel runoff safely. Dormers, deck connections, and especially kickout flashings at the end of a roof-wall junction are areas that often get overlooked, yet they are crucial for diverting water away from the wall.
Horizontal Siding Seams
On siding products like fiber cement, Z-flashing is required at butt joints to prevent water from entering at the seams.
Poor Overlap (Reverse Lap)
Flashing and housewrap must follow the “shingle principle.” Each layer should overlap the one below it so water drains down and away from the building. Problems occur when materials are installed in reverse order. Tucking an upper piece behind a lower piece creates a pocket where water collects inside the wall. To avoid this, installers must always work from the bottom up. For example, sill flashing goes on first and laps over the housewrap, while head flashing is covered by the housewrap above.
Using the Wrong Type of Flashing
A flashing material that works well around a simple window opening may not hold up at a complex roof-to-wall intersection or in a region with extreme temperature swings. Each application demands a material that can handle the conditions it will be exposed to.
Material Incompatibility
Certain metals, such as copper and aluminum, corrode when placed together. This galvanic reaction quickly undermines the system.
Sub-Par Materials
Thin plastics or low-grade rubber products may be inexpensive, but they are not durable in extreme climates. Choosing these short-term solutions can lead to premature failure.
Wrong Product for the Job
Some installers attempt to cover complex roof-wall intersections with one large piece instead of using multiple pieces of step flashing. This shortcut almost always leads to leaks.
Relying Too Heavily on Caulk
Caulk is a sealant, not a substitute for flashing. It will eventually crack and peel, which makes it unreliable for long-term waterproofing. Worse, applying caulk in places meant to drain, such as the bottom of a drip cap or Z-flashing, traps water inside the wall assembly and accelerates rot.
Not Checking Local Code Requirements
Flashing standards vary by climate and jurisdiction. Areas with heavy snow or rainfall may have stricter guidelines on flashing size, placement, and materials. Local governments often amend the International Residential Code or International Building Code to reflect regional needs. Skipping this step risks both water damage and code violations.
Ignoring Manufacturer Guidelines
Manufacturers provide detailed instructions that ensure their products work as intended.
Incompatible Products
Many components are tested as complete systems. Substituting one piece for a cheaper or different material can compromise the barrier and void warranties.
Adhesive Activation
Some self-adhered flashing tapes require pressure during installation to activate the adhesive. Without this step, the bond may be weak and leave gaps for water intrusion.
Rushing the Installation
Flashing requires careful planning, measuring, and preparation. Cutting corners leads to poor fit and gaps that allow water entry. Installing over dirty or damaged sheathing also reduces effectiveness. Taking the time to prepare surfaces and install flashing precisely is key to long-term performance.
FAQs
Does Fiber Cement Siding Require Special Flashing?
Yes, fiber cement siding requires specific flashing details, including Z-flashing at horizontal seams and butt joint flashing behind vertical seams, to manage water effectively.
Is Flashing Required Behind Vinyl Siding?
Yes. While vinyl siding sheds most water, it is not a perfect seal. Flashing is installed behind it at openings and intersections to create a vital secondary drainage plane.
What Is Z-Flashing And When Is It Used?
Z-flashing is a Z-shaped piece of metal or vinyl used to protect horizontal joints in siding. It is typically used with panelized sidings like fiber cement or engineered wood to direct water away from the horizontal seam.
Conclusion
Flashing is a small detail with a big role in keeping walls dry and siding systems functioning properly. When installed correctly, it prevents water from finding its way into vulnerable areas and helps extend the life of your home’s exterior. Proper placement and sealing are detail-oriented tasks that require experience to get right.
If you are planning new siding or suspect a moisture problem, consider having a qualified siding contractor inspect or install flashing for you. Their expertise ensures correct installation, material compatibility, and code compliance, giving your home lasting protection. Schedule an inspection or request a quote to make sure your siding system is backed by proper flashing.

Anna has over six years of experience in the home services and journalism industries and serves as the Content Manager at MyHomePros.com, specializing in making complex home improvement topics like HVAC, roofing, and plumbing accessible to all. With a bachelor’s degree in journalism from Auburn University, she excels in crafting localized, comprehensive guides that cater to homeowners’ unique needs. Living on both coasts of the United States has equipped her with a distinctive perspective, fueling her passion for turning any house into a cherished home through informed, personalized decision-making.
Connect with top-rated local contractors who can help you with siding, roofing, HVAC, windows, and more. Get free quotes from verified professionals in your area today.