
A successful siding project begins with precise measurements of your home. Getting the numbers right allows you to stay on budget, order the right amount of material, and avoid unnecessary delays. Careful planning at this stage saves money, reduces errors, and sets the foundation for a smooth installation.
This guide walks you through the entire process step by step, from gathering the right tools to completing your final calculations. Along the way, you will see how accurate measurements connect directly to siding costs and learn how to avoid the mistakes that often derail projects. With the right preparation, you can begin your siding project with confidence and clarity.
Table of Contents
DIY vs. Hiring a Siding Contractor
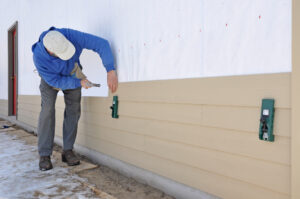
Before you pick up a tape measure, it is important to decide whether siding is a project you want to take on yourself or one that is better left to a professional. The choice you make will affect your budget, your timeline, and the quality of the final result.
The DIY Approach
Handling the work yourself can reduce overall costs since you avoid labor fees. It also gives you complete control over the schedule and can bring a strong sense of accomplishment if you have the right skills. For straightforward projects on simple, single-story homes, an experienced DIYer may be able to achieve good results.
The risks, however, are significant. Siding installation demands accuracy, and even a small mistake in cutting, measuring, or fitting panels can create gaps that allow water intrusion, lead to hidden rot, or result in a poor appearance. What might take a professional crew a few days can stretch into weeks for a homeowner. In many cases, siding manufacturers require professional installation to keep warranties valid, which means a DIY job could leave you responsible for repairs that would otherwise be covered.
Hiring a Professional
Although hiring a contractor costs more upfront, the long-term benefits are considerable. A reputable siding contractor brings years of experience, the right tools, and the efficiency to finish the job properly and on time. Professionals can also identify problems behind the walls, such as rot or moisture damage, that may go unnoticed during a DIY attempt. Their work often comes with warranties covering both materials and labor, which provides long-term protection and peace of mind.
For small, uncomplicated homes, a confident DIYer may succeed. For multi-story houses or designs with complex angles, hiring a professional is almost always the safer and more cost-effective choice.
Tools and Materials You’ll Need for an Accurate Measurement
The success of your siding project begins with accurate measurements, and accuracy depends on having the right tools. Preparing your toolkit in advance ensures you can work efficiently and avoid costly mistakes.
Measuring Tools
A long tape measure, ideally 100 feet, is the standard choice for measuring exterior walls. If you want even greater precision or if you are working alone, a laser distance measurer is an excellent option.
What to use
- Tape measure, at least 100 feet long
- Laser distance measurer with area calculation features
Documentation Supplies
Keeping track of your numbers is just as important as taking them. A simple notepad and pencil work well, but graph paper makes it easier to sketch out each wall and mark windows, doors, and gables. Many homeowners also use their smartphones to snap photos and add notes directly.
Helpful supplies
- Notepad and pencil for quick notes
- Graph paper for scaled sketches of each wall
- Smartphone for photos and digital notes
Calculator
Once measurements are taken, you will need to add them up. A pocket calculator is fine for basic math, but a smartphone calculator app gives you speed and convenience.
Options for calculation
- Pocket calculator for quick math
- Smartphone app for conversions or larger calculations
Safety and Access Equipment
Accurate measurements often require working at height. A sturdy ladder or scaffolding provides stability and reduces the risk of falls. Always use proper safety gear and avoid working alone when climbing.
Safety essentials
- Extension ladder rated for your weight
- Scaffolding for multi-story or large homes
- Safety gloves and non-slip footwear
- Partner or spotter when working at height
Step-by-Step Guide: Measuring Your House for Siding
The most accurate way to measure your home for siding is to treat it as a set of simple geometric shapes. By following a systematic process, you can eliminate guesswork and ensure every surface is accounted for.
Step 1. Sketch Each Wall of Your Home
Before you begin measuring, walk around the exterior and make a rough sketch of each wall. Break the structure down into basic shapes such as rectangles for walls, triangles for gables, and smaller shapes for dormers.
Tips for sketching
- Label each wall clearly, such as “Front Wall” or “West Gable”
- Keep sketches organized in the order you walk around the house
- Use graph paper if possible to maintain proportion
This simple map becomes your blueprint for the entire measuring process.
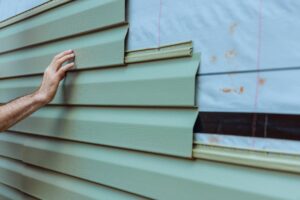
Step 2. Measure the Walls (Rectangles and Squares)
Start with the largest sections of your home, which are usually rectangular walls. For each wall, record two dimensions:
- Height: Measure from the bottom of the wall at the starting point of the siding to the eaves at the top
- Width: Measure the horizontal length from one exterior corner to the other
Use the formula: Area = Height × Width
Write the result on your sketch. Repeat this step for every main wall.
Step 3. Measure the Gables (Triangles)
Gables are the triangular portions of wall under the ends of a pitched roof. To measure them, take two dimensions:
- Base: The width of the gable along its bottom edge
- Height: The distance from the midpoint of the base to the peak of the roof
Use the formula: Area = ½ × (Base × Height)
Add each gable’s area to your sketch.
Step 4. Measure Dormers
Dormers are smaller projections that extend from a sloped roof. Break them down into their parts, which usually include a rectangular face and a triangular gable.
- Measure the rectangle and triangle separately
- Add the two results together for a total dormer area
Some contractors use a shortcut by multiplying the dormer’s face area by 1.5 to account for side walls, but measuring each face individually is always more accurate.
Step 5. Subtract the Openings
For the most precise material estimate, you must subtract areas that will not be covered in siding. This includes windows, doors, garage doors, and vents.
- Measure the height and width of each opening
- Multiply to calculate the square footage of each
- Add the areas of all openings together to get a Total Opening Area
- Subtract the Total Opening Area from your gross siding area to calculate the Net Siding Area
Skipping this step may seem easier, but it often leads to overspending on material, especially if your home has large windows or patio doors.
Step 6. Add a Waste Factor
No siding project is completed without extra material. You need additional siding for cuts, angles, and fitting around architectural features.
- The industry standard is to add 10 percent to the Net Siding Area
- For homes with complex shapes, increase this to 15 percent
Use the formula: Final Siding Total = Net Siding Area × 1.10
This is the number you should use when ordering siding. Having a small surplus is far better than running short in the middle of the job.
Common Mistakes to Avoid
Measuring for siding may seem straightforward, but small errors at this stage can create major problems later. Over-ordering increases costs unnecessarily, while under-ordering can stop a project in its tracks. Paying attention to these common mistakes will help you avoid frustration and keep your project on schedule.
Forgetting to Subtract Openings
It is easy to measure each wall, calculate the area, and assume you have the total square footage of siding needed. What many homeowners forget is that doors, windows, vents, and garage doors take up significant surface area.
Why this matters
- A standard double garage door can measure more than 60 square feet
- Patio doors and large picture windows can each account for 20 to 40 square feet
- Smaller openings like dryer vents and basement windows add up quickly
Failing to subtract these areas means you will buy far more siding than necessary. For a home with several large windows and sliding doors, that could translate into hundreds of extra dollars in unused material.
Ignoring the Waste Factor
Even the most precise measurements will not eliminate the need for extra material. Siding must be cut to fit around corners, angles, and openings, which always leaves scraps behind.
Key points to remember
- The industry standard is to add 10 percent to your net siding area
- Complex homes with dormers or unusual rooflines may require as much as 15 percent
- Running short forces you to reorder, risking delays and color mismatches
Adding a buffer upfront is far less costly than scrambling to find matching panels halfway through the job.
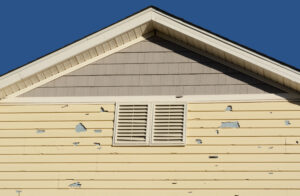
Overlooking Trim, Soffits, and Fascia
Siding panels alone will not finish the job. Trim and accessory components are required to secure panels and protect edges.
What to include
- Trim pieces such as corner posts, J-channels, starter strips, and finishing strips
- Soffits, which cover the underside of roof overhangs and provide attic ventilation
- Fascia boards, which complete the roofline and support the gutter system
Forgetting these elements leads to incomplete material orders and delays in finishing the exterior.
Mixing Up Measurements (Feet vs. Inches)
One of the easiest but most damaging mistakes is confusing feet with inches when recording numbers. A simple slip on a tape measure can distort your totals significantly.
How mistakes happen
- Recording 8 feet 6 inches as 8.6 instead of 8.5
- Forgetting to convert inches into decimals when using a calculator
- Rounding measurements inconsistently across different walls
How to prevent it
- Always write measurements in the same format (either feet and inches or decimal feet)
- Double-check tricky dimensions before calculating area
- Use a calculator or conversion chart to avoid rounding errors
Safety First: A Guide to Ladder Safety
Working at height is one of the most dangerous parts of a siding project, which makes ladder safety a top priority. Most ladder-related accidents are preventable if you take the right precautions. Following these essential guidelines from the Occupational Safety and Health Administration (OSHA) can help you stay safe.
Inspect Your Ladder
Always examine your ladder before each use.
- Look for cracked rails, bent side rails, or missing and broken rungs
- Check that locking mechanisms are secure and working properly
- Wipe off mud, oil, or wet spots that could cause slips
- Never use a damaged ladder, even for a “quick” job
Use the 4-to-1 Rule
Setting up your ladder at the correct angle is crucial. For every 4 feet of height, the base should be placed 1 foot away from the wall.
- Example: A 16-foot ladder should be 4 feet from the base of the wall
- Too steep and the ladder could tip backward
- Too shallow and the ladder may slide out
Extend 3 Feet Above the Roofline
When climbing onto a roof, your ladder should extend at least 3 feet above the landing point.
- This gives you a safe handhold as you step on or off
- Secure the ladder at the top if possible to prevent movement
- Never step on the top rungs, which are not designed for standing
Maintain 3 Points of Contact
The safest way to climb is to always have three points of contact.
- Two hands and one foot, or two feet and one hand
- Always face the ladder when climbing up or down
- Keep your body centered between the rails and avoid leaning out to the side
Avoid Electrical Hazards
Before setting up, look for overhead power lines or exposed wiring.
- Keep ladders at least 10 feet away from power lines
- Never use a metal ladder near electricity, even at a distance
- Use fiberglass or wood ladders if electrical hazards are possible
For more detailed safety guidance, see OSHA’s Portable Ladder Safety QuickCard™.
Advanced Tools and Professional Services
For homeowners who want to go beyond the basics of a tape measure and notepad, modern technology provides smarter ways to get accurate siding measurements. These tools and services cut down on manual math, reduce the risk of costly mistakes, and save hours of work. They are especially valuable for larger homes, multi-story designs, or exteriors with many gables and dormers where traditional measuring can be time-consuming and difficult.
Online Siding Calculators
Many home improvement retailers provide free siding calculators that simplify the math. Tools like the Lowe’s siding calculator allow you to input wall dimensions and openings, then generate a material estimate.
Advantages
- Easy to use and accessible online
- Quick way to estimate siding needs
- Helpful for double-checking manual math
Limitations
- Accuracy depends on the measurements you enter
- Does not account for every trim piece, soffit, or fascia component
- Still requires careful work on your end
3D Measurement Services
Companies such as Hover and EagleView take accuracy a step further. These services use high-resolution smartphone photos or aerial imagery to generate a detailed 3D model of your home. From that model, they provide an exact report covering siding, roofing, windows, and doors.
Advantages
- Virtually eliminates human error in measurements
- Saves time, especially for multi-story or complicated homes
- Removes the need to climb ladders or measure difficult areas
- Reports are detailed enough for both materials and professional installation quotes
Limitations
- Services typically charge a fee, though some contractors include them as part of an estimate
- May require a short turnaround time for processing results
When to Use These Options
If you have a simple, single-story home, manual measurements are usually enough. For larger homes or if you want absolute confidence in your numbers, investing in a professional measurement report can pay for itself by avoiding costly mistakes or extra material orders.
Understanding Siding Costs
Once you have calculated the final square footage of siding your home requires, you can begin building a realistic budget. The way siding is priced and sold may be different from what you expect, so understanding industry terms will help you avoid confusion.
How Siding Is Sold
In the construction industry, siding is sold by the “square.” One square equals 100 square feet of siding material. To determine how many squares you need, divide your total siding area by 100 and round up to the next whole number.
Example calculation
- Final siding total: 2,480 square feet
- Divide by 100 = 24.8 squares
- Round up to 25 squares of siding
This ensures you have enough material to cover your home without running short.
Average Siding Costs in 2025
Costs vary depending on material choice, local labor rates, and the complexity of your project. Below are 2025 national estimates for the installed cost per square foot, which include both materials and professional labor.
| Siding Material | Average Cost per Sq. Ft. (Installed) | Estimated Cost for 1,500 Sq. Ft. | Advantages | Drawbacks |
| Vinyl | $3 – $8 | $4,500 – $12,000 | Affordable, low maintenance, wide variety of colors | Can crack in extreme cold or warp in high heat |
| Fiber Cement | $5 – $15 | $7,500 – $22,500 | Extremely durable, resists fire, rot, and insects, closely mimics wood | Heavier than other options, higher labor costs, brittle before installation |
| Wood | $6 – $20 | $9,000 – $30,000 | Natural look, eco-friendly, easy to customize | Requires ongoing maintenance, vulnerable to rot and insect damage |
| Metal | $4 – $12 | $6,000 – $18,000 | Durable, recyclable, fire resistant, suits modern styles | Can dent, steel may rust if scratched |
What to Keep in Mind
- The total project cost will be higher than the siding panels alone because trim, soffits, fascia, and other accessories must also be purchased.
- Labor costs vary by region. Expect higher prices in areas with expensive housing markets or where scaffolding is required for multi-story homes.
- Material upgrades may save money in the long run. For example, fiber cement or metal may cost more upfront but require less maintenance than wood.
- Waste factor is already included in most contractor estimates, but confirm to be sure.
Conclusion
Accurate measurement is the foundation of a smooth and cost-effective home siding project. It determines how much material you need, shapes your budget, and helps you avoid the expense of over-ordering or the frustration of running short. By breaking your home into simple shapes, subtracting openings, and adding a waste factor, you can create a reliable blueprint for the job.
Before you purchase materials, double-check your measurements and label each section clearly to avoid confusion. If your home has multiple stories or complex gables, remember that safety comes first whenever ladders are involved. At this stage, you should also decide whether the project is manageable as a DIY effort or whether hiring a professional contractor is the better choice. While DIY can save money, professional installation ensures accuracy, efficiency, and warranty protection.
With precise measurements in hand, you can confidently compare siding materials, evaluate the pros and cons of each choice, and request quotes from siding contractors to find the best fit for your home and budget.

Anna has over six years of experience in the home services and journalism industries and serves as the Content Manager at MyHomePros.com, specializing in making complex home improvement topics like HVAC, roofing, and plumbing accessible to all. With a bachelor’s degree in journalism from Auburn University, she excels in crafting localized, comprehensive guides that cater to homeowners’ unique needs. Living on both coasts of the United States has equipped her with a distinctive perspective, fueling her passion for turning any house into a cherished home through informed, personalized decision-making.
Connect with top-rated local contractors who can help you with siding, roofing, HVAC, windows, and more. Get free quotes from verified professionals in your area today.