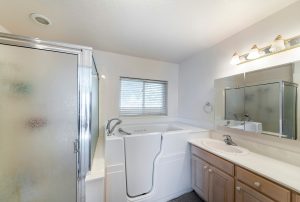
Walk-in tub installation requires adherence to local plumbing codes, National Electrical Code (NEC) standards, and manufacturer load-bearing specifications. A complete installation typically costs $4,000 to $18,000, depending on the tub type, the condition of your existing plumbing and electrical, and whether structural reinforcement is needed.
This guide is organized as a four-phase technical workflow that mirrors how licensed contractors plan and execute these projects. It covers structural load verification, rough-in plumbing and electrical requirements, tub setting and leveling, and commissioning procedures.
If you have not yet decided between a walk-in tub and a walk-in shower, review our walk-in tub vs. walk-in shower comparison before proceeding.
Pre-Installation Checklist: Required for Inspection
Before any demolition or rough-in work begins, verify every item below. This checklist reflects the minimum documentation and site conditions a building inspector will look for during a walk-in tub installation.
- Permit status: Plumbing and electrical permits pulled with your local building department. Walk-in tubs add electrical motors and change drainage Drain Fixture Units (DFUs), so a permit is required in virtually all jurisdictions.
- Structural verification: Floor joists confirmed to support a minimum static load of 60 lbs per square foot. A filled walk-in tub with an occupant can weigh 1,200 lbs or more.
- Electrical: Dedicated GFCI-protected circuit confirmed. Equipotential bonding wire (#8 AWG copper) planned per NEC Article 680.
- Plumbing: Drain line diameter verified (2-inch minimum recommended for walk-in tubs). Water heater capacity confirmed at 75 gallons or equivalent tankless output.
- Safety: Thermostatic Mixing Valve (ASSE 1070) specified to cap water delivery at 110 degrees Fahrenheit.
- Access: Bathroom doorway measured to confirm the tub can physically enter the room. Minimum 32-inch clearance for most standard models.
Phase I: Pre-Site Engineering and Load Verification
The first phase of any walk-in tub installation focuses on confirming that the bathroom structure, plumbing infrastructure, and electrical service can support the new unit.
Phase I Quick-Reference Specs:
- Target load capacity: 60 lbs per square foot (minimum)
- Doorway clearance: 32-inch minimum width
- Floor clearance in front of tub: 30 inches minimum
- Water heater: 75-gallon high-recovery tank or 8 GPM tankless
- Joist inspection: Check for deflection in spans exceeding 10 feet
Structural Load Assessment
A filled walk-in tub with an occupant can weigh 1,200 lbs or more, concentrated on a footprint of roughly 60 by 32 inches. Standard residential floor joists are rated for approximately 40 lbs per square foot. That means many existing bathroom floors do not have adequate capacity without reinforcement.
A qualified installer or structural engineer should perform a static load calculation before any work begins. If the existing joists are undersized, the standard remedy is to “sister” additional joists alongside the originals, effectively doubling the load capacity. This is particularly important for second-floor and above-grade bathroom installations where deflection under load could crack tile, damage plumbing connections, or cause the tub to settle unevenly.
Code Alert: Floor Load Capacity
The National Kitchen and Bath Association (NKBA) recommends verifying floor capacity for a minimum static load of 60 lbs per square foot before walk-in tub installation. Failure to do so risks structural deflection, door seal failure, and potential water damage to the rooms below.
Doorway and Access Clearances
Measure the bathroom doorway width before ordering a tub. Most walk-in tubs are 30 to 32 inches wide, and they must physically pass through the doorway during delivery. If the doorway is narrower than the tub, it will need to be widened before installation day, which adds framing and finishing costs.
Inside the bathroom, you need a minimum of 30 inches of clear floor space in front of the tub for safe entry and exit. If the installation is part of a larger bathroom renovation, plan the layout so that this clearance is preserved after all fixtures are in place.
Water Heater Capacity
Walk-in tubs hold significantly more water than standard bathtubs. Most models require 60 to 80 gallons to fill to a usable depth. A standard 50-gallon water heater only yields approximately 35 gallons of hot water per draw, which means the tub will be half-cold by the time it fills.
Tech Spec: The 75-Gallon Rule
Do not install a 60-plus-gallon walk-in tub on a standard 50-gallon water heater. For reliable performance, specify a 75-gallon high-recovery tank or a tankless unit with a minimum flow rate of 8 GPM. Verify that the unit’s BTU input can recover fast enough to maintain 110 degrees Fahrenheit at the fixture.
If your home currently has a 40- or 50-gallon tank, plan for a water heater upgrade as part of the installation budget. Tankless units eliminate capacity limitations entirely but require adequate gas line sizing or electrical service to operate at the flow rates walk-in tubs demand.
The Fill/Drain Exposure Window: Why Heated Surfaces Are a Functional Requirement
Walk-in tubs require the user to sit inside the tub while it fills and again while it drains. Depending on water heater recovery rate and drain speed, this exposure window totals 15 to 20 minutes of sitting on cold acrylic in ambient bathroom air.
For elderly users and anyone with circulatory conditions, this is not a comfort issue. It is a health risk. Core body temperature can drop meaningfully during a 10-minute fill cycle in a 65-degree bathroom, particularly for users with reduced thermoregulation.
Tech Spec: Heated Backrests and Seats
In 2026, heated backrests and heated seat surfaces are considered a functional necessity for walk-in tubs, not a luxury upgrade. These components maintain surface temperatures during the fill and drain cycles, preventing discomfort and reducing the risk of mild hypothermia. Budget for this feature during Phase I planning, and confirm that the electrical rough-in in Phase II includes capacity for the heated element’s circuit draw.
Phase II: Rough-In Plumbing and Electrical
With the structural assessment complete, the next phase addresses the two systems that carry the highest liability in a walk-in tub installation: plumbing and electrical.
Phase II Quick-Reference Specs:
- Drain size: 2-inch PVC (Schedule 40) minimum
- Electrical: 20-amp dedicated GFCI circuit
- Bonding: #8 AWG copper conductor per NEC Article 680
- Safety valve: ASSE 1070 TMV set to 110 degrees Fahrenheit
- Venting: DWV system verified for DFU load at new drain location
Drain Line Requirements
Walk-in tubs benefit from fast-drain technology, but “fast drain” only works if the drain infrastructure can handle the volume. Standard residential tubs use 1.5-inch drain lines, which drain at a rate that requires 8 to 12 minutes to empty a walk-in tub. That means sitting in cooling water for an extended period after bathing.
| Drain Diameter | Average Drain Time | Application |
|---|---|---|
| 1.5-inch (standard) | 8 to 12 minutes | Standard alcove tubs only |
| 2.0-inch (high-flow) | 2 to 4 minutes | Recommended for all walk-in tubs |
| Powered pump drain | Under 2 minutes | Requires 2-inch drain line and proper venting |
Upgrading from a 1.5-inch to a 2-inch drain line is a plumbing modification that should be scoped during the rough-in phase. Running a pump-assisted drain into undersized drain lines causes backups and can damage the pump motor. If your home has older plumbing that may need attention, address those issues before the tub goes in.
DWV (Drain-Waste-Vent) System Check
High-volume drainage requires high-volume air replacement. If the DWV system cannot supply enough air to the drain line, the tub will drain slowly, create gurgling sounds, and potentially siphon water from the P-traps in nearby fixtures like sinks and toilets.
During the rough-in phase, the plumber should verify that the existing vent stack adequately serves the new drain’s location and DFU load. If the walk-in tub is farther from the vent stack than the code-permitted distance for its drain size, an auxiliary vent or air admittance valve (AAV) may be required. The International Association of Plumbing and Mechanical Officials (IAPMO) provides the reference standards for drain sizing, venting distances, and DFU calculations.
Electrical Requirements for Jetted Tubs
Soaking tubs without jets do not require electrical work. However, any walk-in tub with hydrotherapy jets, air jets, heated seats, or inline heaters requires a dedicated electrical circuit.
Code Alert: NEC Article 680, Equipotential Bonding
All jetted walk-in tubs require equipotential bonding per NEC Article 680. A solid #8 AWG copper wire must connect the motor, pump housing, and all accessible metal parts to the home’s grounding grid. This prevents voltage gradients in the water that can cause electric shock. GFCI protection alone is not sufficient.
The dedicated circuit should be run during the rough-in phase, before the tub is set in place. Access to the junction box must remain available after the tub is installed, either through a built-in access panel on the tub’s apron or through an adjacent closet or hallway wall.
Scald Prevention: Thermostatic Mixing Valve
Walk-in tubs require the user to enter the tub, close the door, and then fill it. Unlike a standard tub where you can test the water temperature before getting in, the user is already seated when hot water begins flowing. This makes scald prevention a critical safety requirement.
Code Alert: ASSE 1070 Thermostatic Mixing Valve
Install a Thermostatic Mixing Valve (TMV) compliant with ASSE International Standard 1070 on the hot water supply line feeding the walk-in tub. Set the maximum delivery temperature to 110 degrees Fahrenheit. This is not optional for vulnerable users, and many jurisdictions now require it by code for accessible bathing fixtures.
Phase III: Structural Setting and Leveling
With rough-in work complete and inspected, the walk-in tub is ready for placement.
Removing the Existing Tub
The crew begins by protecting the bathroom floor and surrounding surfaces with drop cloths and rigid floor protection. They disconnect all plumbing from the existing tub and remove it. Cast-iron tubs may need to be broken apart with a cutting tool before removal due to their weight.
Inspect the exposed subfloor, wall cavities, and plumbing connections for water damage, mold, or rot. Any compromised subflooring must be repaired or replaced before the new tub is set. This is a non-negotiable step. Setting a 1,200-lb loaded tub onto a weakened subfloor risks catastrophic failure.
Tile Flange Installation
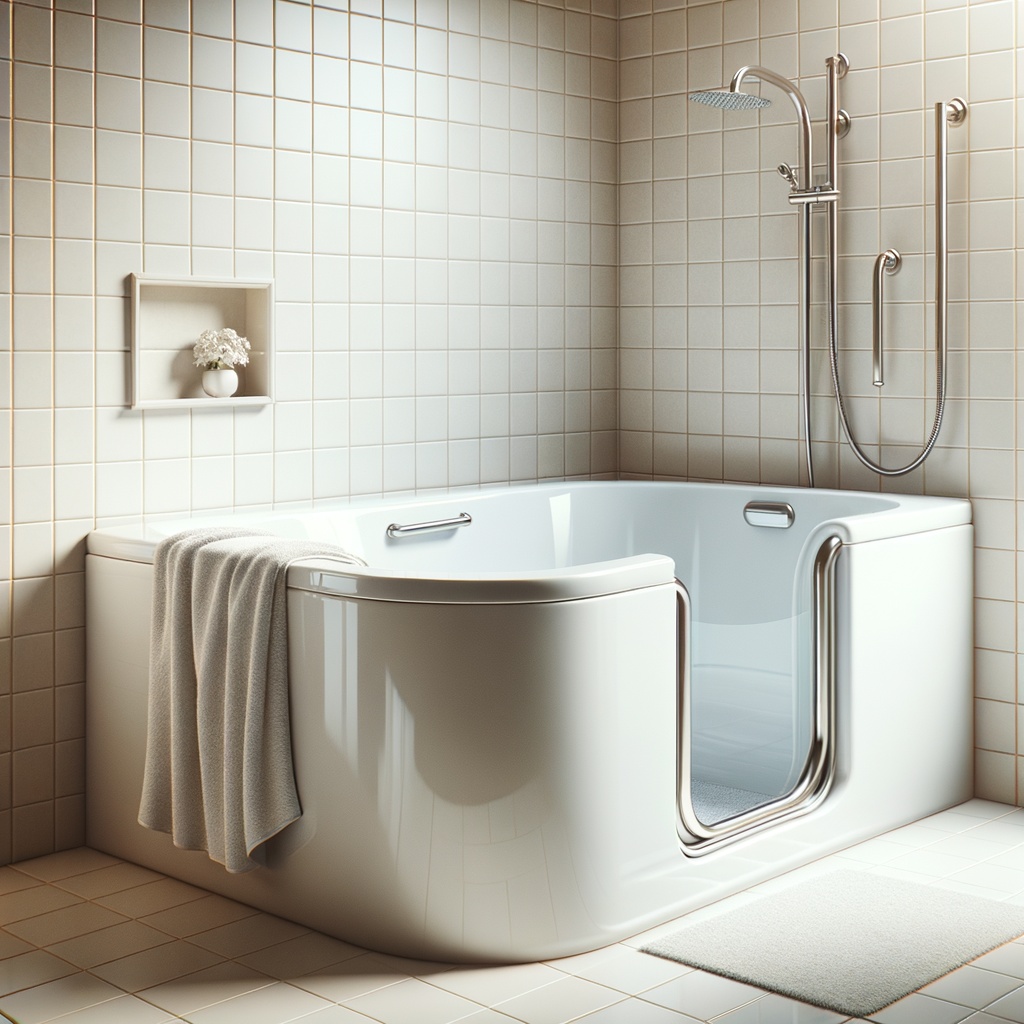
Tubs installed in an alcove configuration require a tile flange (a plastic strip that fits onto the tub rim) to prevent water from seeping behind the tub and into the wall cavity. The tile flange must be installed on the tub before it is placed into the alcove. Measure, miter-cut the corners, and attach the flange to the tub rim with silicone adhesive.
Never nail or screw through the tub body. Penetrating the acrylic or gelcoat shell voids the warranty and creates leak points that are extremely difficult to repair. Walk-in tubs are manufactured from acrylic or gelcoat composites, not porcelain or cast iron, because these materials are lightweight enough for residential floor loads and can be molded into the complex door and seat shapes the design requires.
Extension Panel Installation
Because the longest standard walk-in tub measures approximately 52 inches, it must be turned to fit into a standard 60-inch alcove. An extension panel (essentially a pony wall) fills the remaining gap and creates a seamless appearance. These panels are typically included with the tub or available as manufacturer-specific accessories.
Six-Point Leveling Procedure
Leveling is the single most critical step in the physical installation. If the tub is not level, the door seal will not create a watertight closure, and the tub will not drain properly.
Walk-in tubs have adjustable leveling legs (typically six). Using a four-foot level, check the tub’s position at multiple points: along the back wall, corner to corner diagonally, front to back, and across the seat surface. Adjust each leveling leg until the tub is level in all planes. Verify that every leveling foot is in firm contact with the subfloor before securing the tub frame to the wall studs with metal brackets.
Pro Tip: The Nickel Test
After leveling, place a nickel on the tub floor near the drain. It should remain stationary. If it rolls toward the drain, the tub has a slight pitch, which is acceptable and aids drainage. If it rolls away from the drain, re-level. If it rolls toward the door, stop and correct immediately. Water pooling near the door seal accelerates seal degradation and increases leak risk.
Securing the Tub to the Structure
Once level, secure the tub’s steel support frame to the wall studs using lag screws or the manufacturer’s specified fasteners. Do not over-torque fasteners, which can distort the frame and throw the tub out of level. After securing, re-verify level one final time.
Phase IV: Commissioning and Leak Testing
The final phase verifies that every system functions correctly before the installation is considered complete. This is the phase where problems are caught cheaply, before drywall is closed and trim is installed.
What Is the Two-Stage Testing Protocol?
Walk-in tub commissioning requires a dry test followed by a wet test to verify door alignment, seal integrity, and plumbing connections.
- Dry Test: Cycle the door latch 10 times, verifying smooth operation and consistent engagement each cycle. Inspect the seal visually for uniform compression around the entire door perimeter. Any gaps, wrinkles, or uneven compression indicate a leveling problem or a manufacturing defect that must be resolved before proceeding to the wet test.
- Fill: Fill the tub to at least three inches above the highest jet (or to the overflow level for soaking tubs).
- Static Pressure Hold: Allow the water to stand for a minimum of 20 minutes. During this hold period, inspect every plumbing joint, the door seal from the outside, the overflow connection, and the underside of the tub (if accessible) for any sign of moisture.
- Jet Cycle: For jetted tubs, run the jets for at least 10 minutes during the wet test. Inspect again for leaks at all fittings and the pump housing. Check for “seep” leaks at the door seal, which are slow drips that may not appear during the first few minutes but become evident during a sustained hold.
- Leak Detection: Utilize the Paper Towel Method (see below) around the base to catch seep leaks invisible to the eye.
Pro Tip: The Paper Towel Method
Place dry paper towels on the floor around the base of the tub during the 20-minute static test. Seep leaks that are invisible to the eye will show up as damp spots on the paper towels. This simple technique catches slow leaks that would otherwise go undetected until they cause subfloor damage.
Jet Line Disinfection
Before the homeowner uses the tub for the first time, disinfect the jet lines. Manufacturing residues, testing water, and shipping debris can harbor bacteria in the jet plumbing. Fill the tub above the jet line, add a manufacturer-recommended cleaning solution, and run the jets for 15 to 20 minutes. Drain and refill with clean water, then run the jets for another five minutes to flush the cleaning agent.
If your tub includes ozone or UV-C sterilization capability, this is the stage where the installer should verify that the sterilization system is operational and properly integrated into the jet plumbing loop. These systems significantly reduce biofilm buildup in jet lines and minimize ongoing maintenance requirements.
Feature Demonstration and Homeowner Walkthrough
The installer should walk the homeowner through every feature before leaving the job site. This includes the door mechanism and proper latch engagement, drain and overflow operation, jet controls and intensity settings, the heated backrest or seat (if equipped), and the inline heater and temperature controls. This demonstration is not a courtesy; it is a liability requirement. An improperly used door latch is the most common cause of walk-in tub leaks reported after installation.
For ongoing care guidance, see our detailed guide on how to clean and maintain your walk-in tub.
What Permits Does Walk-In Tub Installation Require?
Walk-in tub installation requires plumbing and electrical permits in virtually all jurisdictions.
Unlike a standard bathtub swap, walk-in tubs change the drainage DFU (Drain Fixture Unit) load and, for jetted models, add motor-driven electrical equipment to a wet location. Both of these changes trigger permit requirements under the International Plumbing Code (IPC) and the National Electrical Code (NEC).
Permit fees vary by location, typically ranging from $50 to $500 depending on scope. Your installer should pull these permits as part of the project. Be cautious of any contractor who suggests skipping permits. Unpermitted work creates liability exposure, complicates insurance claims, and can derail a future home sale during the inspection process.
In most areas, at least two inspections are required: one after the rough-in phase (before the tub is set and drywall is closed) and one after final commissioning. Some jurisdictions require a separate structural inspection if floor reinforcement is part of the scope.
What Door Swing Direction Is Standard on Walk-In Tubs?
Inward-swing doors are the industry standard on walk-in tubs because water pressure assists the seal when the tub is full.
When water fills the tub, hydrostatic pressure pushes against the inside face of an inward-swing door, compressing the seal tighter with every inch of water depth. This is a fundamental design advantage that improves seal reliability over the life of the tub.
Outward-swing doors are a specialized accessibility upgrade designed for users who transfer from a wheelchair. These doors require more precise engineering to maintain a watertight seal against water pressure, which is why they typically cost more and demand tighter manufacturing tolerances. If you do not need wheelchair-transfer access, an inward-swing door offers better long-term seal performance.
What Are the Ongoing Maintenance Requirements?
Regular maintenance keeps a walk-in tub safe, hygienic, and leak-free for years after installation.
The highest-priority maintenance task is inspecting the door seal. Check it monthly for signs of cracking, hardening, or debris buildup. Clean the seal gently with warm water and a soft cloth. Never use petroleum-based cleaners, abrasive pads, or harsh chemicals on the seal, as these degrade the rubber and shorten its service life.
For jetted tubs, run a cleaning cycle at least once a month. Fill the tub above the jet line, add a tub-specific cleaning solution, and run the jets for 15 to 20 minutes. This flushes biofilm, soap residue, and mineral deposits from the internal plumbing. Tubs equipped with ozone or UV-C sterilization systems require less frequent manual cleaning but still benefit from a monthly flush cycle.
Clean the tub’s acrylic or gelcoat surface after each use with a mild, non-abrasive cleaner. Acrylic scratches easily, so avoid scouring pads or powdered cleansers. A soft sponge with a small amount of dish soap is sufficient for routine cleaning.
Check the drain regularly for hair and debris that slow drainage. A slow drain is not just an inconvenience. It extends the time you spend sitting in cooling water after bathing, which can be uncomfortable and, for elderly users, presents a genuine health concern.
Most walk-in tubs carry manufacturer warranties of five to 10 years, with some manufacturers offering lifetime limited warranties. Extended warranty coverage is available for $300 to $1,000. Keep your installation documentation, permit records, and warranty paperwork together in a safe place, and register the product with the manufacturer immediately after installation.
Should You Hire a Professional or DIY?
Walk-in tub installation requires licensed professionals for safe, code-compliant, and warranty-preserving results.
The project spans three distinct trades: plumbing, electrical, and carpentry. A small error in door seal alignment can cause water damage to the subfloor and the rooms below. Incorrect electrical bonding in a wet location creates a genuine shock hazard. And most walk-in tub manufacturers require professional installation by certified technicians to keep the warranty valid.
| Factor | DIY | Professional Installation |
|---|---|---|
| Timeline | Several days to weeks | 1 to 3 days |
| Labor cost | $0 upfront (risk of rework) | $1,500 to $8,000 |
| Warranty status | Voided by most manufacturers | Preserved |
| Inspection risk | High (improper bonding, seal failure) | Low (insured, code-compliant) |
| Required skill level | Plumbing, electrical, carpentry | Handled by certified crew |
If you are evaluating contractors, verify that each candidate holds current plumbing and electrical licenses, carries general liability and workers’ compensation insurance, will pull all required permits, and provides references from previous walk-in tub installations specifically. For more guidance, review our tips on finding the right contractor for home improvement projects.

Anna has over six years of experience in the home services and journalism industries and serves as the Content Manager at MyHomePros.com, specializing in making complex home improvement topics like HVAC, roofing, and plumbing accessible to all. With a bachelor’s degree in journalism from Auburn University, she excels in crafting localized, comprehensive guides that cater to homeowners’ unique needs. Living on both coasts of the United States has equipped her with a distinctive perspective, fueling her passion for turning any house into a cherished home through informed, personalized decision-making.
Connect with top-rated local contractors who can help you with siding, roofing, HVAC, windows, and more. Get free quotes from verified professionals in your area today.