Ductless mini-splits have become one of the fastest-growing HVAC options in the U.S., and for good reason. They heat and cool individual rooms without ductwork, cut energy waste by 20 to 30%, and give you room-by-room temperature control that central air simply can’t match. But they also come with a wide price range and a long list of decisions to get right before you buy.
A ductless mini-split system costs between $2,000 and $15,000 or more to install in 2026. A single-zone system serving one room typically runs $2,500 to $6,000 fully installed, while a multi-zone setup covering three to five rooms lands in the $6,500 to $15,000-plus range.
This guide covers all of it: how mini-splits work, what drives the cost, which brands lead the market in 2026, how to size your system, what the new refrigerant rules mean for your purchase, and which rebates are still available now that the federal tax credits have expired. If you’re still weighing whether to repair or replace your current AC system, start there first.
What Is a Ductless Mini-Split System?
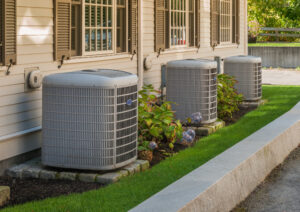
A ductless mini-split is a heating and cooling system that connects an outdoor compressor to one or more indoor air-handling units through small refrigerant lines. Unlike central HVAC systems that push conditioned air through ductwork, a mini-split delivers heating and cooling directly to each room or zone.
This eliminates the 20 to 30% energy loss that typically occurs in ducted systems, making mini-splits one of the most efficient options available for residential comfort. If you’ve noticed signs that your home’s ductwork needs replacement, a ductless system sidesteps the issue entirely.
How the Components Connect
Each indoor unit operates independently, meaning you can set different temperatures in different rooms. The outdoor compressor can typically support one to five indoor units, depending on its capacity.
The two main components are connected by four things, all routed through a small 3-inch opening in the wall:
- A refrigerant line set
- A condensate drain line
- A power cable
- A communication wire
Heating and Cooling in One System
Modern mini-splits function as heat pumps, meaning they both cool and heat your home. Instead of generating heat by burning fuel, they transfer heat from one location to another.
In cooling mode, the system pulls heat out of your room and dumps it outside. In heating mode, it reverses the process and extracts warmth from outdoor air, even in temperatures well below freezing on cold-climate rated models.
How Much Does a Ductless Mini-Split Cost in 2026?
Total installed cost for a ductless mini-split system in 2026 ranges from about $2,000 for a basic single-zone setup to $15,000 or more for a multi-zone whole-home system. The biggest cost driver is the number of zones you need, followed by the brand, efficiency rating, and installation complexity.
| System Type | Equipment-Only Cost | Fully Installed Cost | Best For |
|---|---|---|---|
| Single-Zone | $1,000 – $3,500 | $2,500 – $6,000 | One room or addition |
| Dual-Zone | $2,000 – $5,500 | $4,500 – $9,000 | Two separate rooms |
| 3-Zone | $3,500 – $7,500 | $6,500 – $12,000 | Multiple bedrooms |
| 4 to 5 Zone | $5,000 – $10,000+ | $9,500 – $15,000+ | Whole-home coverage |
Fully installed costs include equipment, materials, and professional labor. Actual pricing varies by region, brand, and installation complexity.
Equipment typically accounts for roughly one-third to just over half of the total installed price, while labor makes up about one-quarter to one-half. The remainder covers materials like line sets, electrical disconnects, condensate drainage, and mounting hardware.
Number of Zones
The number of zones is the single biggest variable in mini-split pricing. Each additional indoor unit requires its own air handler, refrigerant line set, condensate drain, and dedicated labor hours to install. A single-zone system typically costs $2,500 to $6,000 fully installed, while adding a second zone doesn’t just double the indoor unit cost. It also increases the outdoor compressor size needed to support both heads, which raises the equipment price across the board.
For multi-zone systems, the outdoor unit must be rated to handle the combined BTU load of all connected indoor heads. A three-zone system serving a living room, bedroom, and home office might require a 36,000-BTU outdoor compressor, which costs significantly more than the 12,000-BTU unit a single-zone setup would need. Each additional zone also adds roughly $1,500 to $3,500 to the total project cost when factoring in equipment, line sets, and labor.
System Capacity (BTUs)
A standard 9,000- to 12,000-BTU unit sized for a single bedroom or office costs less than a 24,000- or 36,000-BTU system designed for a large open floor plan. Larger compressors require heavier electrical circuits, thicker refrigerant lines, and more robust mounting equipment, all of which add to the installed price.
Oversizing is a common and costly mistake. A 24,000-BTU unit installed in a small bedroom won’t just waste money upfront. It will short-cycle, turning on and off rapidly without properly dehumidifying the space. This leads to a clammy, uncomfortable room and premature wear on the compressor. Always have a contractor perform a Manual J load calculation to match system capacity to the actual cooling and heating demands of the space.
Indoor Unit Style
Wall-mounted units are the most affordable and popular option, typically costing $2,500 to $5,000 per zone installed. They mount high on the wall near the ceiling, require minimal structural modification, and are the fastest for contractors to install, usually taking two to three hours per head.
Ceiling cassette units cost more because they require cutting into the ceiling, reinforcing the mounting area, and routing the condensate drain line through the ceiling cavity. Expect to pay $500 to $1,500 more per unit compared to a wall-mounted head. However, ceiling cassettes distribute air in multiple directions, which can improve comfort in larger or open-concept rooms.
Floor-mounted consoles sit near the base of the wall and work well in rooms with large windows, sloped ceilings, or limited wall space. They typically fall between wall-mounted and ceiling cassette pricing but may require additional considerations for condensate drainage since they sit at floor level.
Brand Selection
Premium manufacturers like Mitsubishi and Daikin command higher prices but offer stronger warranties, broader contractor support, and greater cold-climate performance. A single-zone Mitsubishi system might cost $1,000 to $2,000 more than an equivalent unit from a budget brand, but that premium buys access to their authorized dealer network, extended warranty options, and proven long-term reliability.
Budget-friendly brands like Pioneer, Gree, or MRCOOL can reduce upfront costs, particularly MRCOOL’s DIY-friendly pre-charged systems (though these don’t eliminate all installation expenses; more on that below). The tradeoff is typically shorter warranty coverage, fewer authorized service providers, and less robust performance in extreme temperatures. For a supplemental system in a mild climate, a budget brand may serve you well. For a primary heating and cooling system, the premium investment often pays for itself over the system’s 15- to 20-year lifespan.
Other Cost Factors
Several additional variables can push your installed cost higher. The length of the refrigerant line run between the outdoor compressor and indoor unit matters. Most standard installations include 15 to 25 feet of line set. Runs beyond that, or those that require routing through walls, ceilings, or tight crawl spaces, add both material and labor costs.
Electrical panel capacity is another potential expense. Each mini-split zone requires a dedicated circuit, and older homes with full or undersized panels may need an electrical upgrade costing $1,000 to $2,500 before the mini-split can even be installed.
Permit fees typically run $250 to $400 for multi-zone systems, though they vary by jurisdiction. Some municipalities also require a separate electrical permit. The accessibility of the installation location plays a role as well. A short, straight line run on the same wall will cost less than a long run through tight spaces, second-story installations requiring ladder work, or setups where the outdoor unit must be placed far from the indoor heads.
How Much Do Different Mini-Split Brands Cost?
Brand choice affects both the equipment price and the total installed cost. In 2026, Mitsubishi and Daikin sit at the premium end, while brands like Gree and MRCOOL offer budget-friendly alternatives.
| Brand | Equipment-Only Cost | Fully Installed Cost | Tier |
|---|---|---|---|
| Mitsubishi | $1,500 – $12,000 | $3,800 – $15,500+ | Premium |
| Daikin | $900 – $7,600 | $3,500 – $13,000 | Premium |
| Fujitsu | $1,100 – $8,300 | $3,500 – $13,500 | Premium |
| Carrier | $1,000 – $7,000 | $3,000 – $10,500 | Mid-range |
| LG | $900 – $7,600 | $3,000 – $12,000 | Mid-range |
| MRCOOL (DIY) | $700 – $5,900 | $1,000 – $6,500* | Budget/DIY |
| Gree / Pioneer | $600 – $4,500 | $2,000 – $8,000 | Budget |
*MRCOOL DIY systems use pre-charged quick-connect line sets that eliminate professional HVAC labor, but homeowners should still budget $300 to $600 for required ancillary materials and a licensed electrician. See “The Hidden Costs of DIY Installation” below.
Premium Brands: What You’re Paying For
Mitsubishi consistently ranks as the top choice among HVAC professionals due to its reliability, extensive cold-climate lineup, and one of the largest authorized contractor networks in the industry. Their Hyper-Heat line maintains strong heating output at extremely low outdoor temperatures, making it the go-to option for homeowners in northern climates.
Daikin stands out for its advanced inverter compressor technology and excellent humidity control, making it especially well-suited for hot, humid climates.
Fujitsu is often recommended when noise is a primary concern, as their units consistently deliver some of the quietest operation in the category.
The Hidden Costs of DIY Installation
DIY-friendly systems like MRCOOL eliminate the cost of a licensed HVAC technician, but they don’t eliminate all installation expenses. When installing a DIY system, budget for these required materials and services:
- Electrical disconnect box and whip for the outdoor unit
- Heavy-gauge wiring for a dedicated 120V/240V circuit run to the main panel
- Concrete equipment pad or exterior wall-mounting bracket for the compressor
- Refrigerant line-hide covers for a clean exterior appearance
- Permit fees and licensed electrician labor, which most jurisdictions require even for DIY HVAC installations
Important: These ancillary costs typically add $300 to $600 to the equipment-only price, and can run higher if your electrical panel needs an upgrade or the circuit run is long. Factor them into your budget before assuming a DIY install saves the full cost of labor.
How Do You Size a Ductless Mini-Split?
Proper sizing is one of the most critical decisions in the entire process, and one of the most common mistakes homeowners make. Getting it wrong creates problems that no amount of money can fix after installation.
An oversized mini-split will short-cycle, turning on and off frequently without adequately removing humidity. Your home will feel clammy even when the thermostat reads the right temperature. An undersized system will run constantly without ever reaching your desired temperature.
The General Sizing Rule
The standard rule of thumb is 12,000 BTU per 500 to 600 square feet of living space. However, this is only a starting point.
The accurate way to size a mini-split is through a Manual J load calculation, which accounts for your home’s insulation levels, window size and orientation, ceiling height, climate zone, and occupancy. Most reputable HVAC contractors will perform this calculation as part of their estimate. For a deeper dive into the process, see our HVAC sizing guide.
| Room Size (sq ft) | Recommended BTUs | System Size (tons) | Typical Application |
|---|---|---|---|
| 150 – 300 | 9,000 | 3/4 ton | Bedroom, small office |
| 300 – 550 | 12,000 | 1 ton | Large bedroom, sunroom |
| 550 – 1,000 | 18,000 – 24,000 | 1.5 – 2 tons | Living room, open plan |
| 1,000 – 1,500 | 30,000 – 36,000 | 2.5 – 3 tons | Large open floor plan |
When You’ll Need More BTUs
These general guidelines assume average conditions. You’ll need more capacity for rooms with:
- High or vaulted ceilings
- Lots of south- or west-facing windows
- Poor insulation or older construction
- Heavy sun exposure throughout the day
- Significant internal heat loads (kitchens, home gyms, server rooms)
Always err on the side of professional sizing rather than guessing.
Understanding Efficiency: SEER2 for Ductless Systems
SEER2 stands for Seasonal Energy Efficiency Ratio 2, and it measures how efficiently a cooling system converts electricity into cooling output over an entire season. Think of it like miles per gallon for your air conditioner. A higher number means less electricity used for the same amount of cooling. For a full breakdown of the rating system, see our guide to SEER ratings.
What Changed With SEER2?
The SEER2 rating replaced the original SEER metric in 2023 after the U.S. Department of Energy updated its testing procedures to better reflect real-world performance.
For ducted central systems, the new testing standard introduced higher static pressure requirements that simulate ductwork resistance, which lowered their numerical ratings. However, because ductless mini-splits have no ductwork, they are not penalized by these static pressure changes. Their efficiency ratings remained highly stable during the SEER-to-SEER2 transition. This is one reason mini-splits continue to outperform central air on efficiency benchmarks.
2026 Efficiency Standards at a Glance
Federal minimum efficiency standards for 2026 require approximately SEER2 14.3 and HSPF2 7.5 for split heat pumps. But ductless mini-splits routinely exceed these minimums by a wide margin:
- Entry-level systems: SEER2 16 to 20
- Mainstream models: SEER2 20 to 26
- Premium single-zone units: SEER2 26 to 35
Carrier’s highest-rated ductless unit, for example, achieves up to 35 SEER2.
Why Mini-Splits Are More Efficient Than Central Air
The efficiency advantage comes from two key factors:
No duct losses
Because there’s no ductwork, there’s no duct-related energy loss. Central systems typically lose 20 to 30% of their output through ductwork alone.
Inverter-driven compressors
Modern mini-splits adjust compressor speed continuously based on demand, rather than cycling on and off like traditional systems. This smooth, variable operation maintains more consistent temperatures and uses significantly less electricity.
What Do Efficiency Gains Mean for Your Energy Bills?
Upgrading from an old central system to a high-efficiency mini-split can reduce household cooling energy use by 20 to 40%.
In dollar terms, a homeowner replacing an older system rated around SEER2 13 with a new ductless mini-split rated SEER2 20 could save roughly $60 per month on cooling costs alone, or about $720 per year. If the mini-split also replaces inefficient electric baseboard heating or an oil furnace, annual savings can exceed $1,000 to $1,500 depending on local utility rates and climate. For more ways to reduce your energy costs, check out our home energy saving tips.
Practical efficiency targets for 2026: If the mini-split will serve as your primary whole-home system in a climate with heavy cooling or heating seasons, aim for SEER2 20 or higher. For occasional-use rooms, garages, or guest suites, SEER2 16 to 18 still outperforms most central systems while keeping upfront costs down.
What Types of Indoor Units Are Available?
Mini-split indoor units come in several configurations, each suited to different spaces and aesthetic preferences.
Wall-mounted units are by far the most common and most affordable option. They’re installed high on the wall near the ceiling, which helps distribute conditioned air evenly throughout the room. Most residential mini-split installations use wall-mounted heads, and they’re the easiest and fastest for contractors to install.
Ceiling cassette units mount flush into the ceiling and distribute air in multiple directions. They’re a good choice for rooms where wall space is limited or where you want the unit to be less visible. They cost more due to the additional labor and materials required for ceiling installation.
Floor-mounted consoles sit near the floor and are ideal for rooms with large windows, sloped ceilings, or limited wall space. They work well in sunrooms and attic conversions.
When Is a Ductless Mini-Split the Right Choice?
Mini-splits solve specific problems better than any other HVAC option. They’re the ideal choice when:
- Your home has no existing ductwork, including older homes, historic properties, or post-and-beam construction where adding ducts would be impractical or destructive
- You’re conditioning a room addition, finished basement, converted garage, bonus room, or sunroom where extending existing ductwork isn’t feasible
- Specific rooms are consistently too hot or too cold and your central system can’t keep up
- You want a whole-home system in a mild to moderate climate, particularly in a well-insulated home
Cold-climate rated models from manufacturers like Mitsubishi and Fujitsu can serve as primary heating systems even in northern regions where temperatures regularly drop well below zero.
When a Mini-Split Might Not Be the Best Fit
Mini-splits aren’t the right answer for every situation:
- Homes with good existing ductwork. A central heat pump or air conditioner may cover more rooms more economically. See our central air conditioning cost guide for a direct comparison.
- Very cold climates with standard models. Non-cold-climate units lose heating capacity as outdoor temperatures drop. You’d need premium cold-climate rated units or a backup heating source.
- Many small rooms. Oversized heads in small spaces lead to poor humidity control. A traditional central system may handle this layout better.
The 2026 Refrigerant Transition Explained
The HVAC industry is in the middle of a significant refrigerant transition that directly affects mini-split purchases in 2026. R-410A, the refrigerant that dominated residential systems for the past two decades, is being phased down due to its high global warming potential. New low-GWP alternatives, primarily R-32 and R-454B, are replacing it. This mirrors the earlier R-22 refrigerant phase-out that affected older systems.
What the EPA Manufacturing Ban Means for You
The EPA’s Technology Transitions rule banned the manufacturing of new R-410A residential HVAC systems as of January 1, 2025. However, the EPA removed the originally proposed hard deadline for installing pre-existing R-410A residential inventory.
The current phase-out timeline:
- January 1, 2025: Manufacturing of new R-410A residential systems officially banned.
- 2026 and beyond: Contractors may legally continue to sell and install existing R-410A inventory until supplies are depleted.
Why the New Refrigerants Matter
R-32 has a global warming potential of 675 compared to R-410A’s 2,088. That’s roughly a 70% reduction in environmental impact. It also requires about 20% less refrigerant charge than R-410A systems, which can improve efficiency and reduce long-term service costs.
Both R-32 and R-454B are classified as A2L refrigerants, meaning they are mildly flammable. This requires updated installation practices and safety considerations from licensed contractors.
Can I Still Buy an R-410A System?
Yes, for now. Contractors can legally sell and install R-410A systems from pre-2025 inventory throughout 2026, and owning and servicing an existing R-410A system remains fully legal.
Important: R-410A refrigerant prices are expected to climb steadily as production decreases. If you’re purchasing a new system in 2026, choosing one that runs on R-32 or R-454B positions you for lower long-term maintenance costs and better alignment with current environmental standards.
2026 Tax Credits and Rebates
The federal incentive landscape for mini-split heat pumps changed dramatically in 2025. Homeowners shopping for a new system in 2026 need to understand what has expired and what remains available.
The Expiration of Federal Tax Credits (Sections 25C and 25D)
The Section 25C Energy Efficient Home Improvement Credit, which provided a 30% tax credit up to $2,000 for qualifying heat pump installations, expired on December 31, 2025.
What many homeowners don’t realize is that the One Big Beautiful Bill Act (OBBBA), signed in July 2025, also accelerated the expiration of Section 25D credits that previously covered geothermal heat pump systems. Both credit programs were terminated for expenditures made and systems placed in service after December 31, 2025.
Key takeaway: Homeowners who had a qualifying system installed on or before December 31, 2025 can still claim the credit on their 2025 tax return filed in 2026. But new installations completed in 2026 are no longer eligible for either federal tax credit.
How to Find State-Level HEAR Rebates
While the federal tax credits are gone, state and utility rebate programs remain the primary path to reducing your out-of-pocket cost in 2026.
The most significant of these is the HEAR (Home Electrification and Appliance Rebates) program, funded through the Inflation Reduction Act and administered by individual states. HEAR provides point-of-sale rebates, meaning the discount is applied at the time of purchase rather than as a credit on your tax return months later.
Income-qualified households at or below 80% of area median income can often access doubled rebate caps. Availability and amounts vary by state, and some states are still launching their HEAR programs.
State-level highlights:
- Massachusetts: Up to $8,500 in rebates for whole-home heat pump conversions through the Mass Save program.
- New York: State renewable energy tax credits up to 25%, capped at $5,000.
- Colorado: Contractor-applied discounts that frequently exceed $1,500.
Many utility companies also offer their own separate rebate programs for high-efficiency heat pump installations. The ENERGY STAR Rebate Finder and the DSIRE database are the best tools for identifying exactly what’s available in your area.
What Does the Installation Process Involve?
Professional installation of a single-zone ductless mini-split typically takes one day. Multi-zone systems with three to five indoor units may take two to three days depending on complexity.
The Step-by-Step Process
- Mount the indoor unit on the wall or ceiling, depending on the type selected.
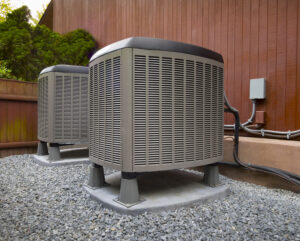
- Place the outdoor compressor on a concrete pad or wall-mounted bracket.
- Drill a 3-inch hole through the wall to route the refrigerant lines, condensate drain, and communication wiring between the units.
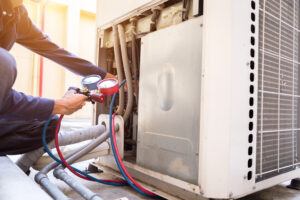
- Connect the refrigerant lines, then vacuum the system to remove moisture and air.
- Charge the system with the correct amount of refrigerant. This step requires specialized equipment and EPA certification.
- Wire the system to your electrical panel, which may require a dedicated circuit breaker.
- Test both heating and cooling modes to verify proper operation.
Why DIY Installation Is Risky
DIY installation is generally not recommended for most homeowners. While brands like MRCOOL sell pre-charged quick-connect systems designed for homeowner installation, most jurisdictions still require permits and licensed electrical work.
Improper installation can lead to:
- Refrigerant leaks
- Reduced efficiency
- Premature component failure
- Voided manufacturer warranties
The cost savings of DIY installation rarely outweigh the risks for systems expected to last 15 to 20 years.
How Do You Maintain a Ductless Mini-Split?
Mini-splits require regular maintenance to operate efficiently, but the upkeep is simpler than many other HVAC systems.
What You Can Do Yourself
The most important homeowner task is cleaning or replacing the air filters on each indoor unit every two to four weeks during heavy-use seasons. Most indoor heads have washable, reusable filters that slide out easily, making this a quick, no-cost task.
Pro tip: Neglecting filter cleaning is the single most common cause of reduced efficiency, increased energy bills, and premature wear. Set a recurring reminder on your phone.
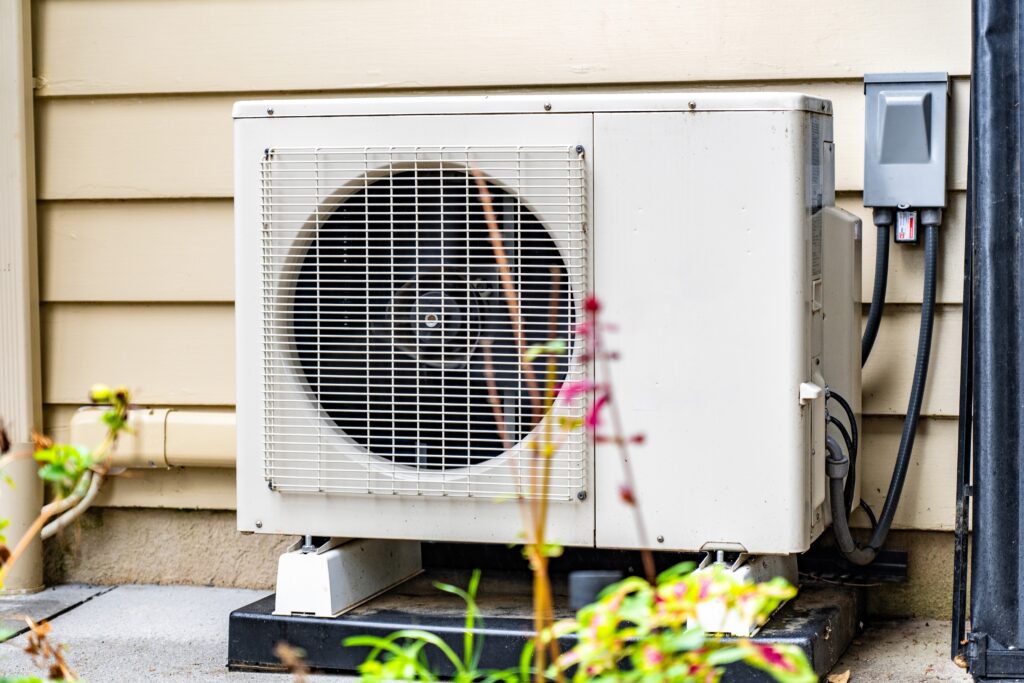
You should also keep the outdoor compressor unit clear of debris, vegetation, snow, and ice. Aim for at least 18 to 24 inches of clearance on all sides for proper airflow.
What a Professional Should Handle
An annual professional maintenance visit, typically costing $75 to $200, should include:
- Cleaning the indoor evaporator coils
- Checking refrigerant levels
- Inspecting electrical connections
- Verifying thermostat calibration
- Clearing the condensate drain line
Many HVAC companies offer annual maintenance contracts in the $150 to $500 range that include one or two scheduled visits and priority service.
Expected Lifespan
With proper maintenance, a well-installed mini-split system should last 15 to 20 years or longer. Regular upkeep also preserves your manufacturer’s warranty, which typically covers the compressor for five to 12 years depending on the brand. Some premium manufacturers like Mitsubishi offer extended warranty programs.
How Does a Mini-Split Compare to Central Air?
Mini-splits and central air conditioning serve the same fundamental purpose, but they approach the job differently. For a detailed side-by-side comparison, see our full guide on ductless mini-splits vs. central AC.
Where Mini-Splits Win
- No duct losses. Mini-splits deliver conditioned air directly to each room, eliminating the 20 to 30% energy loss typical of ducted systems.
- True zone control. Each room gets its own thermostat. Unoccupied rooms can be turned off completely.
- Easier installation. No ductwork to design, fabricate, or install. Just a 3-inch hole in the wall.
- Better for homes without ducts. Installing new ductwork costs $3,000 to $7,000+, making a mini-split the more affordable path.
Where Central Air Wins
- Lower per-room cost in homes with existing, well-sealed ductwork.
- Invisible operation. No indoor wall units to look at.
- Better for many small rooms. A single air handler can serve multiple rooms through ducts more effectively than individual heads.
The decision comes down to whether the energy savings, zone control, and quiet operation of a mini-split justify the higher per-room cost compared to a conventional central system.
How Do You Choose the Right HVAC Contractor?
The quality of your installation matters as much as the equipment itself. A poorly installed mini-split will never achieve its rated efficiency, may develop refrigerant leaks, and could fail years earlier than expected. Watch out for common HVAC contractor red flags before signing any contract.
What to Look For
Start by verifying that any contractor you’re considering is licensed, insured, and bonded in your state. Ask specifically about their experience with ductless mini-split installations, since the skills required differ from traditional ducted HVAC work.
Getting Estimates
Request at least three written estimates, and be cautious of bids that come in dramatically lower than the others. Each estimate should include a line-by-line breakdown of:
- Equipment make and model
- Materials (line sets, disconnects, mounting hardware)
- Labor hours
- Permit fees
- Any additional work like electrical upgrades
A good contractor will perform a Manual J load calculation before recommending a system size, rather than using rough square-footage estimates. They should also discuss indoor unit placement to optimize airflow and comfort, not just installer convenience.
Warranty Considerations
Most manufacturers require installation by an authorized dealer to maintain the full warranty. Mitsubishi, Daikin, and Fujitsu all have authorized dealer networks, and using one of these dealers often unlocks extended warranty options that aren’t available through general contractors.
Bottom Line
Ductless mini-split systems remain one of the most flexible, efficient, and practical HVAC solutions for residential homes in 2026. They’re particularly well-suited for homes without ductwork, room additions, and spaces that your central system can’t adequately serve.
The upfront cost is higher than some alternatives, but the combination of energy savings, zone-by-zone control, and quiet operation typically delivers a strong return on investment over the system’s 15 to 20 year lifespan.
The key decisions to get right:
- Sizing: through a Manual J calculation, not guesswork
- Efficiency tier: matched to your climate and usage patterns
- Brand: with strong warranty coverage and local contractor support
- Installer: experienced, licensed, and preferably manufacturer-authorized
Take the time to get multiple quotes, verify contractor credentials, and research available state and utility HEAR rebates before committing. With the right system properly installed, a ductless mini-split can deliver reliable, efficient comfort for decades.

Anna has over six years of experience in the home services and journalism industries and serves as the Content Manager at MyHomePros.com, specializing in making complex home improvement topics like HVAC, roofing, and plumbing accessible to all. With a bachelor’s degree in journalism from Auburn University, she excels in crafting localized, comprehensive guides that cater to homeowners’ unique needs. Living on both coasts of the United States has equipped her with a distinctive perspective, fueling her passion for turning any house into a cherished home through informed, personalized decision-making.
Connect with top-rated local contractors who can help you with siding, roofing, HVAC, windows, and more. Get free quotes from verified professionals in your area today.