

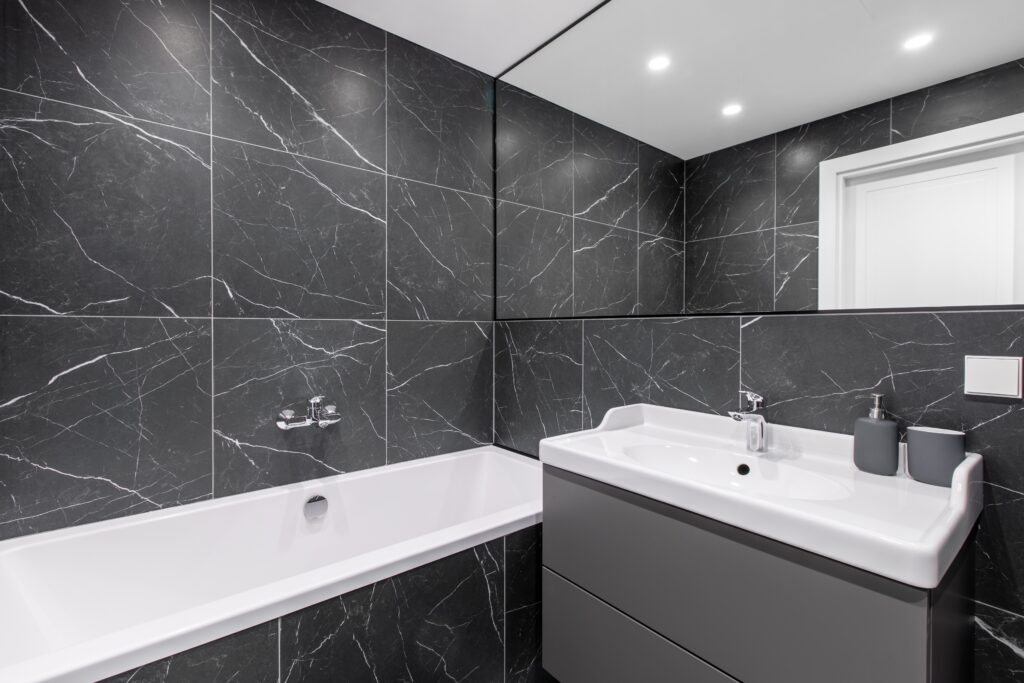
Installing bathroom wall tile transforms a dated space into something that looks professionally finished, and it’s a project most intermediate DIYers can tackle successfully. The key is understanding that tile installation is less about speed and more about methodical preparation. Rush through waterproofing or layout, and you’ll regret it within a year. For a detailed breakdown of project duration, see our guide on how long it takes to tile a bathroom.
Whether you’re tiling a shower surround, tub enclosure, or accent wall, the fundamentals remain the same: prepare the substrate properly, waterproof wet areas, plan your layout before mixing thinset, and let each layer cure completely before moving to the next. All bathroom wall substrates should be prepared in accordance with TCNA Handbook standards for wet environment durability.
Tools and Materials
Having the right tools makes the difference between frustration and satisfaction. Don’t skimp on the trowel or level, as these directly affect your results.
Essential Tools
- Notched trowel: 1/4″ × 1/4″ square notch for most wall tiles; 1/4″ × 3/8″ for tiles larger than 12″×12″
- 4-foot level: Essential for establishing level lines and checking tile alignment
- Tile spacers or leveling system: Match your desired grout line width (1/16″, 1/8″, or 3/16″ most common); leveling clips recommended for large-format tile
- Wet saw or snap cutter: Wet saw preferred for precision; snap cutter works for basic ceramic cuts
- Tile nippers: For small notches and curved cuts around fixtures
- Carbide-tipped hole saw: For cutting holes around shower valves and pipes
- Rubber grout float: For applying and working grout into joints
- Mixing bucket and paddle: Drill-mounted paddle mixer saves time and ensures consistent mix
- Large sponge: For cleaning grout haze and wiping excess thinset
- Rubbing stone: For smoothing cut tile edges
Materials
- Wall tile: Order 10-15% extra for cuts, breakage, and future repairs. Browse current bathroom tile trends for design inspiration
- Cement backer board: 1/2″ thickness for walls; brands include Durock, Permabase, HardieBacker
- Backer board screws: Corrosion-resistant, 1-1/4″ length for 1/2″ board
- Alkali-resistant mesh tape: For sealing backer board seams
- Waterproofing membrane: Liquid (RedGard, Hydroban) or sheet (Kerdi, NobleSeal)
- Thinset mortar: Polymer-modified for most applications (see thinset section below)
- Grout: Sanded, unsanded, or epoxy depending on joint width and performance needs
- Grout sealer: Required for cement-based grouts; not needed for epoxy
- Silicone caulk: Color-matched to grout; for corners, edges, and changes in plane
Step 1: Prepare the Surface
Proper substrate preparation determines whether your tile lasts decades or fails within years. In wet areas like showers and tub surrounds, cement backer board is non-negotiable. Standard drywall will absorb moisture, grow mold, and eventually crumble.
Remove Existing Materials
If you’re working over existing tile or damaged drywall in a wet area, remove everything down to the studs. This is dusty, labor-intensive work, but trying to tile over compromised materials creates hidden problems.
- Turn off power to any circuits in the bathroom before starting demolition
- Remove fixtures including shower heads, handles, and any accessories mounted to the wall
- Score existing tile with an angle grinder to break the bond, then pry tiles off with a flat bar
- Remove old backer board or drywall in the wet area; cut carefully around plumbing to avoid damaging pipes
- Inspect framing for mold, rot, or damage; address any issues before proceeding
Mold Warning: If you discover black mold behind existing walls, stop work immediately. Small areas (less than 10 square feet) can often be remediated by homeowners using proper PPE and following EPA mold remediation guidelines. Larger areas require professional mold remediation before you can continue. For general guidance, see our bathroom mold removal tips.
Install Cement Backer Board
Cement backer board provides a stable, moisture-resistant substrate for tile. Unlike drywall, it won’t deteriorate when exposed to water vapor that inevitably penetrates grout joints over time.
Installation fundamentals:
- Leave a 1/4″ gap at the bottom of the board above the tub or shower pan for expansion
- Stagger seams so they don’t align with seams in the adjacent row or underlying framing joints
- Pre-drill screw holes to prevent cracking, especially near edges
- Space screws 8″ apart in the field and 4″ apart along edges
- Keep screws 3/8″ from edges and 2″ from corners
- Tape all seams with alkali-resistant fiberglass mesh tape embedded in thinset
After taping seams, apply a thin layer of thinset over the tape and feather the edges smooth. Allow this to cure for at least 24 hours before waterproofing.
Step 2: Waterproof the Wet Area
Waterproofing is the most critical step in shower and tub surround installations. Tile and grout are not waterproof, and moisture will eventually penetrate to the substrate. Modern shower longevity depends on a fully bonded waterproof membrane that prevents moisture from reaching the wall framing. For additional context on moisture protection in bathrooms, see our guide on waterproofing wood for bathroom applications.
Actual costs depend on your location, project scope, and materials. The best way to know what you'll pay is to get quotes from local contractors.
Get Your Free Estimate →Liquid Waterproofing Membranes
Products like RedGard, Laticrete Hydroban, and Mapei AquaDefense are painted onto the backer board and create a seamless waterproof barrier once cured.
Application steps:
- Dampen the backer board with a sponge to prevent it from pulling moisture out of the membrane too quickly
- Apply the first coat using a paint roller or brush, working in one direction
- Embed fabric membrane tape at all corners and seams while the first coat is still wet
- Allow first coat to dry until it turns from pink to solid red (RedGard) or as directed (1.5-2 hours typically)
- Apply second coat perpendicular to the first coat direction
- Check for pinholes after the second coat dries; spot-treat any thin areas
Coverage matters: RedGard requires 55 square feet per gallon for waterproofing (not the 110 sq ft rate listed for crack prevention). Using too little defeats the purpose entirely.
Critical Rule: When using a liquid membrane over cement backer board, do not install a plastic vapor barrier behind the backer board. You don’t want two waterproof layers with the substrate sandwiched between them, as this traps moisture and creates mold problems. The waterproof membrane goes on the front, exposed side only.
Sheet Membrane Systems
Sheet membranes like Schluter Kerdi and Laticrete HydroBan Board offer an alternative to liquid waterproofing. These polyethylene sheets are bonded to the substrate with thinset and create a waterproof layer in a single step.
Sheet membranes require unmodified thinset (not polymer-modified) because the membrane is impervious and modified thinset cannot dry and cure properly when sandwiched between two non-porous surfaces.
Step 3: Plan Your Layout
Layout planning prevents ending up with thin slivers of tile in visible corners or unbalanced placement around focal points. Take time with this step, because it’s much easier to adjust lines on a wall than to remove set tile.
Find Your Starting Point
For most bathroom wall tile installations, the goal is to center the tile layout so cut tiles on opposite ends are equal in size, and to ensure the most visible areas get full tiles while cuts hide in corners.
- Measure the wall width and find the center point; mark a vertical plumb line
- Dry-fit tiles along a horizontal line to see where cuts will fall
- Adjust the center point if necessary to avoid slivers less than half a tile width
- Measure wall height and plan vertical layout to avoid thin cuts at ceiling or at eye level
- Account for grout lines when calculating tile placement
If you’re working within a larger renovation, our shower remodel cost guide can help you budget for materials and labor.
"We matched with a great contractor the same day. The whole process was easy and completely free."
Install the Ledger Board
Starting tile installation on the second row up from the bottom ensures a level base regardless of whether the tub or floor is perfectly level. A temporary ledger board supports tiles while the thinset cures.
- Measure one tile height plus one grout line up from the lowest point of the tub or floor
- Draw a level line across the entire wall at this height
- Screw a straight board (1×4 works well) to the wall along this line
- Verify level in multiple places; this ledger board is your reference for the entire installation
Step 4: Mix and Apply Thinset
Thinset mortar bonds tile to the substrate. Getting the right consistency and working in manageable sections are keys to success.
Choosing Thinset Type
Select a mortar that meets ANSI standards for your specific application. The table below outlines the appropriate thinset type for common bathroom tile scenarios:
| Application | Thinset Type | Notes |
|---|---|---|
| Standard ceramic/porcelain on backer board | Polymer-modified (ANSI A118.4) | Most common choice; provides flexibility and strong bond |
| Over Schluter DITRA/Kerdi membrane | Unmodified (ANSI A118.1) | Required by manufacturer; modified thinset won’t cure properly |
| Large format tile (12″×24″ or larger) | Large tile mortar (ANSI A118.11) | Non-sag formula prevents tiles from slipping on walls |
| Glass tile | White polymer-modified | White color prevents show-through; check tile manufacturer specs |
| Natural stone | White polymer-modified | Prevents staining translucent stone |
Mixing Thinset
Proper mixing creates thinset with a smooth, peanut-butter-like consistency that holds ridges when troweled.
- Add water to the bucket first, then add powder; this prevents dry pockets at the bottom
- Mix with a drill-mounted paddle for 2-3 minutes until smooth
- Let the mixture slake (rest) for 5-10 minutes, then remix briefly
- Test consistency: trowel ridges should stand up without slumping; mix should not be runny
- Only mix what you can use in 30-45 minutes; thinset becomes unworkable as it begins to set
Applying Thinset
Proper trowel technique creates full contact between tile and substrate, which is essential for both bond strength and preventing hollow spots where moisture can collect.
- Apply thinset to the wall using the flat side of the trowel to spread a thin base layer
- Comb through with the notched side held at a 45-degree angle, creating uniform ridges
- Work in small sections (approximately 3-4 square feet) so thinset doesn’t skin over before tiles are placed
- Keep ridges running in one direction; this allows air to escape when tiles are pressed into place
- Back-butter large tiles (over 8″×8″) with a thin layer of thinset on the tile back in addition to the wall
Coverage Check: Periodically remove a tile immediately after setting it and examine the back. You should see at least 80% coverage for wall tile (95% for floor tile and wet areas). If coverage is poor, use more thinset or a larger notched trowel.
Step 5: Set the Tiles
With your layout marked and thinset applied, you’re ready to set tiles. Work methodically, starting from the ledger board and moving upward.
Placing Tiles
- Set the first tile at your center reference line, resting on the ledger board
- Press firmly and wiggle slightly perpendicular to the trowel ridges to collapse them and ensure full contact
- Insert spacers at each corner as you go
- Check level and plumb every few tiles; adjust immediately while thinset is still workable
- Work outward from center to maintain symmetry
- Complete full tiles first; save cuts for corners and ends of rows
- Wipe excess thinset from tile faces and grout joints immediately with a damp sponge
Using Tile Leveling Systems
For large-format tiles (12″×24″ or larger), a tile leveling system is considered essential for preventing “lippage,” which refers to uneven edges between adjacent tiles. These systems use clips inserted beneath tile edges and wedges that apply even pressure across the joint, holding tiles flush while thinset cures.
Tile leveling systems offer several advantages:
- Eliminates lippage: Wedges pull adjacent tiles to the same plane, creating a flat surface even with slight substrate irregularities
- Speeds installation: Less time spent checking and adjusting individual tiles
- Maintains consistent spacing: Clips double as spacers, ensuring uniform grout lines
- Improves professional appearance: Flat tile planes reflect light evenly and look significantly better than installations with visible lippage
Common leveling system types include:
- Wedge-and-clip systems: Reusable wedges pair with disposable clips; most popular for DIY and professional use
- Spin cap systems: Threaded posts with spin-on caps; faster to install but higher cost per unit
- Strap systems: Flexible straps that wrap around tile edges; work well for curved layouts
When using leveling systems, insert clips along each tile edge before setting adjacent tiles. After setting the adjacent tile, insert wedges into the clips and tighten until both tiles are flush. Allow thinset to cure fully (24-48 hours), then snap off the clip posts by kicking them sideways. The portion of the clip beneath the tile remains permanently embedded.
When Leveling Systems Matter Most: Lippage becomes increasingly visible as tile size increases. For tiles smaller than 6″×6″, standard spacers work fine. For tiles 12″×12″ and larger, leveling clips significantly improve results. For large-format tiles like 12″×24″ or 24″×48″, leveling systems are strongly recommended to achieve a professional finish.
Cutting Tiles
Most wall tile projects require a combination of cutting techniques:
- Straight cuts: Use a snap cutter for ceramic tile or a wet saw for porcelain. Score once and snap; don’t run the cutter back and forth
- Notches and L-cuts: Use a wet saw to make multiple parallel cuts, then snap out the waste with tile nippers
- Holes for pipes: Use a carbide-tipped hole saw on a drill. Start slowly to prevent skipping, then increase speed once the pilot bit catches
- Curved cuts: Score the cut line, make relief cuts with a wet saw, then nibble away waste with tile nippers
Always smooth cut edges with a rubbing stone before installation, especially for edges that will be visible or near hands.
Safety: Wet saws spray water and tile chips. Wear safety glasses, hearing protection, and keep your hands clear of the blade. Cut tile dust is hazardous. If cutting indoors, use a wet saw (not dry cutting) and ensure adequate ventilation.
Why Hire a Licensed Professional
- Licensed & insured — protects you from liability
- Warranty coverage — manufacturers require pro installation
- Code compliance — avoids permit issues
- Faster completion — pros finish in days, not weeks
Completing the Bottom Row
After the upper tiles have cured for at least 24 hours, remove the ledger board and install the bottom row. Measure from the tub or floor to the first row of tile at multiple points, as the gap will likely vary if the tub isn’t perfectly level.
Cut each bottom-row tile to fit its specific location, leaving a 1/8″ gap between the tile and tub or floor. This gap will be filled with silicone caulk, not grout, to accommodate movement.
Step 6: Grout the Joints
Allow thinset to cure completely before grouting. The minimum is 24 hours, though 48 hours is safer. Rushing this step can cause tiles to shift and thinset to crack.
Choosing Grout Type
| Grout Type | Joint Width | Best For | Sealing Required |
|---|---|---|---|
| Unsanded cement | 1/16″ to 1/8″ | Wall tile, polished stone, glass | Yes, annually |
| Sanded cement | 1/8″ to 5/8″ | Floor tile, wider wall joints | Yes, annually |
| Epoxy | 1/16″ to 1/2″ | Showers, wet areas, stain-prone areas | No (waterproof and stain-proof) |
| Urethane/Acrylic | 1/16″ to 1/2″ | DIY-friendly alternative to epoxy | No |
For shower walls where water resistance matters most, epoxy grout is the premium choice. It’s completely waterproof, never needs sealing, and won’t stain or grow mold. The tradeoff is that epoxy sets quickly and is less forgiving to work with. If you’re new to tiling, consider using a high-performance polymer-modified cement grout as a middle ground.
Applying Grout
- Remove all spacers and clean any thinset from grout joints with a razor blade
- Mix grout according to manufacturer instructions; consistency should be like thick peanut butter
- Work in small sections (about 10-15 square feet for cement grout; smaller for epoxy)
- Apply with rubber float held at a 45-degree angle, pressing grout firmly into joints
- Work diagonally across joints to pack them fully without pulling grout out
- Allow grout to firm up (10-15 minutes for cement grout) before cleaning
- Clean with damp sponge using circular motions, rinsing frequently
- Remove haze after grout has dried (usually 24 hours) with a dry cloth or grout haze remover
Do Not Grout Corners: Where walls meet, where walls meet the ceiling, and where walls meet the tub or floor are change-of-plane joints. These should be filled with color-matched silicone caulk, not grout. Grout will crack at these locations due to building movement.
DIY vs. Professional: At a Glance
Step 7: Seal and Caulk
Final sealing protects your work and completes the watertight envelope.
Seal Cement-Based Grout
If you used cement-based grout (sanded or unsanded), apply a penetrating grout sealer after the grout has fully cured (typically 72 hours to one week, depending on the product).
- Apply sealer with a small brush or applicator bottle, saturating the grout joints
- Wipe excess from tile faces within 5 minutes to prevent hazing
- Allow to dry per manufacturer instructions (usually 24 hours)
- Re-seal annually in shower areas, every 2-3 years elsewhere
Apply Silicone Caulk
Silicone caulk provides a flexible, waterproof seal at all change-of-plane joints. For detailed technique, see our guide on how to caulk a bathtub properly.
- All corners (wall-to-wall)
- Wall-to-ceiling joint
- Wall-to-tub or shower pan joint
- Around fixtures (shower valve trim, shower head escutcheon)
Use 100% silicone caulk, not latex caulk, for wet areas. Color-matched options are available from most grout manufacturers. Apply with a caulk gun, then smooth with a wet finger or caulk tool for a professional finish.
Common Mistakes to Avoid
These errors cause most DIY tile failures. For related guidance, review our bathroom remodeling mistakes to avoid:
- Skipping waterproofing: Cement backer board alone is not waterproof. Water vapor will penetrate grout joints and reach the substrate over time. Without a waterproofing membrane, you’re creating conditions for mold and eventual failure.
- Using drywall in wet areas: Standard or even “green board” moisture-resistant drywall is not suitable for shower or tub surrounds. It will absorb water and fail.
- Improper thinset consistency: Thinset that’s too wet will slump and not hold tiles; too dry and it won’t bond properly. Target peanut butter consistency.
- Not back-buttering large tiles: Tiles larger than 8″×8″ need thinset applied to both the wall and the tile back to achieve proper coverage.
- Skipping leveling systems on large-format tile: Lippage is difficult to correct after thinset cures. Use leveling clips for tiles 12″×12″ and larger.
- Grouting too soon: Grouting before thinset has fully cured can cause tiles to shift and thinset to crack. Wait at least 24 hours.
- Grouting corners: Grout is rigid and will crack at inside corners and changes of plane. Use silicone caulk instead.
- Skipping sealer: Cement-based grout is porous and will stain and absorb water without sealer. Apply sealer and maintain it annually.
- Using modified thinset over Kerdi/DITRA: Modified thinset cannot cure properly between two impervious surfaces. Use unmodified thinset as the manufacturer requires.
Spring and summer are the busiest seasons for home improvement projects — top-rated contractors book up fast. Lock in your estimate now before demand peaks.
Check Availability in Your Area →FAQs
Can I Tile Over Existing Drywall in a Bathroom?
You can tile over drywall in dry areas of a bathroom (areas that won’t get wet regularly), but never in shower or tub surrounds. Drywall absorbs moisture and will eventually fail, causing tiles to fall off and promoting mold growth behind the wall. Wet areas require cement backer board with proper waterproofing.
What Type of Thinset Should I Use for Bathroom Wall Tile?
Use polymer-modified thinset meeting ANSI A118.4 standards for most bathroom wall tile applications. Modified thinset provides stronger adhesion and flexibility than unmodified versions. However, if installing over Schluter DITRA or Kerdi membrane, use unmodified thinset as required by the manufacturer. Modified thinset cannot cure properly between two impervious surfaces.
Should I Use Sanded or Unsanded Grout for Bathroom Wall Tile?
Use unsanded grout for grout lines 1/8 inch or narrower, and sanded grout for lines wider than 1/8 inch. The sand prevents shrinking and cracking in wider joints. For shower walls where durability and water resistance matter most, consider epoxy grout, which is waterproof, stain-resistant, and never needs sealing. Epoxy is more difficult to work with than cement grout, so consider your experience level.
How Long Should Thinset Dry Before Grouting?
Allow thinset to cure for at least 24 hours before grouting, though some manufacturers and conditions require 48 hours. Check the product instructions, as cure times vary based on temperature and humidity. The thinset should be completely dry with no visible moisture before you begin grouting. Grouting too soon can cause tiles to shift.
Ready to Move Forward?
Tell us about your project and get matched with up to 3 pre-screened contractors. Compare quotes, check reviews, and hire with confidence.
Do I Need to Waterproof Bathroom Walls Before Tiling?
Yes, waterproofing is essential in shower and tub areas. Apply a liquid waterproofing membrane like RedGard over cement backer board, or use a sheet membrane system like Schluter Kerdi. Tile and grout are not waterproof, and moisture will penetrate over time. The waterproofing membrane is what actually protects your framing from moisture damage and mold. Bathroom areas outside the shower can use moisture-resistant drywall without additional waterproofing.
Where Do I Start Tiling a Bathroom Wall?
Start with the second row up from the bottom, using a level ledger board screwed to the wall to support tiles while they set. This approach ensures your tile layout is level regardless of whether the tub or floor is perfectly level. Mark your horizontal and vertical center lines, then work outward from center so cut tiles on opposite ends are equal. Once the upper tiles have cured (24+ hours), remove the ledger board and install the bottom row, cutting tiles to fit if needed.
Do I Need a Tile Leveling System?
For small tiles (under 6″×6″), standard spacers work fine. For tiles 12″×12″ and larger, a leveling system significantly improves results by preventing lippage. For large-format tiles like 12″×24″ or 24″×48″, leveling systems are strongly recommended to achieve a professional finish. The clips and wedges hold adjacent tiles flush while thinset cures, eliminating the uneven edges that make installations look amateur.
Project Timeline
For a typical tub surround (approximately 60 square feet), expect the following timeline:
| Phase | Duration | Notes |
|---|---|---|
| Remove old materials, prep studs | 2-4 hours | Longer if removing existing tile |
| Install backer board | 2-3 hours | Including taping seams |
| Cure time | 24 hours | Seam tape thinset must cure |
| Apply waterproofing | 2-3 hours | Two coats with dry time between |
| Cure time | 24 hours | Membrane must fully cure |
| Layout and set tile | 4-8 hours | Depends on tile size and complexity |
| Cure time | 24-48 hours | Thinset must cure before grouting |
| Grout | 2-3 hours | Including cleanup |
| Cure time | 72 hours | Before sealing and regular use |
| Seal and caulk | 1-2 hours | Final step |
Total elapsed time: 5-7 days including all cure times. Actual work time: approximately 12-20 hours depending on experience level and complexity. For a full breakdown of costs associated with these projects, see our bathroom remodel cost guide.
When to Hire a Professional
While bathroom wall tiling is achievable for intermediate DIYers, certain situations warrant hiring a CTEF-certified tile installer. Professional installation ensures that the waterproofing and layout follow verified industry best practices, reducing the risk of costly failures.
Consider professional installation if:
- You’re tiling a custom shower with multiple niches, benches, or complex geometry
- The project involves natural stone that requires special handling and sealing
- You discover structural issues like significant mold, rot, or framing damage during demolition
- You’re working with very large format tiles (24″×48″ or larger) that require precise substrate preparation
- Time constraints prevent proper cure times between installation steps
For guidance on finding qualified professionals, see our tips on hiring a reliable bathroom remodel contractor or learn how to find the right contractor for your project.
Connect with top-rated local contractors who can help you with siding, roofing, HVAC, windows, and more. Get free quotes from verified professionals in your area today.