Installing new flooring is one of the fastest ways to transform your home , but it’s also one of the easiest projects to mess up. With more homeowners tackling DIY projects and contractors juggling tight schedules, flooring installation mistakes have become surprisingly common.
Small errors can lead to big repair bills. Warped planks, uneven surfaces, and squeaky floors often trace back to shortcuts taken during installation.
In this guide, you’ll learn the most common flooring installation mistakes homeowners make and how to avoid them.
Skipping Proper Subfloor Preparation
Your floor is only as good as what’s underneath it. The subfloor provides the foundation for everything above, and ignoring its condition is one of the biggest installation mistakes out there.
Why subfloor condition matters
An uneven or damaged subfloor can cause planks to shift, tiles to crack, and flooring to feel spongy underfoot.
Common subfloor issues
- Uneven surfaces or dips
- Moisture damage
- Rot or loose panels
- Old adhesive residue
How to properly inspect and level a subfloor
Before installing new flooring, check for flatness using a long level. Sand down high spots and fill low areas with leveling compound. Make sure the surface is clean, dry, and structurally sound.
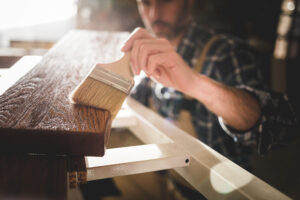
Not Acclimating Flooring Materials
Acclimation is the process of letting flooring materials adjust to your home’s temperature and humidity before installation.
What acclimation means
Wood, laminate, and even some vinyl products expand and contract based on their environment. Acclimation helps prevent movement after installation.
Recommended acclimation times by flooring type
- Hardwood: 48–72 hours
- Laminate: 24–48 hours
- Luxury vinyl plank (LVP): 24–48 hours
Always check manufacturer guidelines for exact recommendations.
Problems caused by skipping this step
Without acclimation, floors may develop gaps, buckle, or warp shortly after installation.
Choosing the Wrong Flooring for the Room
Not every flooring type works well in every space.
Moisture-prone areas
Bathrooms, basements, and kitchens need water-resistant materials. Traditional hardwood often struggles in these areas, while tile, vinyl, and engineered wood perform better.
High-traffic zones
Entryways and living rooms require durable flooring that can handle wear and tear.
Matching flooring types to room conditions
Choosing the right material based on moisture, traffic, and lifestyle helps prevent premature damage.
Ignoring Expansion Gaps
Expansion gaps allow flooring to expand and contract naturally.
What expansion gaps are
Small spaces left around the edges of the room that allow movement without causing damage.
Why temperature and humidity matter
Seasonal changes cause flooring materials to expand and shrink. Without space to move, floors can buckle or lift.
Signs expansion gaps were installed incorrectly
- Boards pushing up at seams
- Warped edges
- Loud popping sounds
Improper Measurement and Layout Planning
Rushing into installation without planning leads to wasted materials and awkward layouts.
Why accurate measurements prevent waste
Proper measurements reduce excess cuts and help you order the right amount of flooring.
Planning plank direction and seam placement
Plank direction can affect how large a room feels. Staggering seams also improves stability and appearance.
Avoiding awkward cuts
Poor planning often results in thin strips along walls, a visual red flag of rushed work.
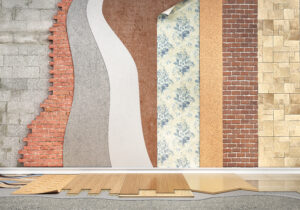
Using the Wrong Underlayment
Underlayment adds comfort, sound reduction, and moisture protection.
Role of underlayment
It improves insulation, reduces noise, and helps smooth minor imperfections.
Underlayment mistakes by flooring type
Some floors have built-in padding and don’t need extra underlayment. Using the wrong type can void warranties.
Manufacturer requirements
Always follow product-specific underlayment guidelines to avoid performance issues.
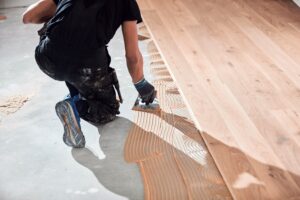
Rushing Adhesive or Fastening Steps
Fast doesn’t mean better when it comes to flooring installation.
Common glue and nail spacing errors
- Applying too little adhesive
- Incorrect nail spacing
- Uneven fastening patterns
Cure time mistakes
Walking on floors too soon can shift materials before they set properly.
Long-term impact
Rushed installs often lead to loose boards, squeaks, and early failure.
Poor Transition and Trim Installation
Transitions and trim give your flooring a polished look.
Why transitions matter
They protect edges and allow different flooring types to meet cleanly.
Common trim mistakes
- Gaps between trim and floor
- Crooked cuts
- Poorly secured pieces
Achieving a finished look
Proper trim installation hides expansion gaps and creates smooth transitions between rooms.
DIY Without Proper Tools or Experience
DIY flooring can save money, but only if done correctly.
Tools homeowners often overlook
- Spacers
- Moisture meters
- Tapping blocks
- Proper saw blades
Risks of improper cutting and spacing
Bad cuts and tight spacing lead to weak joints and visible flaws.
When DIY makes sense
Small rooms and floating floors can be DIY-friendly. Complex layouts and glued installations are often better left to professionals.
Not Following Manufacturer Installation Guidelines
Ignoring product instructions is a fast way to void warranties.
Why warranty claims get denied
Improper installation is one of the top reasons manufacturers reject claims.
Common overlooked requirements
- Approved underlayment
- Specific nail spacing
- Temperature requirements
Where to find specs
Installation guides are usually included in packaging or available on manufacturer websites.
Skipping Moisture Testing
Moisture is one of flooring’s biggest enemies.
How moisture damages flooring
It causes swelling, mold growth, and adhesive failure.
Simple moisture tests
Homeowners can use moisture meters or plastic sheet tests on concrete slabs.
Special considerations for concrete
Basements and slab foundations need vapor barriers to prevent long-term damage.
Signs Your Floor Was Installed Incorrectly
Not sure if your floor was installed properly? Watch for these red flags:
- Buckling or lifting boards
- Persistent squeaking
- Visible gaps between planks
- Uneven surfaces or soft spots
Early detection can prevent more expensive repairs.
How to Avoid Flooring Installation Problems
A little planning goes a long way.
Hiring qualified installers
Look for licensed professionals with flooring-specific experience.
Asking the right questions
Ask about subfloor prep, moisture testing, and warranty coverage.
Getting documentation
Always request written warranties and installation receipts.
Cost of Fixing Flooring Installation Mistakes
Fixing mistakes often costs more than doing it right the first time.
Typical repair vs replacement costs
Minor fixes may cost a few hundred dollars. Full replacements can reach thousands.
When repairs are possible
Loose boards and small gaps may be fixable, but widespread damage usually requires replacement.
Why proper installation saves money
Quality installation protects your investment and extends your floor’s lifespan.
Frequently Asked Questions
What is the most common flooring installation mistake?
Skipping subfloor preparation is the most common and most costly error.
Can poorly installed flooring be fixed?
Some issues can be repaired, but severe problems often require partial or full replacement.
How long should flooring acclimate before installation?
Most materials need 24–72 hours, depending on the product and environment.
Should homeowners install flooring themselves?
DIY can work for simple projects, but professional installation is safer for complex layouts or moisture-prone spaces.
Final Thoughts
Flooring installation mistakes are avoidable if you plan ahead. Proper preparation, correct materials, and following manufacturer guidelines make a huge difference in long-term performance.
Whether you’re installing floors yourself or hiring a pro, taking the time to do it right protects your home, your budget, and your peace of mind. A little extra effort upfront can save you years of frustration.

Anna has over six years of experience in the home services and journalism industries and serves as the Content Manager at MyHomePros.com, specializing in making complex home improvement topics like HVAC, roofing, and plumbing accessible to all. With a bachelor’s degree in journalism from Auburn University, she excels in crafting localized, comprehensive guides that cater to homeowners’ unique needs. Living on both coasts of the United States has equipped her with a distinctive perspective, fueling her passion for turning any house into a cherished home through informed, personalized decision-making.
Connect with top-rated local contractors who can help you with siding, roofing, HVAC, windows, and more. Get free quotes from verified professionals in your area today.