
Discovering black mold in your home can be alarming, but with the right knowledge and tools, you can tackle this common household problem safely and effectively
Black mold thrives in moisture-rich environments, silently spreading behind walls, under floors, and across ceilings before you might even notice its presence.
The good news? With proper knowledge, safety precautions, and thorough cleaning techniques, you can effectively eliminate black mold from your home and prevent it from returning.
Whether you’re dealing with a small bathroom mold spot or concerned about more extensive contamination, this guide provides the expert-backed information you need to tackle the problem head-on.
Table of Contents
- What Is Black Mold?
- How to Identify Black Mold in Your Home
- Safety Precautions Before You Start
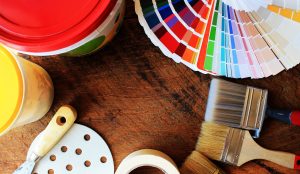
- Supplies You'll Need to Remove Black Mold
- Step-by-Step: How to Get Rid of Black Mold
- Best Cleaning Solutions for Black Mold Removal
- When to Call a Professional Mold Remediation Company
- How to Prevent Black Mold from Coming Back
- Additional Home Improvement Resources
What Is Black Mold?
Black mold, scientifically known as Stachybotrys chartarum, is a type of toxigenic fungus that can develop in homes with excessive moisture problems. While “black mold” often refers specifically to Stachybotrys, many types of mold can appear black or dark in color. What makes black mold particularly concerning is its potential to produce compounds called mycotoxins under certain conditions.
Black mold typically spreads in environments with:
- High humidity levels (above 55%)
- Persistent moisture from leaks, flooding, or condensation
- Cellulose-rich building materials like drywall, wood, paper, or cardboard
- Poor ventilation that traps moisture indoors
- Warm temperatures between 64-83°F (18-28°C)
Common locations for black mold growth include bathrooms (especially shower areas), basements, crawl spaces, attics with roof leaks, areas around plumbing fixtures, and areas affected by previous water damage.
Health Impacts of Black Mold Exposure
Exposure to black mold can cause various health problems, with severity depending on individual sensitivity, exposure duration, and concentration. Health risks include:
- Respiratory issues: Coughing, wheezing, throat irritation, nasal congestion
- Allergic reactions: Sneezing, red eyes, skin rashes
- Asthma attacks in people with asthma, particularly those with mold sensitivity
- Chronic sinus infections
- More serious reactions in individuals with compromised immune systems or existing respiratory conditions
Long-term exposure to high concentrations of black mold may potentially cause more serious health issues, which is why prompt identification and removal are essential.
How to Identify Black Mold in Your Home
Identifying black mold correctly is the crucial first step in addressing the problem. Here’s what to look for:
Visual Identification
Black mold typically appears as:
- Dark greenish-black patches or spots
- Slimy or wet surface when active and growing
- Powdery texture when dried out
- Circular growth patterns that spread outward
Other Warning Signs
Even if you can’t see obvious mold growth, these signs might indicate a hidden black mold problem:
- Distinctive musty, earthy odor (often described as a “dirty wet socks” smell)
- Water stains or discoloration on walls, ceilings, or floors
- Warping, bulging, or peeling of surface materials
- Increasing allergy symptoms when spending time in particular areas of your home
- Recent water damage or flooding that wasn’t properly remediated
Differentiating Black Mold from Other Molds
Not all dark-colored molds are Stachybotrys chartarum. Common household molds like Cladosporium, Alternaria, and Aspergillus can also appear dark but may have slightly different characteristics:
- Cladosporium: Often appears olive-green to brown or black, velvety texture
- Alternaria: Dark brown or greenish-black with a velvety texture, often found in damp areas
- Aspergillus: Can appear in multiple colors including black, usually powdery
While proper identification is helpful, the CDC notes that all molds should be treated with caution and removed regardless of type, as various molds can cause health issues in sensitive individuals.
Safety Precautions Before You Start
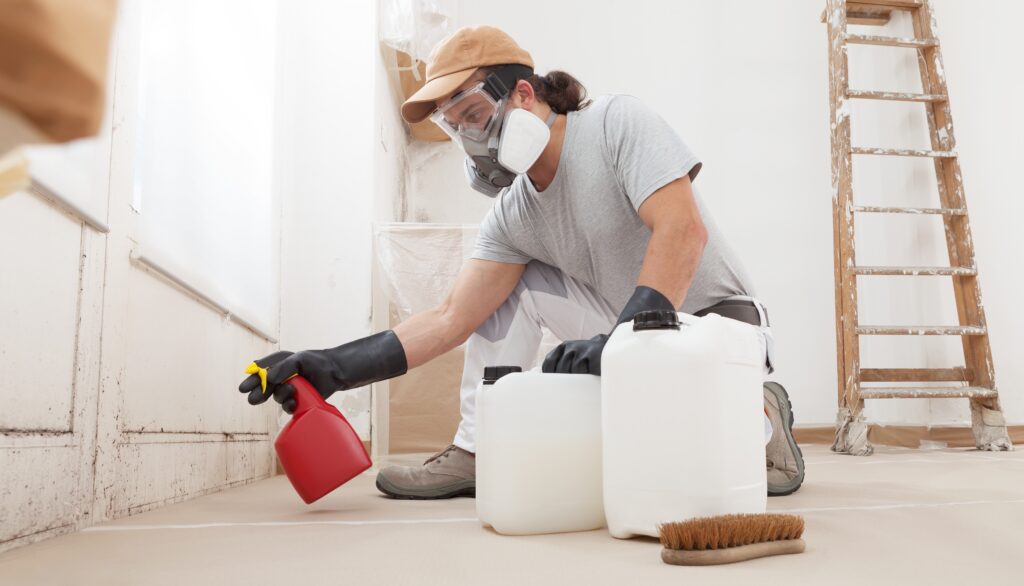
Before tackling black mold removal, protecting yourself is absolutely essential. Disturbing mold colonies releases spores into the air, which can cause increased exposure and potential health issues.
Essential Protective Equipment
Always wear the following before beginning any mold cleanup:
- N95 respirator mask or better: Standard dust masks won’t provide adequate protection against mold spores
- Goggles or eye protection: Choose models without ventilation holes to prevent spore entry
- Long rubber gloves: Extending to mid-forearm, never touch mold with bare skin
- Long-sleeved shirt and long pants: Preferably clothing that can be washed immediately after or disposed of
- Disposable hair covering (optional but recommended for larger cleanup jobs)
- Disposable shoe covers (optional but recommended for larger cleanup jobs)
Preparation and Containment
Before beginning removal:
- Turn off HVAC systems: Prevents spores from spreading to other areas
- Cover doorways and vents: Use plastic sheeting and tape to seal off the work area
- Ensure proper ventilation to the outside: Open a window with a fan blowing outward
- Remove uncontaminated items: Move furniture and belongings out of the work area
- Prepare a disposal plan: Have thick plastic bags ready for contaminated materials
When NOT to DIY
According to EPA guidelines, you should call a professional mold remediation specialist if:
- The moldy area exceeds 10 square feet (roughly a 3′ × 3′ section)
- You suspect mold is inside your HVAC system or ductwork
- The mold damage was caused by contaminated water (sewage, floodwater)
- You have underlying health conditions that could be aggravated by mold exposure
- The mold has grown inside walls or structural components
- You’ve attempted DIY removal and the mold has returned
Professional remediation services have specialized equipment and training to safely handle larger or more complex mold problems.
Supplies You’ll Need to Remove Black Mold
Having the right tools and products ready before you start will make the black mold removal process more effective and efficient. Here’s a comprehensive list of what you’ll need:
Protective Equipment
- N95 respirator mask (or better)
- Safety goggles (without ventilation holes)
- Rubber gloves (extending to mid-forearm)
- Disposable coveralls or old clothes that cover arms and legs
- Disposable hair caps (for extensive cleanup)
- Shoe covers or shoes that can be washed afterward
Containment Materials
- Plastic sheeting (6-mil thickness)
- Duct tape
- Spray bottle with water (to dampen mold before removal, reducing airborne spores)
Cleaning Tools
- Scrub brushes (various sizes for different surfaces)
- Disposable scouring pads
- Microfiber cloths
- Spray bottles (for cleaning solutions)
- Buckets
- Sponges
- Garbage bags (heavy-duty)
- Vacuum with HEPA filter (not regular vacuum)
- Moisture meter (optional but helpful for checking if materials are truly dry)
Effective Cleaning Solutions
Choose from these options based on the surface and severity:
- White vinegar (undiluted in spray bottle)
- Hydrogen peroxide (3% solution)
- Baking soda (mixed with water to form paste)
- Borax (1 cup per gallon of water)
- Commercial mold removers (follow manufacturer’s instructions)
- Bleach solution (1 cup per gallon of water – use only on non-porous surfaces, never mix with other cleaning products)
Drying Equipment
- Dehumidifier
- Fans
- Heaters (if needed in damp, cool areas)
- Moisture barrier materials (for future prevention)
Having these supplies ready before you begin will save time and ensure you can complete the mold removal process without interruption.
Step-by-Step: How to Get Rid of Black Mold
Follow this systematic approach to safely and effectively remove black mold from your home:
Step 1: Prepare and Contain the Area
- Put on all protective gear before entering the moldy area.
- Turn off HVAC systems and seal vents with plastic and tape.
- Setup containment barriers by covering doorways with plastic sheeting.
- Create negative pressure if possible (using a fan in a window blowing outward).
- Remove unaffected items from the area to prevent contamination.
- Lightly mist the moldy area with water to minimize airborne spores during cleaning.
Step 2: Remove Heavily Contaminated Materials
- Assess porous materials like drywall, carpet, insulation, and fabric items.
- Cut out and remove severely affected porous materials (wear cut-resistant gloves).
- Double-bag all removed materials in heavy plastic bags and seal tightly.
- Wipe off the outside of the bags with a damp cloth and cleaning solution.
- Dispose of contaminated materials according to local regulations.
Step 3: Clean Salvageable Surfaces
For non-porous surfaces (tile, glass, metal, sealed wood):
- Apply your chosen cleaning solution and let it sit for the recommended time:
- White vinegar: 1 hour
- Hydrogen peroxide: 10-15 minutes
- Commercial cleaners: Per product instructions
- Borax solution: 10-15 minutes
- Bleach solution (non-porous surfaces only): 10-15 minutes
- Scrub surfaces thoroughly using brushes or scouring pads.
- Wipe away loosened mold with disposable towels.
- Repeat if necessary for stubborn growth.
- Rinse surfaces with clean water where appropriate.
For semi-porous surfaces (wood, concrete):
- Sand or scrape visible mold (wear additional dust protection).
- Apply appropriate cleaner for the material.
- Consider a commercial sealant after cleaning to prevent future growth.
Step 4: Dry Everything Thoroughly
- Set up fans and dehumidifiers to completely dry the area.
- Monitor humidity levels (aim for below 50%).
- Use moisture meters on walls and materials if available.
- Allow 24-48 hours of drying time before removing containment barriers.
- Check for lingering moisture in hidden areas.
Step 5: HEPA Vacuum the Entire Area
- Use only a true HEPA vacuum (not a regular vacuum which may spread spores).
- Vacuum all surfaces slowly and methodically, including walls and ceiling.
- Vacuum the floor last, working toward the exit.
- Clean or dispose of the vacuum filter according to manufacturer instructions.
Step 6: Final Inspection and Prevention
- Inspect all areas visually for any remaining mold.
- Address the original moisture source that allowed mold growth.
- Apply mold inhibitors or preventative sprays if desired.
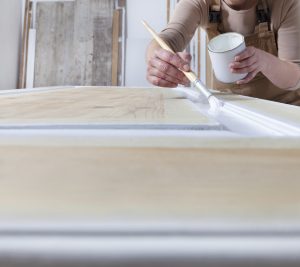
- Consider repainting with mold-resistant paint after surfaces are completely clean and dry.
Remember to maintain your protective equipment throughout the entire process, and dispose of or thoroughly clean all tools, clothing, and materials used during cleanup.
Best Cleaning Solutions for Black Mold Removal
Different cleaning solutions offer various benefits for mold removal. Here’s a comparison of the most effective options:
White Vinegar
- Effectiveness: Kills approximately 82% of mold species
- How to use: Pour undiluted white vinegar into a spray bottle, apply directly to moldy surfaces, let sit for one hour, then scrub and rinse
- Best for: Most household surfaces including porous materials
- Pros: Natural, non-toxic, safe around children and pets
- Cons: Strong odor (dissipates after drying), not effective against all mold types
Hydrogen Peroxide (3%)
- Effectiveness: Kills mold and lightens stains
- How to use: Pour 3% hydrogen peroxide into a spray bottle, saturate moldy areas, let sit for 10-15 minutes, scrub and wipe clean
- Best for: Multiple surface types including walls, fixtures, counters
- Pros: No toxic fumes, effective against bacteria and viruses too
- Cons: Can bleach some materials, degrades over time when exposed to light
Baking Soda
- Effectiveness: Moderate mold-killing properties, excellent for prevention
- How to use: Mix with water to form paste for scrubbing or dissolve in water for spray solution
- Best for: Gentle cleaning, absorbing odors
- Pros: Very safe, deodorizing properties, helps prevent future growth
- Cons: Less powerful than other options for killing established mold
Borax
- Effectiveness: Good mold-killing capability, inhibits future growth
- How to use: Mix 1 cup of borax with 1 gallon of hot water, apply to moldy surfaces
- Best for: Wood and fabric surfaces
- Pros: No volatile organic compounds, continues to prevent mold after application
- Cons: Toxic if ingested, requires thorough rinsing on food contact surfaces
Commercial Mold Removers
- Effectiveness: Usually very high, specifically formulated for mold
- How to use: Follow manufacturer’s instructions
- Best for: Varies by product, often specialized for bathroom surfaces, wood, etc.
- Pros: Convenient, may contain mold inhibitors for future prevention
- Cons: Often contain harsh chemicals, can be expensive
Bleach Solution
- Effectiveness: Kills surface mold on non-porous materials
- How to use: Mix 1 cup bleach with 1 gallon of water, apply, wait 10-15 minutes, rinse
- Best for: Non-porous surfaces only like tile, glass, countertops
- Pros: Readily available, inexpensive
- Cons: Not effective on porous surfaces, harsh fumes, can damage colored materials, does not prevent future growth, cannot be mixed with other cleaning products
DIY Mold-Killing Spray Recipe
For an effective homemade solution:
Multi-Surface Mold Spray
- 1 cup white vinegar
- 1 tablespoon borax
- 10 drops tea tree essential oil (optional antimicrobial boost)
- 2 cups warm water
Mix ingredients in a spray bottle, shake well before each use. Apply to moldy surfaces, let sit for 1 hour, then scrub and rinse.
Choose your cleaning solution based on the surface material, severity of the mold problem, and your sensitivity to chemicals or odors.
When to Call a Professional Mold Remediation Company
While many mold problems can be handled DIY-style, some situations require professional expertise. Knowing when to call in the pros can save you time, money, and potential health complications.
Size and Extent of Infestation
According to EPA guidelines, professional remediation is recommended when:
- The moldy area exceeds 10 square feet (approximately 3′ × 3′)
- Multiple areas of mold growth exist throughout your home
- Visible mold covers large areas of walls, ceilings, or floors
Hidden or Structural Mold Issues
Seek professional help if:
- Mold is suspected inside wall cavities, ceiling spaces, or under floors
- Structural elements (support beams, joists, subflooring) are affected
- Material removal goes beyond surface cleaning (removing drywall, lifting carpet, etc.)
- Water damage has been ongoing for a prolonged period
HVAC System Contamination
If you suspect mold in your heating, ventilation, or air conditioning system:
- Visible mold near air ducts or HVAC components
- Musty smell when system operates
- Family members experiencing symptoms only when system runs
These situations require specialized equipment and techniques that most homeowners don’t possess.
Health Considerations
Professional remediation becomes necessary when:
- Residents have underlying health conditions like asthma, allergies, or immune disorders
- Family members are experiencing unexplained symptoms that may be mold-related
- Very young children or elderly individuals live in the home
- You’re concerned about proper containment to protect family members
Water Damage Scenarios
Call professionals immediately in these circumstances:
- Sewage backup or flood water contamination (Category 2 or 3 water damage)
- Large-scale water events (flooding affecting multiple rooms)
- Hidden leaks that have persisted for weeks or months
- Water damage inside ceiling/wall cavities or in crawl spaces
Professional Qualifications to Look For
When hiring mold remediation experts, verify they have:
- Industry certifications from organizations like IICRC (Institute of Inspection Cleaning and Restoration Certification) or NORMI (National Organization of Remediators and Mold Inspectors)
- Proper insurance coverage (liability and workers’ compensation)
- Written protocol for how they’ll address your specific situation
- Containment and negative air pressure procedures
- Clear documentation of the extent of work needed
- Post-remediation verification plan to ensure complete removal
Cost Considerations
Professional mold remediation typically costs:
- Small areas (under 10 sq ft): $500-$1,500
- Medium-sized areas: $1,500-$5,000
- Large or whole-house remediation: $5,000-$20,000+
While professional services represent a significant investment, they provide proper containment, thorough removal, and often offer guarantees against mold recurrence when moisture issues are properly addressed.
How to Prevent Black Mold from Coming Back
Once you’ve gone through the effort of removing black mold, taking preventative measures is essential to ensure it doesn’t return. These strategies focus on controlling moisture, the primary factor in mold growth.
Control Indoor Humidity
- Maintain indoor humidity between 30-50%. Purchase hygrometers (humidity meters) to monitor levels.
- Use dehumidifiers in naturally damp areas like basements, crawl spaces, and bathrooms.
- Empty and clean dehumidifier collection tanks regularly to prevent them from becoming mold sources.
- Run air conditioners during humid months as they naturally reduce indoor humidity.
Address Water Issues Immediately
- Fix leaks promptly, no matter how small (faucets, pipes, roofs).
- Inspect water-using appliances regularly (washing machines, dishwashers, refrigerators).
- Monitor areas around water heaters and boilers for moisture.
- Ensure proper drainage around your home’s foundation:
- Clean gutters regularly
- Extend downspouts away from the foundation
- Grade soil to slope away from the house
Improve Ventilation Throughout Your Home
- Install and use exhaust fans in bathrooms, kitchens, and laundry rooms.
- Vent appliances properly to the outside (clothes dryers, stoves, heaters).
- Open windows periodically to allow fresh air circulation when weather permits.
- Consider whole-house ventilation systems for air exchange in tightly sealed homes.
Mold-Resistant Products and Materials
- Use mold-resistant drywall or sheetrock for bathroom renovations or repairs.
- Apply mold-inhibiting paints in high-risk areas.
- Select mold-resistant materials when remodeling basements or bathrooms.
- Choose washable bathroom curtains and wash them regularly.
Regular Cleaning and Maintenance
- Clean bathrooms with mold-inhibiting products weekly.
- Regularly check behind furniture positioned against exterior walls.
- Inspect window sills and frames where condensation frequently occurs.
- Quarterly checks of attics, basements, and crawl spaces for early signs of moisture or mold.
- Professional HVAC system cleaning every 3-5 years.
Specific Room Strategies
Bathrooms:
- Wipe down shower walls after use
- Keep shower curtains extended to dry
- Fix exhaust fans directly outside, not into attics
- Repair grout and caulking promptly when damaged
Basements:
- Use a dehumidifier year-round in most climates
- Avoid wall-to-wall carpeting
- Install proper insulation to prevent condensation
- Consider waterproofing treatments for masonry walls
Kitchens:
- Use exhaust fans when cooking
- Check under sinks monthly for leaks
- Clean refrigerator drip pans regularly
- Wipe up spills immediately
Seasonal Maintenance Checklist:
- Spring: Check for winter damage to roof and exterior, clean gutters
- Summer: Monitor AC drain lines, check basement during rainy periods
- Fall: Clear gutters of leaves, inspect weatherstripping around doors/windows
- Winter: Monitor indoor humidity during heating season, check for ice dams
Conclusion
Black mold presents a serious challenge to homeowners, but with the right approach, it’s a problem that can be effectively managed and prevented.
The battle against black mold is ultimately about creating a healthier living environment for you and your family. By understanding what causes mold growth and taking proactive steps to control moisture in your home, you can maintain a mold-free environment for years to come.
For persistent or returning mold problems despite your best efforts, don’t hesitate to consult with qualified professionals who can identify hidden issues and provide customized solutions for your specific situation.
By following the comprehensive approaches outlined in this guide, you’ll be well-equipped to handle black mold issues effectively and maintain a clean, healthy home environment.
Additional Home Improvement Resources
- How to Stage a House for Sale Successfully
- Gutter Maintenance by Climate
- Home Energy-Saving Tips to Reduce Your Electricity Bill

Anna has over six years of experience in the home services and journalism industries and serves as the Content Manager at MyHomePros.com, specializing in making complex home improvement topics like HVAC, roofing, and plumbing accessible to all. With a bachelor’s degree in journalism from Auburn University, she excels in crafting localized, comprehensive guides that cater to homeowners’ unique needs. Living on both coasts of the United States has equipped her with a distinctive perspective, fueling her passion for turning any house into a cherished home through informed, personalized decision-making.
Connect with top-rated local contractors who can help you with siding, roofing, HVAC, windows, and more. Get free quotes from verified professionals in your area today.