Mold and mildew on exterior walls are more than an eyesore. Left unchecked, fungal growth can penetrate siding, rot wood framing, and eventually work its way inside your home. The tricky part isn’t spotting the growth. It’s knowing what you’re actually looking at. Every dark stain isn’t mold, every fuzzy patch isn’t dangerous, and that distinction determines whether you need a garden hose or a remediation contractor.
What Mold Looks Like on Exterior Walls
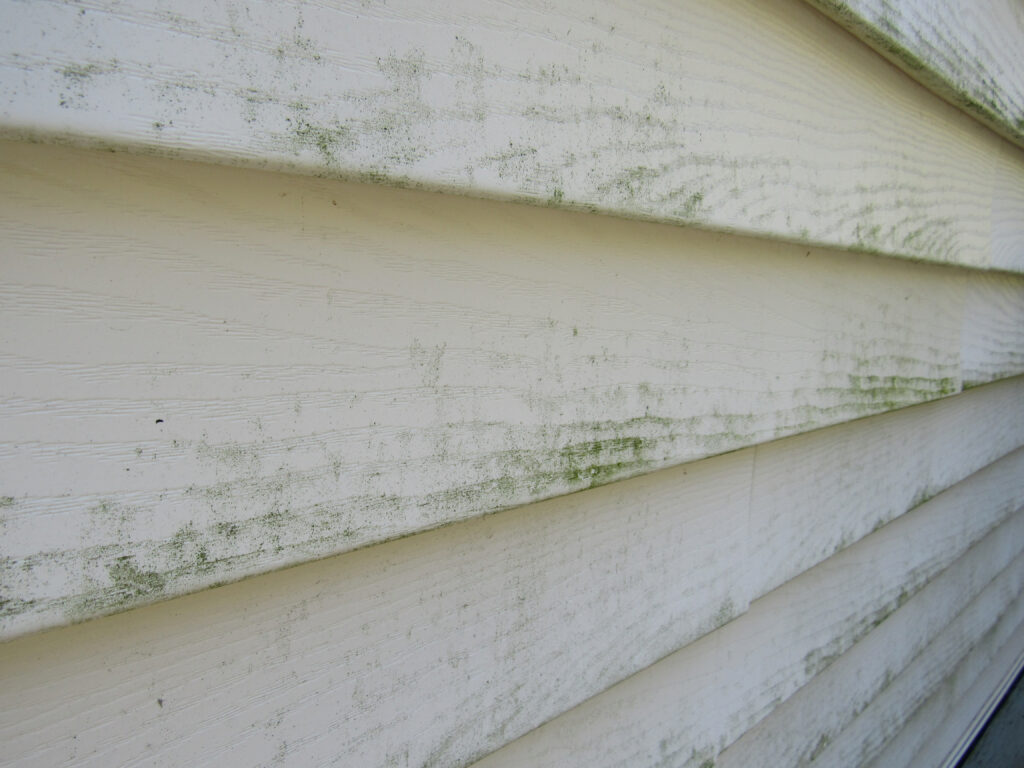
Exterior wall mold typically appears as dark green, black, or gray splotches with fuzzy or powdery texture, often in shaded or moisture-prone areas of your siding.
The color range is wider than most homeowners expect. Mold colonies on siding can appear black, dark green, grayish-brown, or even orange depending on the species and substrate. Unlike a uniform stain from dirt or rust, mold tends to grow in irregular, expanding patches. Under closer inspection, you’ll usually see a slightly fuzzy or filamentous surface rather than a flat discoloration. It commonly clusters near the base of walls, under overhangs, around window and door frames, and anywhere caulk has cracked or failed. If the discoloration widens over weeks rather than staying stable, that’s a strong sign you’re dealing with active growth rather than accumulated grime.
Mold vs. Mildew: What’s the Difference?
Mildew is a surface-level fungal growth, usually white or gray, that sits on top of siding, while mold penetrates deeper into materials and poses greater structural and health risks.
Both are fungi that thrive in damp conditions, but they behave differently and call for different responses. Understanding which one you’re dealing with changes your next step entirely.
| Mildew | Mold | |
|---|---|---|
| Appearance | Flat, powdery, white or gray | Fuzzy, raised, dark green or black |
| Penetration | Surface only | Into substrate (wood, OSB, stucco) |
| Smell | Mild or none | Musty, often stronger |
| DIY removal | Usually yes | Depends on extent |
| Structural risk | Low | Moderate to high |
| Health risk | Low | Moderate to high (species-dependent) |
According to the EPA’s guidance on mold, the term “mildew” is sometimes used loosely to describe early-stage mold on surfaces. The distinction matters most when you’re deciding between a DIY cleaning and a professional inspection.
What Causes Mold and Mildew on Exterior Walls
Exterior mold and mildew are caused by excess moisture combined with organic material and poor air circulation, creating ideal conditions for fungal spores to colonize your siding.
Every exterior surface has fungal spores on it at all times. They travel through the air and settle everywhere. What separates a clean wall from a moldy one is sustained moisture. Common sources include:
- Inadequate roof overhangs that allow rain to splash up against siding
- Failed caulk or flashing around windows that lets water wick behind the surface
- Improper grading that directs soil moisture toward the foundation
- Dense vegetation that blocks airflow and keeps walls perpetually damp
- Poor attic ventilation that causes condensation on exterior sheathing from the inside out
North-facing walls and heavily shaded areas are especially vulnerable because sunlight never gets a chance to dry them out. On painted wood siding, any crack in the paint film can trap water against bare wood, which is all mold needs to get established.
Where to Look: High-Risk Zones on Your Exterior Walls
Mold concentrates on exterior walls in shaded, moisture-retaining zones: near the roofline, under windows, at the base of siding, and around improperly sealed penetrations.
If you’re doing a systematic inspection, work from the bottom up. The base of walls is where rain splash-back keeps surfaces perpetually damp. Move up to window and door frames, where visible deterioration around caulk lines often signals deeper moisture intrusion. The area directly above and below windows is a classic trouble spot because window flanges can redirect water against the wall cavity. Then check any north-facing elevation and areas under large trees.
Inspection checklist:
- Base of siding at the foundation line
- Transition zones where siding meets concrete or masonry
- Window and door frames, particularly where caulk has shrunk or cracked
- Under overhangs and soffits
- North-facing walls and areas shaded by trees or structures
- Around dryer vents, pipe penetrations, and utility entries
- Below gutter seams and downspout areas
Those utility and plumbing penetrations are often overlooked until mold growth around them makes the problem obvious.
Is Exterior Wall Mold Dangerous?
Exterior wall mold is primarily a structural risk when it reaches wood framing, and a health risk if species like Stachybotrys release spores that migrate indoors through wall gaps.
Most exterior mold starts as a cosmetic and structural concern rather than an immediate health emergency. Surface mildew on vinyl or fiber cement siding poses minimal health risk because those materials don’t provide organic food for mold to thrive long-term. The real danger comes in two forms. First, mold that degrades wood siding, sheathing, or framing can compromise structural integrity and lead to expensive repairs. Wood rot from fungal activity on exterior walls costs between $500 and $10,000 to remediate depending on how far it has spread. Second, certain mold species produce mycotoxins, and if exterior mold reaches wall cavities, spores can migrate inside and affect air quality in ways that compound other respiratory hazards. The CDC notes that mold exposure can trigger respiratory symptoms, especially in individuals with asthma or compromised immune systems.
The Bleach Test: Mold or Just Dirt?
You can distinguish mold from dirt using the bleach test: apply diluted household bleach to the stain, and if it lightens within two minutes, you likely have mold or mildew rather than dirt.
This is one of the most reliable ways to tell biological growth from inorganic staining, and it takes about two minutes.
How to do it:
- Mix one part household bleach with three parts water
- Apply to a small area with a brush or spray bottle
- Watch for 60 to 120 seconds
Mold and mildew contain melanin and organic pigments that bleach breaks down quickly, so the stain will visibly fade. Dirt, rust, and mineral deposits will not react.
Beyond the bleach test, pattern and texture are useful clues. Dirt tends to accumulate uniformly on exposed horizontal surfaces, while mold grows outward from a central point in irregular, organic shapes. Up close, dirt leaves a flat coating while mold shows a slightly fuzzy or three-dimensional surface, even under a smartphone camera.
Mold Risk by Siding Material
Wood siding is the most mold-prone exterior material because it provides organic food for fungi, while vinyl, fiber cement, and stucco can support surface mildew but rarely allow deep mold colonization.
The substrate your siding is made of dramatically affects how mold behaves and how far it can travel.
| Siding Material | Mold Risk | Why | DIY Cleanable? |
|---|---|---|---|
| Wood (cedar, pine, redwood) | High | Cellulose feeds mold; rot possible | Sometimes |
| Stucco | Medium-High | Porous; traps moisture within layers | Surface only |
| OSB / Sheathing | High | Organic substrate behind all siding types | No |
| Fiber cement (HardiePlank) | Medium | Resistant but vulnerable if coating fails | Usually |
| Vinyl | Low | Doesn’t feed mold; risk shifts to sheathing behind it | Yes |
| Brick / masonry | Low-Medium | Efflorescence common; mold in mortar joints possible | Usually |
Routine cleaning and maintaining paint or sealant integrity is the most effective prevention regardless of siding material.
Inspecting for Hidden Mold Behind the Siding
To find mold that isn’t visible from outside, look for soft or spongy spots in siding when pressed, musty odors near wall penetrations, and interior damp spots that correspond with exterior staining.
Surface mold is the easy part to find. The harder diagnostic challenge is mold colonizing behind your siding or inside wall cavities. A few things to check:
- Press on wood siding and trim. Soft or spongy spots that compress slightly suggest wood rot from sustained mold activity beneath the surface.
- Smell near exterior walls indoors. A persistent musty odor around outlets, windows, and baseboards on the interior often means mold in wall cavities is venting inward.
- Look for interior damp spots or peeling paint that line up spatially with exterior staining.
- Check the attic or crawl space for dark staining on the back of sheathing near suspect exterior walls.
Worth knowing: A professional can use a moisture meter to detect elevated moisture content in wall materials without cutting into the siding. Readings above 19% moisture content in wood indicate active mold risk.
Exterior Mold Removal Costs
Exterior mold removal costs between $500 and $6,000 depending on the affected area size, siding material, and whether mold has penetrated into sheathing or framing.
| Scope | Typical Cost |
|---|---|
| Professional soft wash (surface mildew) | $300 to $800 |
| Wood siding board replacement (mold penetration) | $1,000 to $4,000 |
| Sheathing or framing remediation | $5,000 to $10,000+ |
| Certified mold inspection (exterior) | $200 to $600 |
Geographic location adds another layer to these numbers. Remediation contractors in high-cost markets typically charge 20% to 40% more than national averages. For small areas of surface mildew under 10 square feet, a diluted bleach solution, stiff brush, and appropriate protective gear is a reasonable DIY job. For anything larger, or any situation involving wood rot or penetration behind the siding, understanding when professional intervention becomes necessary makes more sense than guessing.
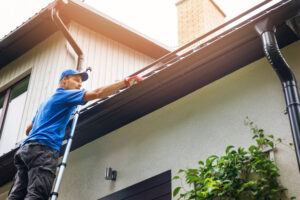
When to Call a Professional
Call a professional when mold covers more than 10 square feet, when you find wood rot or soft spots in siding, when mold has returned after cleaning, or when you see interior signs of moisture intrusion.
The 10-square-foot threshold comes from EPA guidelines, which treat that area as a general boundary between DIY-appropriate situations and those warranting professional remediation. Beyond size, a few other conditions push the call toward professional help:
- Mold returns within a few weeks of cleaning (the moisture source is still active)
- Soft or rotted siding, fascia, or trim visible during inspection
- Any indication mold has gotten inside the wall assembly
- Interior air quality concerns or residents with respiratory conditions
When selecting a contractor, look for certifications from the Institute of Inspection Cleaning and Restoration Certification (IICRC) or the American Council for Accredited Certification (ACAC), and ask for a written scope of work before any remediation begins.
Early Warning Signs
The earliest warning signs of exterior wall mold are greenish-black streaking below gutters, dark spots forming around window caulk, and a musty odor near exterior walls on humid days.
Catching mold before it spreads into the wall assembly keeps remediation simple and inexpensive. A twice-yearly walk-around, once in spring after wet weather and once in fall before winter, is the most cost-effective prevention habit you can build. The signs that tend to show up first:
- Greenish-black streaks running down siding below gutter seams
- Small dark spots forming a ring around window or door frames
- A musty odor concentrated near one section of wall, especially on warm humid days
- Paint bubbling or peeling on siding without obvious mechanical damage
- Visible efflorescence (white salt deposits) on masonry, which signals moisture moving through the wall
Conclusion
Mold and mildew share some surface characteristics but differ significantly in how deeply they penetrate and how urgently they need attention. Mildew responds to basic cleaning. Mold can penetrate siding and framing and compromise structural integrity if left alone. The bleach test is the fastest field diagnostic, and soft or spongy siding combined with a musty odor near wall penetrations are the clearest signs of something deeper going on.
Addressing the moisture source, whether that’s failed caulk, improper grading, or overflowing gutters, is always the necessary last step. Clean the growth without proper installation practices that prevent recurring moisture problems and the problem will be back in a season.
If you need help locating qualified specialists who can diagnose and fix both the visible damage and underlying causes or a professional who can determine whether targeted repairs or full replacement makes financial sense in your area, MyHomePros can connect you with vetted professionals for a free estimate.

Anna has over six years of experience in the home services and journalism industries and serves as the Content Manager at MyHomePros.com, specializing in making complex home improvement topics like HVAC, roofing, and plumbing accessible to all. With a bachelor’s degree in journalism from Auburn University, she excels in crafting localized, comprehensive guides that cater to homeowners’ unique needs. Living on both coasts of the United States has equipped her with a distinctive perspective, fueling her passion for turning any house into a cherished home through informed, personalized decision-making.
Connect with top-rated local contractors who can help you with siding, roofing, HVAC, windows, and more. Get free quotes from verified professionals in your area today.