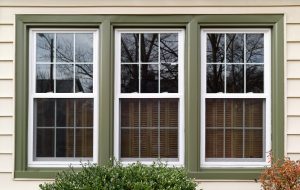

Most of the time, no. A straight swap of an old window for a new one in the same opening, with no changes to the framing, is exempt from permits in roughly 40 states under IRC Section R105.2. But the moment you touch the structure, change an opening size, or live in a state with stricter rules, you need a building permit before any work starts.
The distinction comes down to one thing: whether the rough opening framing is modified. If it is, you need a permit everywhere. If it is not, you are exempt in most places. The table below gives you the quick answer for common scenarios, and the rest of this guide covers the code details, state-specific rules, and process behind each one.
Quick Reference: Does Your window Replacement Project Need a Permit?
| Project Type | Permit Needed? |
|---|---|
| Same-size replacement, no framing changes (pocket/retrofit install) | No (except in CA, FL, NJ, OR, WA, HI, NYC) |
| Same rough opening, different window style (e.g., single-hung to casement) | No (except in always-permit states listed above) |
| Full-frame replacement that exposes the rough opening studs | Depends on jurisdiction; some treat this as structural |
| Enlarging or reducing the window opening | Yes, everywhere |
| Adding a new window where none existed | Yes, everywhere |
| Converting a window to a door | Yes, everywhere |
| Moving a window to a different wall location | Yes, everywhere |
| Replacing a window in a bedroom (egress location) | No permit needed in most states, but must meet IRC R310 egress minimums |
| Any replacement in a historic district | Standard permit rules apply, plus a Certificate of Appropriateness is required |
| Any replacement in a pre-1978 home | Standard permit rules apply, plus EPA Lead RRP Rule applies (requires EPA-certified contractor) |
When a Permit Is Required for Replacing Windows
A building permit is required any time window work involves structural changes to the wall. In the experience of most building inspectors, the trigger is simple: if you are cutting, adding, or modifying studs or headers, it is structural work and requires a permit. Specifically:
- Enlarging or reducing the rough opening: Cutting or adding studs and headers is structural work. A new or modified header must be engineered for the span and load above it. Every jurisdiction requires a permit for this.
- Adding a window where none existed: A new opening in any wall, load-bearing or not, requires a permit. Load-bearing walls need an engineered header sized for the span.
- Converting a window to a door (or vice versa): This changes the structural opening and has separate code implications for egress, threshold height, and accessibility.
- Modifying a load-bearing wall: Any work that affects the structural framing around a window in a load-bearing wall triggers a permit, even if the window size stays the same.
- Changing window location: Moving a window to a different spot on the wall means cutting a new opening and closing the old one. Both require permits.
Some jurisdictions also require permits when replacing windows in egress-required locations (bedrooms, basements) if the new unit changes the clear opening dimensions, or when adding or removing safety glazing in code-mandated locations.
When You Can Skip the Permit
In most states, a like-for-like window replacement does not require a permit. “Like-for-like” means:
- The rough opening stays the same size
- No studs, headers, or structural framing are cut or modified
- The new window fits into the existing opening (retrofit or insert installation)
The window itself can be a different brand, frame material, or glass package. You can swap a single-hung for a casement, or go from aluminum to vinyl, as long as the rough opening dimensions do not change. The exemption is about the structure, not the product.
One critical point: permit-exempt work still has to comply with all applicable building codes. Your replacement windows must still meet energy efficiency standards, egress requirements, and safety glazing rules for their location, even without a permit on file.
Retrofit vs. Full-Frame Replacement: Why It Matters for Permits
The installation method affects whether your project triggers permit requirements, so it is worth understanding the difference.
A pocket (retrofit) installation leaves the existing window frame, exterior trim, and flashing in place. The new window inserts directly into the old frame. Because nothing structural is touched, this method rarely requires a permit in states that follow the standard IRC exemption. It is the faster, less invasive option and is the most common approach for straightforward replacements.
A full-frame replacement removes the entire window unit down to the rough opening, including the old frame, interior and exterior trim, and often the flashing and weather barrier. This exposes the rough opening studs and sheathing. While a full-frame replacement does not necessarily modify the structural framing, some jurisdictions treat exposure of the rough opening as grounds for requiring a permit because it creates an opportunity to inspect the moisture barrier, flashing, and framing condition. Full-frame replacements also typically require reinstallation of the weather-resistive barrier and proper pan flashing, which some code officials want to inspect.
If you are planning a full-frame replacement, ask your local building department whether they require a permit for it. According to structural engineers who work on residential projects, full-frame replacements that do not alter the rough opening size or framing should technically be exempt under IRC R105.2, but local interpretation varies.
Actual costs depend on your location, project scope, and materials. The best way to know what you'll pay is to get quotes from local contractors.
Get Your Free Estimate →States That Require Permits for All Window Replacements
About a dozen states and municipalities override the IRC exemption and require permits for every window replacement, including like-for-like swaps. If you live in one of these places, you need a permit no matter how simple the job.
California
California’s Title 24 energy standards apply to every replacement window. All replacements must be dual-glazed with Low-E coatings. Single-pane replacements are not allowed for any permitted work. Standard requirements are a U-factor of 0.30 and SHGC of 0.23 for most climate zones. There is a small-project exception: if the total replacement area is under 75 square feet, the limits relax to a U-factor of 0.40 and SHGC of 0.35. A Title 24 energy compliance report must be submitted with the permit application.
California homeowners in Wildland-Urban Interface (WUI) zones face additional requirements. Replacement windows in WUI-designated areas must use ignition-resistant materials and dual-pane tempered glass to resist radiant heat exposure during wildfires. These requirements are defined in Chapter 7A of the California Building Code. WUI zones cover large portions of the state, particularly in the foothills, canyon areas, and regions adjacent to undeveloped land. Check your local fire authority or CAL FIRE’s WUI map to determine if your property is in a designated zone.
"We matched with a great contractor the same day. The whole process was easy and completely free."
Florida
Florida requires permits for all window replacements and adds hurricane protection requirements that vary by zone.
In High-Velocity Hurricane Zones (HVHZ), which covers Miami-Dade and Broward counties, all exterior glazing must be impact-rated or protected by permanent code-approved shutters. Products must carry a Miami-Dade Notice of Acceptance (NOA) tested to ASTM E1886 and E1996 standards, and withstand 170 to 200 mph winds.
Statewide, wind-borne debris regions require impact-rated glazing or approved coverings where the ultimate design wind speed is 140 mph or higher, or 130 mph or higher within one mile of the coast. You can look up your property’s wind speed requirement on the Florida Building Code website.
Florida also has a 25% rule: if you replace more than 25% of total glazed opening area (measured by glass surface area, not number of windows) within a 12-month period, all replaced windows must meet current Florida Building Code hurricane protection standards. This primarily affects older homes built before the current Florida Building Code took effect.
Other Strict Jurisdictions
- New Jersey: The Uniform Construction Code requires a permit for any window replacement.
- Oregon: The Residential Specialty Code requires permits for most window work. Replacement windows must have a U-factor of 0.30 or less.
- Washington: Replacement windows must comply with the Washington State Energy Code, and permits are required.
- Hawaii: Permits required for all replacements.
- New York City: The DOB requires permits when window openings or frames are changed, and historic districts require separate Landmarks Preservation Commission approval.
If your state is not on this list, a like-for-like replacement is probably exempt, but confirm with your local building department. County and city codes can be stricter than state minimums.
Lead Paint and the EPA RRP Rule (Pre-1978 Homes)
If your home was built before 1978, window replacement triggers the EPA’s Lead Renovation, Repair, and Painting (RRP) Rule. Old window frames, sills, and surrounding trim are among the most common locations for lead-based paint in older homes, and disturbing them during removal releases lead dust.
Under the RRP Rule, any contractor performing window replacement in a pre-1978 home must be EPA-certified and must follow specific lead-safe work practices: containing the work area with plastic sheeting, using HEPA vacuums, wet-scraping rather than dry-sanding, and performing a post-work cleaning verification. Homeowners doing the work themselves are exempt from RRP certification requirements, but the lead exposure risk is the same.
The penalties for non-compliance are severe. The EPA can impose fines up to $37,500 per day per violation for contractors who fail to follow lead-safe practices. This is federal law and applies regardless of whether your state or city requires a building permit for the window replacement itself.
If you are replacing windows in an older home with wood frames, ask your contractor for their EPA RRP certification number before work begins.
Condominiums and Multi-Family Buildings
Window replacement in condominiums and multi-family buildings (three or more units) often falls under different rules than single-family residential work.
Multi-family buildings are typically governed by the International Building Code (IBC) rather than the IRC. The IBC generally requires permits for any window replacement in commercial or multi-family structures. Additional requirements that do not apply to single-family homes may include:
- Fire-resistance ratings: Windows in fire-rated walls or near property lines may need to maintain specific fire-resistance ratings. Replacing a fire-rated window with a standard residential unit creates a code violation.
- Fall protection (IRC R312.1.3): In buildings where the window sill is less than 24 inches above the finished floor and more than 72 inches above exterior grade, fall-prevention devices or window opening limiters may be required, particularly in units occupied by children.
- Association approval: In a condo, the windows are often part of the building envelope, which is common property. Most condo associations require board approval and may dictate the window manufacturer, style, and color to maintain building uniformity. Some associations handle window replacement as a building-wide project rather than allowing individual unit owners to replace on their own.
Check your condo association’s governing documents and your local building department’s requirements for multi-family structures before starting any work.
Egress Window Requirements (IRC R310)
Every bedroom must have at least one window that meets emergency escape and rescue standards. These requirements apply whether or not you pull a permit. If your replacement window reduces the clear opening below these minimums, you have a code violation, and a code inspector will flag it during any future inspection or home sale.
The IRC R310 minimums for egress windows:
- Minimum net clear opening area: 5.7 square feet (5.0 square feet for windows at or below grade)
- Minimum net clear height: 24 inches
- Minimum net clear width: 20 inches
- Maximum sill height: 44 inches above the finished floor
These are measured with the window fully open, not the overall window size. A window can be large enough on paper and still fail egress if the sash mechanism limits how far it opens. Double-hung windows are common offenders here because the clear opening is limited to one sash. Casement windows typically provide a larger clear opening relative to their frame size.
Basements with habitable space also require egress windows, and these typically need a window well with minimum dimensions of 36 inches from the wall and 9 square feet of floor area if the sill is below grade.
Safety Glazing Requirements (IRC R308)
Tempered or laminated safety glass is required at specific hazardous locations, regardless of whether you need a permit. If your replacement window falls in one of these locations, it must use safety glazing. These rules are defined in IRC Section R308.
- Near doors: Any glazing within 24 inches of a door edge, where the bottom of the glass is less than 60 inches above the floor.
- Large low panes: Windows where all four conditions are met: the pane is larger than 9 square feet, the bottom edge is less than 18 inches above the floor, the top edge is more than 36 inches above the floor, and there is a walking surface within 36 inches. This commonly applies to floor-to-ceiling windows and large picture windows.
- Wet areas: Glass in and around showers, bathtubs, hot tubs, and pools where the bottom edge is less than 60 inches above the standing surface.
- Near stairs: Glazing where the bottom edge is less than 36 inches above the walking surface adjacent to stairs, landings, or ramps.
- All glazing in doors: Every glass panel in swinging, sliding, and bifold doors requires safety glazing.
Why Hire a Licensed Professional
- Licensed & insured — protects you from liability
- Warranty coverage — manufacturers require pro installation
- Code compliance — avoids permit issues
- Faster completion — pros finish in days, not weeks
Energy Code Requirements by Climate Zone
Replacement windows must meet minimum energy performance standards based on your climate zone, even in states that do not require permits for like-for-like swaps. The table below shows the current requirements under the IRC/IECC model codes. (Older code editions used slightly higher U-factor allowances in northern zones; confirm which edition your jurisdiction has adopted.) You can verify a window’s ratings by looking for the NFRC label, which is required on all new windows sold in the U.S.
| Climate Zone | Max U-Factor | Max SHGC | Typical States |
|---|---|---|---|
| 1 | 0.50 | 0.25 | Hawaii, southern tip of Florida, US territories |
| 2 | 0.40 | 0.25 | Southern Texas, southern Florida, southern Arizona, southern Louisiana |
| 3 | 0.35 | 0.25 | Northern Florida, coastal Carolinas, Georgia, Alabama, Mississippi, most of Texas and Arizona |
| 4 | 0.30 | No limit | Tennessee, Virginia, Kentucky, southern Missouri, southern California, mid-Atlantic |
| 5 | 0.27 | No limit | Most of Midwest, Pennsylvania, New Jersey, southern New England, Pacific Northwest coast |
| 6 | 0.27 | No limit | Northern Midwest, Vermont, New Hampshire, Maine, Montana, inland Pacific Northwest |
| 7 | 0.22 | No limit | Northern Minnesota, northern Wisconsin, northern Maine |
| 8 | 0.22 | No limit | Interior Alaska |
Lower U-factor means better insulation. Lower SHGC means less solar heat gain through the glass, which matters more in hot climates (zones 1 through 3). Choosing windows rated for your climate zone is not just a code requirement; it directly affects your heating and cooling costs. Windows that meet or exceed ENERGY STAR guidelines for your zone may also qualify for federal energy tax credits.
What a Window Permit Costs
Permit fees vary by jurisdiction and project scope but are usually a minor line item relative to the total project cost.
| Scenario | Typical Cost |
|---|---|
| Single window, like-for-like replacement | $50 to $150 |
| Whole-house replacement (10+ windows) | $150 to $600 |
| New or enlarged opening with engineered header | $200 to $800 |
| Florida HVHZ permit | $150 to $500 |
| California Title 24 review | $100 to $400 |
| Historic district design review (additional) | $50 to $250 |
| Retroactive (after-the-fact) permit | 2x to 4x the standard fee |
Some cities have flat-rate schedules. Others calculate fees as a percentage of the project value, typically 1% to 2%. Call your local building department for the exact amount before you start.
How to Get a Window Replacement Permit
The process is straightforward in most jurisdictions.
- Contact your local building department. Look up your city or county building and permits office online. Most have a phone number and many offer online applications. Ask specifically about window replacement permits and what documentation they need.
- Submit the application. You will typically need the property address, a description of the work (number of windows, locations, whether any openings are being modified), the contractor’s license number if you are using one, and product specifications for the replacement windows. In California, include the Title 24 energy compliance report. In Florida hurricane zones, include the product’s NOA or impact certification.
- Pay the fee and wait for approval. Simple replacements are often approved same-day or within a few business days. Projects involving structural changes or historic district review can take several weeks.
- Schedule inspections. Most permitted window work requires at least a final inspection after installation to verify code compliance. Structural modifications may require a rough-framing inspection before the window is installed. Keep the approved permit posted at the job site during work.
DIY vs. Professional: At a Glance
Who Pulls the Permit: You or the Contractor?
If you hire a licensed contractor, they typically handle the permit as part of the job. The cost is usually included in their bid. Confirm this in writing before work starts. If it is not in the contract, ask before signing.
If you are doing the work yourself, the permit is your responsibility. You apply as the homeowner-builder, and you are responsible for scheduling and passing inspections. Some jurisdictions require homeowner-builders to sign an affidavit confirming they will do the work themselves and that the property is owner-occupied.
One thing to watch for: if a contractor asks you to pull the permit under your name while they do the work, that is a red flag. Licensed contractors pull permits under their own license. A contractor who avoids this may be unlicensed or trying to sidestep liability.
What Happens If You Skip a Required Permit
Unpermitted work creates problems that compound over time. The further you get from the original project, the more expensive and disruptive the fix becomes.
Spring and summer are the busiest seasons for home improvement projects — top-rated contractors book up fast. Lock in your estimate now before demand peaks.
Check Availability in Your Area →Fines
Fine amounts vary widely by jurisdiction.
- Typical range: $200 to $10,000 per violation
- Daily penalties: Some jurisdictions impose $100 to $500 per day until the violation is resolved
- New York City: Up to $10,000 for one- and two-family homes; up to $15,000 for multi-family. Stop-work order violations carry an additional $2,000 for the first offense and $10,000 for each subsequent offense
- Retroactive permit fees: Expect to pay two to four times the original permit fee to legalize work after the fact
Home sale complications
Unpermitted work surfaces during inspections and appraisals. Buyers and their lenders look for it. Sellers are required to disclose known unpermitted work in most states (California Civil Code 1102 makes this explicit). Appraisers may refuse to assign value to unpermitted improvements. Title insurance may exclude coverage. Buyers walk away from deals over this regularly.
In the worst case, a building department can require removal of unpermitted work at the owner’s expense. If you enlarged a window opening without a permit and the framing does not meet code, you could be ordered to restore the wall or re-do the work under permit.
Insurance exposure
Homeowner’s insurance policies can deny claims related to unpermitted work. If water damage, fire, or structural failure traces back to a window that was improperly installed without required permits and inspections, the insurer has grounds to refuse coverage.
Ready to Move Forward?
Tell us about your project and get matched with up to 3 pre-screened contractors. Compare quotes, check reviews, and hire with confidence.
Historic Districts and HOA Rules
These are separate layers of approval that exist on top of building permits. You can need one, both, or neither depending on your property.
Historic districts
Properties in designated historic districts require a Certificate of Appropriateness (COA) from the local historic preservation commission before any exterior alteration, including window replacement. The commission reviews proposed changes for compatibility with the district’s character.
Common restrictions in historic districts:
- Material limits: Many commissions require wood or wood-clad windows on street-facing elevations. Vinyl is often rejected for primary facades but may be acceptable on rear or secondary elevations. If your district requires wood frames, understanding exterior window components and their historical profiles will help you select an approved replacement.
- Design matching: Window style, muntin pattern, glass divisions, profile depth, and proportions must match or closely replicate the originals.
- Review timeline: The COA process adds weeks or months to a project and typically involves a separate application fee of $50 to $250.
HOA rules
Most homeowners associations require written approval before exterior window replacement, even when no building permit is needed. Typical restrictions include approved window styles, frame materials, colors from a pre-approved palette, and grille patterns.
Submit product brochures, color samples, and contractor details with your HOA application. The approval timeline varies but can add two to six weeks. Do this before ordering windows or scheduling installation.
HOA approval and building permits are completely independent processes. Getting one does not satisfy the other. Check both before starting work.
Planning Your Window Replacement Project
If you are replacing multiple windows at the same time, especially as part of a larger renovation, organizing the sequence of work matters. Windows should go in before exterior siding and after any rough framing or structural work is complete. If you are also planning to re-side the house, doing the windows first ensures proper flashing integration and avoids having to remove new siding to access window openings.
Before starting, confirm three things: whether your project requires a building permit, whether your home falls under any additional rules (historic district, HOA, WUI zone, pre-1978 lead paint), and whether your contractor is licensed and will pull the permit under their own name. Getting those answers takes a phone call to your building department and a few minutes reviewing your property’s designation. It is far less expensive than sorting out unpermitted work after the fact.
Connect with top-rated local contractors who can help you with siding, roofing, HVAC, windows, and more. Get free quotes from verified professionals in your area today.