Vertical siding offers a sleek, contemporary look while improving a home’s overall durability and weather resistance. It’s a simple way to refresh exterior design, add visual height, and protect against the elements year-round.
This guide explains how vertical siding works, what styles and materials are available, and the key steps for proper installation so you can achieve a durable, professional finish that lasts.
Pros and Cons of Vertical Siding
Vertical siding has unique benefits, but also specific drawbacks you need to consider.
The Pros
- Unique Aesthetics: Vertical siding stands out. It gives your home a modern, custom look and can make the building feel taller.
- Better Water Resistance: A vertical orientation has no horizontal ledges where water can collect. Rainwater runs straight down and off the siding, which helps reduce the risk of water infiltration.
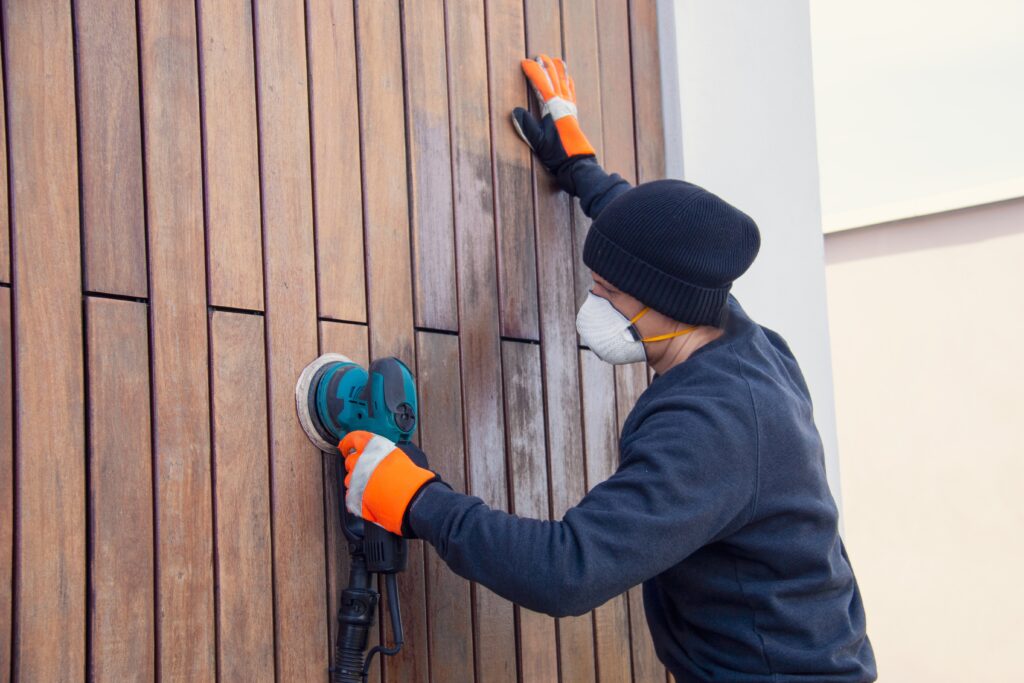
- Easier Cleaning: The smooth, vertical orientation makes it simple to clean mold on siding, as dirt and grime have fewer places to settle.
The Cons
- Higher Cost: As mentioned, the complex installation and extra materials make vertical siding more expensive than most horizontal options.
- Difficult Installation: Installing vertical siding is not a simple project. It requires a special substructure (furring strips) to be installed correctly, making the job more labor-intensive.
Popular Vertical Siding Styles
Vertical siding isn’t just one look; it comes in a few distinct styles.
Actual costs depend on your location, project scope, and materials. The best way to know what you'll pay is to get quotes from local contractors.
Get Your Free Estimate →Board and Batten
Board and batten is the most popular style. An installer places wide vertical panels (the “boards”) on the home, then covers the seams with thin strips (the “battens”). A board and batten system creates a layered, rustic, and charming look perfect for farmhouse designs.
"We matched with a great contractor the same day. The whole process was easy and completely free."
Vertical Panels
For a cleaner, minimalist appearance, you can choose seamless or locking vertical panels. Often made of fiber cement or metal, these panels provide a very modern and sleek look.
Channel Siding
With channel siding, each board has a small groove, or “channel,” that overlaps with the next board. The overlap creates a distinct shadow line and a rustic look, making it a great choice for cabins or modern homes.
Best Materials for Vertical Siding
Your choice of material will impact the cost, longevity, maintenance, and specific installation requirements. Each has unique properties that must be taken into consideration. Nearly all siding materials are available in vertical options, but these four are the most common.
Vinyl
Vinyl is the most affordable and lowest-maintenance option. It’s lightweight and comes in many board and batten styles.
Best for: Homeowners on a budget who want the vertical look without the upkeep.
Fiber Cement
A premium, highly durable choice. It offers realistic wood grain textures, is fire and pest resistant, and holds paint for years.
Best for: Homeowners who want a high-end, long-lasting siding that closely resembles natural wood.
Why Hire a Licensed Professional
- Licensed & insured — protects you from liability
- Warranty coverage — manufacturers require pro installation
- Code compliance — avoids permit issues
- Faster completion — pros finish in days, not weeks
Wood
Wood offers true, unmatched authenticity for a rustic or cabin feel. However, it is high-maintenance, requiring regular wood siding maintenance to prevent rot and fading.
Best for: Authentic, rustic designs where maintenance is not a deterrent.
Metal
Metal is the most durable and long-lasting option. It provides a sharp, clean look for industrial or ultra-modern homes.
Best for: Modern, industrial designs where longevity is the top priority.
DIY vs. Professional: At a Glance
Where to Use Vertical Siding
You can use vertical siding in three primary ways to enhance your home’s architecture.
- Full-Body Coverage: Using vertical siding across your entire home makes a bold architectural statement and fully defines the home’s style.
- As an Accent: The most common approach is to use vertical siding in smaller, defined areas like gables, dormers, or entryways to break up long runs of horizontal siding.
- Mixed With Other Materials: Many designers pair vertical siding with other materials, such as horizontal lap siding on the first floor and vertical siding on the second or a stone wainscot at the base.
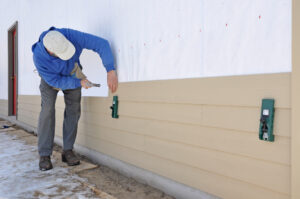
How Is Vertical Siding Installed?
You cannot just nail vertical siding directly to the wall. The installation is more complex than horizontal siding and requires a different approach.
Spring and summer are the busiest seasons for home improvement projects — top-rated contractors book up fast. Lock in your estimate now before demand peaks.
Check Availability in Your Area →Part 1: Prep Work
Long-term success is determined long before the first panel goes up. This foundational work is your home’s primary, and most important, defense against water. Failures at this stage are not correctable without tearing everything off and starting over.
Inspect Your Substrate
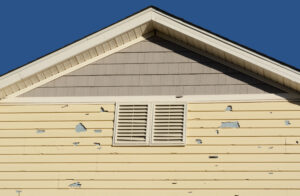
The wall sheathing (the OSB or plywood) must be flat, solid, and free of rot. Go over the entire wall, probing with a screwdriver or awl for any soft, punky spots, especially under windows and near the ground. Use a long, 6-foot level or a string line to find any significant bows or dips. Vertical siding will “telegraph,” or visually amplify, any imperfections beneath it. A 1/4-inch dip you can’t see on the sheathing will look like a pronounced, ugly wave on the finished siding. Repair and replace any damaged sections and shim any dips to create a flat plane.
Install the Water-Resistive Barrier (WRB)
“House wrap” is your wall’s raincoat. It must be installed in a “shingle-lap” style. This means you start from the bottom of the wall and work your way up, ensuring each new layer overlaps the one below it by at least 6 inches. This uses gravity to your advantage, ensuring water is always shed to the outside of the layer below. Use cap-nails (which have a plastic gasket) instead of staples, as they seal the penetration and prevent tearing. Taping all seams is also a critical step to create a continuous air and water barrier.
Flashing
Every window, door, and vent in your home can be a potential leak. Flashing must also be installed in a shingle-lap sequence. For a window, this means:
- Install a sill pan or flexible flashing tape at the bottom (sill) of the opening first. It should wrap up the sides of the jambs by at least 6 inches.
- Install the side flashing next, starting from the bottom and working up. It must overlap the sill flashing.
- Install the head (top) flashing last. This is typically a rigid metal “drip cap.” It must overlap the side flashing.
- Finally, fold the flap of house wrap down over the top flashing and tape it.
A common mistake is tucking the house wrap behind the top flashing. This creates a reverse lap that acts as a funnel, directing 100% of the water running down the wall into the wall cavity, guaranteeing rot.
Part 2: The Rainscreen
This is the single most important, and most often missed step. A rainscreen is an intentional air gap (typically 1/4- to 3/4-inch) created between the back of the siding and the house wrap.
- It allows any water that gets behind the panels (and it will) to hit the house wrap and drain harmlessly down and out.
- It allows air to circulate behind the siding, drying out the entire wall assembly, which prevents mold and rot.
Vertical siding panels need horizontal strips (called furring strips) to attach to. But, horizontal furring strips, when nailed directly to the wall, act as “dams.” They block the vertical drainage path.
You must provide both horizontal nailing and a vertical drainage path to avoid water damage. Here are the two best professional methods to do address this:
- Double-Furring Method
- First, install a layer of vertical 1×4 furring strips, typically aligned with the wall studs.
- Then, install a second layer of horizontal 1×4 strips on top of the vertical ones.
This creates a 3/4-inch grid. Water drains freely down the vertical strips, and you have a solid horizontal surface for nailing your siding.
- Drainage Mat Method
Install a modern drainage mat (a mesh or dimpled-sheet product) directly over the house wrap. These mats create a built-in drainage and ventilation gap (usually 1/4-inch to 3/8-inch). You then nail the vertical siding through the mat and into the sheathing/studs. This is faster, can’t rot (since it’s plastic), and also acts as a “compressive break” that helps prevent the “telegraphing” (wavy lines) that can happen with uneven wood furring.
Part 3: Installation Best Practices
With the critical prep work and rainscreen in place, follow these steps for a professional finish.
Plan Your Layout
Don’t just start on one side and hope for the best. You’ll almost certainly end up with a tiny, awkward “sliver” of siding at the last corner. To avoid this amateurish look, start from the center. Find the exact center point of the wall (especially important on gables and prominent entry walls), snap a perfectly vertical (plumb) line, and install your first pieces here. Work your way out to both corners. This ensures the final pieces at each end will be of equal and substantial width, giving a balanced, professional look.
Fasten, Don’t “Tighten”
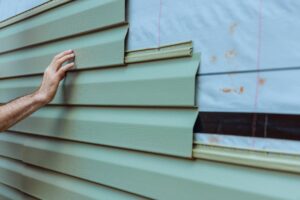
This is especially critical for vinyl and metal. Siding panels are designed to move. The nailing slot is oblong for a reason—to let the panel slide back and forth as it expands in the summer heat and contracts in the winter cold.
- Place the nail in the center of the nailing slot, not at the ends.
- Leave a 1/32-inch gap (the thickness of a dime) between the nail head and the siding flange. Driving the nail tight pins the panel, and when it tries to move, it will buckle, warp, and crack.
Manage Horizontal Seams
If a wall is too tall for a single panel, you must install a horizontal “Z-flashing” at the seam. This metal piece goes over the top of the lower panel. The upper panel is then installed above it, leaving a 1/4-inch gap between the bottom of the panel and the Z-flashing. Never caulk this gap. Caulk will eventually fail, trap water, and act as a dam, submerging the bottom edge of the upper panel in a pond—leading to failure. The gap is a drainage channel.
Drill Weep Holes
This is the final, essential step of your drainage system. The bottom piece of trim (J-channel or starter strip) that holds the siding will catch all the water draining down your rainscreen. You must give that water an exit. Drill 3/16-inch “weep holes” in the bottom face of this channel every 24 inches. Without these weep holes, the bottom channel becomes a stagnant gutter, filling with water and promoting mold, rot, and insect infestations.
Ready to Move Forward?
Tell us about your project and get matched with up to 3 pre-screened contractors. Compare quotes, check reviews, and hire with confidence.
How Much Does Vertical Siding Cost?
Vertical siding is a premium option and generally costs more than horizontal siding. You can expect to pay between $4.00 and $14.00 per square foot installed, with the final price depending on your material choice.
The higher price comes from two factors: the extra materials needed for installation (furring strips) and the more complex, labor-intensive process.
Here is a typical cost breakdown by material:
- Vinyl: $4.00–$8.00 per square foot
- Fiber Cement: $6.00–$13.00 per square foot
- Wood: $7.00–$14.00 per square foot
- Metal: $8.00–$16.00 per square foot
According to Angi, the average installed cost for board and batten siding is around $7.50 per square foot, with most projects landing between $2.50 and $12.50 per square foot.
- For a typical 2,000-square-foot home, the average total cost is $12,800.
- Most projects range from $7,500 to $21,300.
- If you need to remove and dispose of old siding, expect to add $1,000 to $3,000 to your total.
These costs are averages and they vary. A complex, multi-story home with many gables and windows will be on the higher end, while a simple, single-story rectangular home will be on the lower end. Labor rates for vertical siding are generally higher than for horizontal. A good contractor must account for the extra time and materials to meticulously flash and build a proper rainscreen (double-furring or mat), which isn’t a factor in most horizontal jobs. This is a necessary “cost of quality” that protects your investment.
DIY vs. Professional Installation
The primary motivation for DIY is saving on labor, which can be 50% or more of the total project. However, for this specific job, the risk is extremely high.
Unless you are a professional, vertical siding installation is not a good DIY project. The risks are high: a single mistake with the furring strips or flashing can lead to signs of siding damage like water intrusion, mold, and rot.
The siding will look perfect on the day you finish. The failure—rot, delamination, mold—happens inside the wall, silently, for 5 or 10 years. By the time you see a symptom (like stained drywall or a soft floor), you’re facing a catastrophic structural repair costing many times more than the initial labor savings. This is a job where “good enough” is not good enough.
Furthermore, improper installation will void your material warranty. You should hire a professional installer who has specific experience with vertical siding and rainscreen systems.
Conclusion
Vertical siding combines modern design appeal with reliable performance, giving homes a clean, distinctive look that stands out. When properly installed, it enhances both curb appeal and long-term protection by keeping moisture out and maintaining a durable finish through changing weather conditions.
To get the best results, plan your project carefully and work with qualified installers who understand vertical systems and materials. For accurate pricing and professional guidance, get free estimates from local siding experts who can help you choose the right style and ensure a quality installation.

Anna has over six years of experience in the home services and journalism industries and serves as the Content Manager at MyHomePros.com, specializing in making complex home improvement topics like HVAC, roofing, and plumbing accessible to all. With a bachelor’s degree in journalism from Auburn University, she excels in crafting localized, comprehensive guides that cater to homeowners’ unique needs. Living on both coasts of the United States has equipped her with a distinctive perspective, fueling her passion for turning any house into a cherished home through informed, personalized decision-making.
Connect with top-rated local contractors who can help you with siding, roofing, HVAC, windows, and more. Get free quotes from verified professionals in your area today.