Mixing siding materials is one of the most effective ways to add character and elevate your home’s exterior design. Combining textures such as horizontal lap siding, shakes, or stone accents creates visual depth and a custom, high-end look.
This guide covers the essentials of mixing siding materials, helping you choose styles and colors that work together for a cohesive, attractive look.
Why Mix Siding Materials?
Using a single siding style and color can make a home look flat or “monolithic”. Mixing materials is a design strategy to add character and depth. It allows you to:
- Boost curb appeal: The contrast between a smooth plank and a rough shake, or between siding and stone, creates a rich, custom look that stands out.
- Break up large walls: On tall, two-story homes or long, flat walls, using a second material (like shakes in a gable) prevents the house from looking like a “boring box”.
- Highlight key features: You can use a different texture or color to draw the eye to architectural features you want to emphasize, like a gabled entryway, a cozy bump-out, or the entire second story.
Design Rules for Mixing Siding Materials
A successful mixed-material design looks intentional, not accidental. The goal is to create balance. Here are the core principles designers follow.
Stick to the “Rule of 3”
The most important guideline is the “Rule of 3”. As a general rule, limit your home’s exterior to three primary materials (your main siding, your accent siding, and your trim) and three primary colors. A fourth material, like metal for a porch roof, can work in small doses, but pushing to four or five materials will almost always make the exterior look chaotic and over-designed.
Actual costs depend on your location, project scope, and materials. The best way to know what you'll pay is to get quotes from local contractors.
Get Your Free Estimate →Create a Clear Visual Hierarchy
Your materials shouldn’t compete for attention. You need a dominant material and a secondary, accent material. Your dominant material (like horizontal lap siding) should cover 60%–70% of the exterior. Your accent material (like shakes or stone) should cover the remaining 30%–40% in defined, contained areas. This 70/30 split creates a sense of balance and order.
Contrast Smooth and Textured Surfaces
The biggest impact comes from contrasting textures. You should pair a smooth, flat surface (like lap siding or large panels) with a highly textured one (like stone veneer, brick, or cedar-look shakes). This interplay of light and shadow is what creates visual interest and a high-end feel.
Popular Siding Combinations That Work
You don’t need to reinvent the wheel. These combinations are popular because they are proven to work on almost any home style.
"We matched with a great contractor the same day. The whole process was easy and completely free."
1. Horizontal Lap and Shake Siding
A classic and common combination. The clean, long lines of horizontal lap siding (the “smooth”) contrast perfectly with the rustic, rough-hewn texture of shakes (the “textured”). You get a timeless look that fits Craftsman, Coastal, and modern farmhouse siding styles.
- Where to use it: Use horizontal lap for the main body of the house and shakes as an accent in the gables or on dormers.
2. Siding and Stone or Brick Veneer
Pairing siding with a “heavy” or “permanent” material like stone or brick creates a powerful, high-end look. The stone or brick acts as a visual anchor for the home, making it feel solid and grounded.
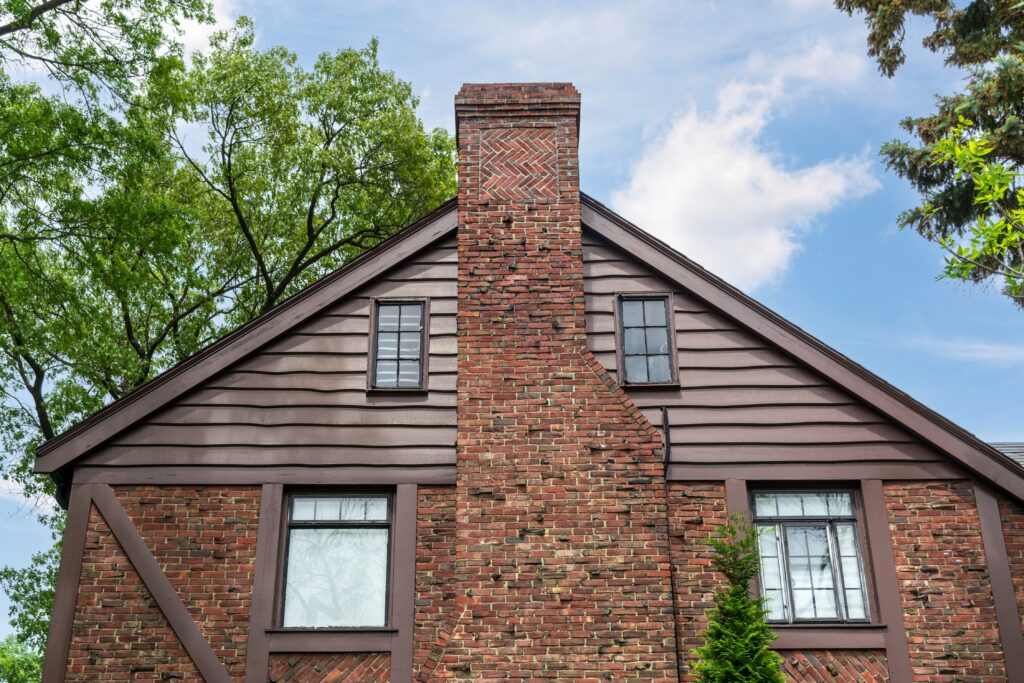
- Where to use it: Use stone/brick on the foundation as a “wainscot” around the base of the house, or to cover a prominent feature like a chimney or the columns of a front porch.
3. Horizontal and Vertical Siding
A more modern, subtle combination. Using vertical siding (like board and batten) on a specific section, like a “bump-out” or entryway, draws the eye upward and makes that feature feel taller.
- Where to use it: Use horizontal siding for the main body and vertical siding on gables, dormers, or entryways to create a clean, contemporary look.
Where to Change Materials on Your Home
The where is just as important as the what. Changes in material should happen at natural transition points where the architecture shifts.
- In the Gables: The gable (the triangular wall section under the roof) is the most popular and “can’t-miss” spot for an accent material. Adding shakes here breaks up a tall wall and draws the eye up.
- On Dormers: Cladding dormers in a different material, like shakes, sets them apart from the main roof and wall, turning them into charming architectural details.
- On “Bump-Outs”: Use your accent material on any section of the house that projects forward, like a bay window, a gabled entryway, or a cantilevered wall. Doing so highlights the home’s 3D-dimensionality.
- At the Foundation: Adding a 2–3 foot high ‘wainscot’ of stone or brick veneer around the base of the home grounds it and gives it a feeling of permanence and stability.
- Between Stories: On a two-story home, you can use one material (like stone or lap siding) on the first floor and a different one (like shakes) on the entire second floor. A wide ‘belly band’ trim piece is needed to make this transition look clean.
Common Mistakes to Avoid
Getting the mix wrong can be an expensive mistake. Watch out for these common pitfalls.
Why Hire a Licensed Professional
- Licensed & insured — protects you from liability
- Warranty coverage — manufacturers require pro installation
- Code compliance — avoids permit issues
- Faster completion — pros finish in days, not weeks
Mistake 1: Creating a “Clown Suit”
Using too many materials, textures, and colors makes the house look like a patchwork quilt with no clear focus. Remember, the goal is to complement your home’s architecture, not overwhelm it.
Mistake 2: Bad Proportions
Don’t split your materials 50/50. A 50/50 split creates visual competition where the eye doesn’t know where to rest. Stick to the 70/30 (or 60/40) rule, with one dominant material and one clear accent.
Mistake 3: Ignoring Transitions
You can’t just butt one siding style up against another. Every transition point needs a “physical and visual break” to look intentional. Your installer uses siding trim for this purpose. Wide trim boards, corner posts, and belly bands frame each section, which makes the change look crisp and professional.
DIY vs. Professional: At a Glance
Mistake 4: Forgetting About Water
Every transition is a potential weak spot for water intrusion. Where a gable meets a roof, or where siding meets a stone wainscot, you must have proper flashing and house wrap. Cutting corners here is a recipe for disaster, and it’s a key reason to hire a professional who knows what to expect during installation.
Maintenance Tips for Mixed-Siding Exteriors
Maintaining mixed-siding exteriors requires attention to each material’s specific care needs, proper moisture management at transition points, and regular inspections. A well-maintained exterior not only preserves the look of your home but also extends the lifespan of every material used.
Material-Specific Care
Each siding material has unique cleaning, inspection, and maintenance requirements.
| Material | Cleaning Tips | Inspection Focus | Repainting / Resealing |
| Vinyl | Wash annually with mild detergent and a soft brush or hose. Avoid high heat sources such as grills. | Check for cracks, holes, or loose panels after storms. Ensure panels can move freely. | UV-resistant coatings can help reduce fading. |
| Wood | Clean gently with a soft brush and mild solution. Avoid high-pressure washing. | Look for rot, cracks, insect damage, or sponginess. Use a screwdriver to probe suspect areas. | Repaint or stain every 3–7 years to protect from moisture and UV damage. Seal all edges, including the lower ones. |
| Fiber Cement | Clean every 6–12 months with mild detergent and a soft brush. Low-pressure washing is acceptable with care. | Inspect for chips, cracks, or peeling paint that may indicate moisture intrusion. | Repaint every 10–15 years to maintain protection. |
| Stucco / Masonry | Wash with a garden hose and soft brush. Avoid pressure washing that may damage the finish or mortar. | Check mortar joints for cracks or deterioration. Look for signs of water damage. | Apply a clear masonry sealant every 5–10 years. Avoid painting stucco to preserve breathability. |
| Metal | Clean annually with mild detergent. Avoid abrasive cleaners that can scratch the surface. | Inspect for scratches, dents, or rust. Address damage promptly to prevent corrosion. | Repaint as needed if the finish fades or chips. |
Spring and summer are the busiest seasons for home improvement projects — top-rated contractors book up fast. Lock in your estimate now before demand peaks.
Check Availability in Your Area →Preventing Moisture Gaps Between Materials
The transition areas where materials meet are the most vulnerable to water intrusion. Proper detailing and maintenance are critical to keeping these points dry and protected.
- Proper Flashing: Make sure all transitions, especially around windows, doors, corners, and the foundation, have flashing installed to direct water away.
- Use Flexible, Exterior-Grade Sealant: Seal joints and small gaps with a high-quality, exterior-grade caulk made for multi-material use, such as silicone or siliconized acrylic latex. The sealant must flex with seasonal expansion and contraction.
- Avoid Dissimilar Metals: When using metal siding or flashing, select corrosion-resistant fasteners like galvanized or stainless steel. Avoid mixing metals that could react and cause corrosion.
- Maintain Clearances: Keep at least 6 inches between the siding and the ground, and 1 inch above flatwork or roofing materials, to prevent moisture wicking.
- Incorporate Drainage: A weather-resistant barrier (WRB) or rain-screen system behind the siding provides a drainage space that protects against trapped moisture and wind-driven rain.
Inspection Checklist
Inspect your siding twice a year, preferably once in spring and once in fall, and after major storms. Regular checks help identify small issues before they become costly repairs.
Siding Surfaces
- Look for cracks, holes, dents, or chips in all materials.
- Check for warped, buckled, or loose boards or panels.
- Watch for mold, mildew, or algae growth, especially in shaded areas.
- Examine finishes for peeling, flaking, or significant fading.
Joints and Transitions
- Inspect caulking and seals around windows, doors, and material intersections.
- Verify that flashing is intact and securely attached.
- Check for gaps where pests could enter.
Surroundings and Drainage
- Ensure gutters and downspouts are clear and direct water at least 5 feet away from the foundation.
- Trim trees and shrubs so they do not touch the siding.
- Confirm that the ground slopes away from the house for proper drainage.
“Screwdriver Test” (for wood or fiber cement)
Gently press suspect areas with a screwdriver. A soft or spongy surface may indicate rot and should be repaired immediately.
Ready to Move Forward?
Tell us about your project and get matched with up to 3 pre-screened contractors. Compare quotes, check reviews, and hire with confidence.
DIY vs Professional Siding Installation
Deciding whether to take on a siding project yourself or hire a professional depends on the project’s size, your experience, and the safety risks involved. While small repairs can be manageable for a capable homeowner, large or complex projects demand the expertise of a licensed contractor to ensure proper installation, safety, and long-term durability.
When a Contractor Is a Must
Simple fixes such as patching a hole or replacing a single damaged board are suitable for DIY work. However, the following situations require that you work with a licensed and insured professional:
- Whole-house installation: Full siding replacement is a major project that requires specialized tools, correct flashing techniques, and knowledge of building codes. Professionals also work more efficiently and safely, often as part of a team.
- Complex materials: Products like fiber cement or certain metal sidings are heavy, require precision cutting, and must be installed according to manufacturer specifications to keep warranties valid.
- Structural or moisture issues: If you discover rot, damaged sheathing, or a compromised weather-resistant barrier (WRB), professional repair ensures the home’s structure and protection are properly restored.
- Working at height: Multi-story installations involve significant safety risks that require proper scaffolding, harnesses, and training.
- Warranty requirements: Many siding manufacturers void warranties if installation is not completed by a certified professional.
Benefits of Expert Installation for Seams and Transitions
Mixed-siding exteriors rely heavily on high-quality installation, especially at seams and transition points. Professionals bring key advantages that protect both appearance and performance:
- Effective weatherproofing: Contractors install flashing, house wrap, and moisture barriers correctly, preventing leaks and long-term water damage.
- Airtight sealing: Proper sealants and caulking techniques reduce drafts and improve energy efficiency.
- Material compatibility: Professionals understand how different siding materials expand and contract, allowing for the right spacing and fasteners to avoid warping or gaps.
- Code compliance: Licensed installers follow all local building codes, which is important for safety, insurance, and resale value.
- Proper fastening: They use the correct type and number of fasteners for each material and substrate, ensuring secure, lasting installation.
Conclusion
Mixing siding materials can enhance both the design and performance of your home’s exterior when done thoughtfully. Combining complementary textures and colors allows you to highlight architectural features while adding dimension and visual balance. A well-planned mix also supports durability because each material can be used where it performs best, such as moisture-resistant products near the foundation and lighter options on upper levels.
Before finalizing your design, review material samples in natural lighting, study how transitions align with windows and corners, and seek input from qualified contractors who have experience with multi-material installations. Their guidance can help ensure proper detailing, weatherproofing, and long-term performance. Get free quotes from local siding experts today to explore design options and find the best approach for your home.
Connect with top-rated local contractors who can help you with siding, roofing, HVAC, windows, and more. Get free quotes from verified professionals in your area today.