If your kitchen cabinets are looking dated but a full remodel isn’t in the budget, refinishing them can make a major impact without the high cost. Whether you choose to paint, stain, or reface, you can completely transform your kitchen with the right approach.
The key is knowing which option makes the most sense for your cabinets, your budget, and your DIY skill level.
Cabinet Refinishing vs. Replacement: What’s the Difference?
Before diving into DIY options, it helps to understand the difference between refinishing and replacing your cabinets.
Refinishing means updating what you already have (painting, staining, or applying new surfaces) while keeping the cabinet boxes intact. This is significantly more affordable and less disruptive.
Replacing cabinets involves removing everything and installing brand-new units. While this gives you total design freedom, it’s also one of the most expensive kitchen upgrades.
For most homeowners, refinishing is the smarter choice if your cabinets are structurally sound but just look outdated.
Overview of Your Cabinet Refinishing Options
When it comes to refreshing your cabinets, you have three main choices. Each delivers a different look and level of effort.
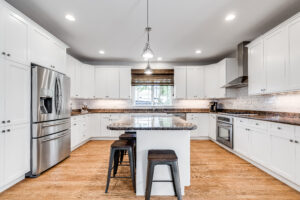
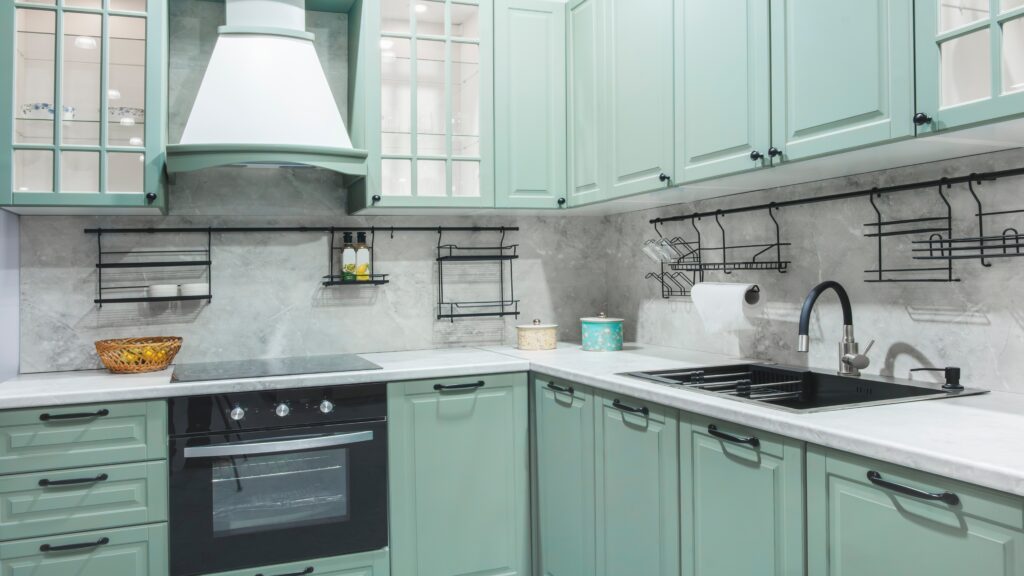
Painting Cabinets
Painting is the most popular DIY option because it’s affordable and offers the biggest visual transformation. It’s perfect for covering outdated wood tones or worn finishes and works on both wood and some laminate surfaces with proper prep.
Staining Cabinets
Staining enhances the natural beauty of wood rather than covering it. This option works best if you have solid wood cabinets and want a richer, more classic look that highlights the grain.
Refacing Cabinets
Refacing goes a step further by replacing cabinet doors and covering cabinet boxes with a new veneer. It delivers a near “brand-new kitchen” look without the cost of full replacement, but it’s more involved than painting or staining.
How to Paint Kitchen Cabinets (Step-by-Step)
Painting cabinets takes time and prep, but the results can be dramatic.
Tools and Materials Needed
You’ll need primer, cabinet-grade paint, brushes or rollers (or a sprayer), sandpaper, degreaser, drop cloths, and painter’s tape. Choosing the right paint is key for long-term results.
Actual costs depend on your location, project scope, and materials. The best way to know what you'll pay is to get quotes from local contractors.
Get Your Free Estimate →Step 1: Remove Doors and Hardware
Start by taking off all cabinet doors, drawers, and hardware. Label everything so reinstallation is easy later.
Step 2: Clean and Degrease Surfaces
Kitchen cabinets collect grease and grime over time, especially near the stove. Thorough cleaning ensures paint adheres properly.
Step 3: Sand and Prep
Light sanding helps remove the existing finish and creates a surface the primer can stick to. In some cases, a liquid deglosser can speed things up.
Step 4: Prime Cabinets
Primer is essential. It blocks stains, improves adhesion, and creates a smooth base for paint.
"We matched with a great contractor the same day. The whole process was easy and completely free."
Step 5: Paint and Apply Multiple Coats
Apply thin, even coats and allow proper drying time between each layer. Two to three coats usually provide the best coverage and durability.
Step 6: Reassemble and Cure
Once everything is dry, reinstall doors and hardware. Keep in mind that cabinets may take a few weeks to fully cure, even if they feel dry to the touch.
How to Stain Kitchen Cabinets (Step-by-Step)
If you love the look of natural wood, staining is a great option. However, it requires a bit more prep.
When Staining Is a Good Option
Staining works best on solid wood cabinets. If your cabinets are laminate or heavily painted, staining may not be possible without significant work.
Tools and Materials Needed
You’ll need wood stain, wood conditioner, sandpaper, clean rags or brushes, and a protective topcoat like polyurethane.
Step 1: Strip Old Finish (If Needed)
If your cabinets have an existing finish, you may need to strip it using a chemical remover or sanding.
Step 2: Sand and Prep Wood
A smooth, even surface is critical for a consistent stain. Take your time with sanding.
Step 3: Apply Wood Conditioner
This step helps prevent blotchy or uneven color, especially on softer woods.
Step 4: Apply Stain
Apply the stain evenly and wipe off excess to control the color depth. Multiple coats can deepen the tone.
Why Hire a Licensed Professional
- Licensed & insured — protects you from liability
- Warranty coverage — manufacturers require pro installation
- Code compliance — avoids permit issues
- Faster completion — pros finish in days, not weeks
Step 5: Seal with Topcoat
Finish with a protective sealant to lock in color and protect against wear and moisture.
How to Reface Kitchen Cabinets (Step-by-Step)
Refacing is a more advanced DIY project but delivers a high-end result.
What Cabinet Refacing Includes
Refacing typically involves installing new cabinet doors and drawer fronts, then applying a veneer or laminate to the existing cabinet boxes.
Tools and Materials Needed
You’ll need veneer sheets or laminate, adhesive, a utility knife, roller, and basic tools for installation.
DIY vs. Professional: At a Glance
Step 1: Remove Old Doors and Hardware
Start by clearing out all existing doors, drawers, and hardware.
Step 2: Prep Cabinet Boxes
Clean and lightly sand surfaces to ensure the veneer adheres properly.
Step 3: Apply Veneer or Laminate
Carefully cut and apply the veneer, smoothing it out to avoid bubbles or wrinkles.
Step 4: Install New Doors and Hardware
Finish the transformation by installing new doors, hinges, and handles for a completely updated look.
Spring and summer are the busiest seasons for home improvement projects — top-rated contractors book up fast. Lock in your estimate now before demand peaks.
Check Availability in Your Area →Cost Comparison: Paint vs Stain vs Reface
The cost of refinishing cabinets varies depending on the method you choose.
Painting is typically the most budget-friendly option, often costing a few hundred dollars in materials for a DIY project. Staining falls in a similar range but may require more prep work. Refacing is more expensive but still significantly cheaper than full cabinet replacement.
Time is also a factor. Painting can take a weekend or more, staining may take longer due to prep, and refacing can span several days depending on complexity.
Pros and Cons of Each Cabinet Refinishing Method
Painting
Painting is affordable and offers the most dramatic visual change, especially for modern kitchens. However, it requires detailed prep and can chip over time if not done properly.
Staining
Staining highlights natural wood grain and provides a durable finish. The downside is that it only works on real wood and offers less flexibility in color.
Refacing
Refacing delivers a like-new appearance and can completely change your kitchen’s style. The trade-off is higher cost and a more complex installation process.
Ready to Move Forward?
Tell us about your project and get matched with up to 3 pre-screened contractors. Compare quotes, check reviews, and hire with confidence.
How to Choose the Best Option for Your Kitchen
The right choice depends on your cabinets and your goals.
If you have laminate cabinets or want a bold color change, painting is likely your best bet. If you have high-quality wood and want a natural look, staining may be the way to go. And if your cabinet structure is solid but the doors are outdated, refacing offers a middle ground between refinishing and full replacement.
Budget, timeline, and skill level should also factor into your decision.
Common DIY Cabinet Refinishing Mistakes to Avoid
One of the biggest mistakes homeowners make is skipping prep work. Cleaning, sanding, and priming are critical for a lasting finish.
Other common issues include using the wrong type of paint or stain, rushing drying times, and applying thick coats that lead to drips or uneven coverage.
When to DIY vs Hire a Professional
DIY cabinet refinishing can save money, but it’s not always the best choice.
If your cabinets require major repairs, you want a factory-smooth sprayed finish, or you’re tackling a full refacing project, hiring a professional may be worth it. For simpler painting or staining jobs, many homeowners can achieve great results on their own with the right tools and patience.
FAQs About Refinishing Kitchen Cabinets
How long does cabinet refinishing last?
With proper prep and materials, refinished cabinets can last 5–10 years or more.
Can you paint over laminate cabinets?
Yes, but proper cleaning, sanding, and priming are essential for adhesion.
Is refacing cheaper than replacing cabinets?
Yes, refacing typically costs much less than full replacement while offering a similar look.
How long does the project take?
Most DIY projects take anywhere from a few days to a week, depending on the method and kitchen size.
Final Thoughts: Transform Your Kitchen Without a Full Remodel
You don’t need a full kitchen renovation to make a big impact. Painting, staining, or refacing your cabinets can completely refresh your space at a fraction of the cost.
The key is choosing the right method for your cabinets and taking the time to do it right. Whether you DIY or bring in a pro, a cabinet refresh is one of the most effective ways to upgrade your kitchen and boost your home’s value.
Connect with top-rated local contractors who can help you with siding, roofing, HVAC, windows, and more. Get free quotes from verified professionals in your area today.