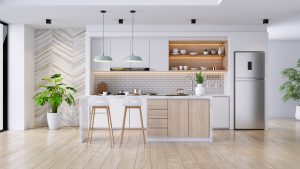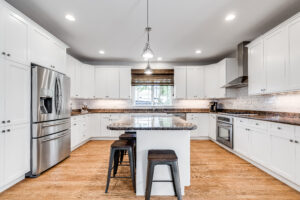


Most kitchen island problems come down to size. Too wide, and you lose the clearance needed to open drawers and move between counters.
Too narrow, and you miss out on usable prep space and seating. The fix is knowing the right measurements before anything gets built or ordered.
Standard kitchen islands range from 2 feet by 4 feet for compact kitchens up to 4 feet by 8 feet or larger in open-concept layouts, with heights of 36 inches for countertop work and 42 inches for bar-style seating.
But those numbers only tell part of the story. The clearance around the island, the overhang depth for seating, the support requirements for your countertop material, and the method you choose to add or extend an island all affect whether the final result actually works.
This guide covers standard kitchen island dimensions by kitchen size, overhang rules and support requirements for different countertop materials, and practical ways to add a new island or extend an existing one.
What Are Standard Kitchen Island Dimensions?
Standard kitchen islands measure 36 inches tall, 24 to 48 inches deep, and 48 to 96 inches long depending on the kitchen’s square footage.
These measurements reflect the most common configurations used in residential construction and remodeling. However, your kitchen’s specific layout, the island’s intended purpose, and the number of people using the space all influence which dimensions make sense.
Height Guidelines
The standard island height of 36 inches matches typical base cabinet and countertop height, creating a level work surface across the kitchen. This height works well for food preparation, cooking, and general workspace tasks.
For islands with bar-style seating, 42 inches is the common choice. This taller height accommodates standard bar stools and creates a more casual dining feel.
Some homeowners opt for a two-tier island design with a 36-inch work surface on one side and a raised 42-inch bar on the other. This approach has fallen out of favor in recent years as single-height islands offer a cleaner look.
| Island Purpose | Recommended Height | Stool Type |
|---|---|---|
| Food prep and cooking | 36 inches | Counter-height (24-26 inches) |
| Bar-style seating | 42 inches | Bar-height (28-30 inches) |
| Two-tier design | 36 + 42 inches | Varies by side |
| ADA accessible | 28-34 inches | Standard chair |
If you are taller than average, consider raising the work surface to 38 or 39 inches. Spending hours at a counter that’s too low leads to back strain, and a contractor or cabinet installer can adjust base cabinet height during installation.
Width and Length by Kitchen Size
The size of your kitchen determines how large an island can be without crowding the space. A common guideline is to keep the island footprint between 10% and 15% of your kitchen’s total square footage.
| Kitchen Size | Square Footage | Recommended Island Dimensions |
|---|---|---|
| Small | 70-130 sq ft | 24″ x 48″ to 36″ x 60″ |
| Medium | 130-160 sq ft | 36″ x 60″ to 48″ x 84″ |
| Large | 160-200+ sq ft | 48″ x 84″ to 48″ x 108″ |
Small kitchens benefit from narrow islands in the 24-inch depth range, which provide prep space and some storage without overwhelming the room. Rolling or portable islands can be a practical alternative when floor space is tight, since they can be moved out of the way when you need an open path through the kitchen.
For medium kitchens, a 36-inch by 72-inch island is a popular middle ground. If you are planning a full kitchen remodel, this is the size range where you have the most flexibility to integrate sinks, dishwashers, or cooktops into the island.
Large kitchens can support islands exceeding 8 feet in length. At this scale, the island becomes a true command center with dedicated zones for cooking, cleanup, and seating.
The risk with oversized islands is creating too much distance between the island and surrounding counters. If the gap exceeds 60 inches, the island starts to feel disconnected from the rest of the kitchen.
Actual costs depend on your location, project scope, and materials. The best way to know what you'll pay is to get quotes from local contractors.
Get Your Free Estimate →How Much Clearance Do You Need Around a Kitchen Island?
A kitchen island needs at least 36 inches of clearance on all sides, with 42 to 48 inches recommended for high-traffic areas and zones with seating.
Clearance is the single most overlooked measurement in island planning, and getting it wrong creates daily frustration. The space between the island and surrounding counters, appliances, and walls determines whether two people can work in the kitchen simultaneously and whether cabinet doors and dishwashers open freely.
| Zone | Minimum Clearance | Recommended Clearance |
|---|---|---|
| General walkway | 36 inches | 42-48 inches |
| Near appliances (oven, dishwasher) | 42 inches | 48 inches |
| Seating area (behind stools) | 36 inches | 44-48 inches |
| Between island and sink counter | 42 inches | 48 inches |
Before committing to an island size, mock up the footprint using painter’s tape on the floor or cardboard boxes cut to the island’s dimensions. Live with it for a few days, open nearby cabinet and appliance doors to confirm nothing collides, and walk through the space during meal prep to see if the traffic flow feels natural.
If your kitchen is on the smaller side, you may need to choose between a wider island and comfortable clearance. Prioritize the clearance every time.
A slightly smaller island with 42 inches of open space around it will serve you better than a larger island that forces people to squeeze past each other. For more layout strategies, explore remodeling ideas for a small kitchen.
What Is the Right Kitchen Island Overhang for Seating?
A seating overhang of 12 to 15 inches provides comfortable knee room, and any overhang beyond 10 to 12 inches requires structural support.
The overhang is the portion of the countertop that extends past the base cabinets. It provides knee clearance for anyone seated at the island and adds visual depth to the countertop edge.
Getting the overhang depth right is essential for comfort. Too shallow, and your knees hit the cabinets.
Too deep without proper support, and you risk cracking or breaking the countertop. Both problems are preventable with the right measurements.
"We matched with a great contractor the same day. The whole process was easy and completely free."
Overhang Depths for Seating
For comfortable dining or casual eating, plan for at least 12 inches of overhang. This gives seated adults enough room to pull their knees under the counter without bumping the cabinet face.
A 15-inch overhang is more generous and particularly comfortable for taller individuals or households that use the island as a primary dining area. Each seat needs 22 to 24 inches of width to prevent elbow collisions and give each person enough room for a plate or cutting board.
For a four-seat island, the seating section needs to be at least 88 to 96 inches long. You can find more on sizing seating areas in our guide to kitchen island seating.
| Number of Seats | Minimum Island Length (seating side) | Overhang Depth |
|---|---|---|
| 2 | 48 inches | 12-15 inches |
| 3 | 72 inches | 12-15 inches |
| 4 | 96 inches | 12-15 inches |
| 6 | 144 inches | 12-15 inches |
Support Requirements by Countertop Material
Every countertop material has a maximum unsupported span before it needs brackets, corbels, or other structural reinforcement. The general rule, known as the “one-third rule,” states that the unsupported overhang should not exceed one-third of the total countertop depth.
For a typical 25-inch deep countertop, that means roughly 8 inches of unsupported overhang before support is required. In practice, most fabricators and installers follow these material-specific limits:
| Countertop Material | Max Unsupported Overhang (3cm slab) | Max Unsupported Overhang (2cm slab) |
|---|---|---|
| Granite | 10-12 inches | 6 inches |
| Quartz | 10-12 inches | 6 inches |
| Quartzite | 10-12 inches | 6-8 inches |
| Marble | 8-10 inches | 6 inches |
| Butcher block | 12-18 inches (varies by species) | N/A |
| Laminate | 12 inches | N/A |
Marble deserves special attention. Despite its beauty, marble is more brittle than granite or quartzite and is more prone to chipping or cracking at unsupported edges, so support brackets are typically required sooner.
When comparing materials for your island, review the full range of kitchen countertop options to understand durability, maintenance, and cost differences alongside overhang performance.
These overhang numbers are guidelines, not engineering calculations. Natural stone slabs are not uniform, and fissures, veining patterns, and mineral inclusions can create weak spots that a simple depth rule does not account for. When in doubt, add support brackets, since the cost of a few steel brackets is negligible compared to replacing a cracked countertop.
Types of Overhang Support
Once your overhang exceeds the unsupported limit for your countertop material, you need a support system. The right choice depends on your overhang depth, countertop weight, and kitchen style.
Hidden Steel Brackets
These L-shaped or flat brackets mount beneath the countertop and remain invisible from the front. They are the most popular choice for modern kitchens because they maintain a clean, floating look.
Space them 18 to 24 inches apart, with one bracket set 4 to 6 inches from each end of the overhang. Hidden brackets work well with granite, quartz, and quartzite installations.
Corbels
Decorative triangular or L-shaped supports, often made of wood or cast metal, that mount to the cabinet face and extend outward beneath the countertop. Corbels add architectural character and work well in traditional, farmhouse, or transitional kitchens.
Legs or Posts
For overhangs exceeding 15 inches, decorative legs provide robust support. Turned legs suit traditional kitchens, while square or tapered legs work in modern spaces.
Legs are visible and affect seating arrangements, so plan their placement carefully. Position them at the ends of the overhang to leave the maximum open span for seating in between.
Waterfall Edges
A waterfall countertop drops the stone vertically down one or both sides of the island to the floor. This design provides structural support without visible brackets and creates a striking visual statement.
It is one of the more expensive options but eliminates the need for separate support hardware. Waterfall edges work particularly well with dramatic veining in materials like quartzite or marble-look quartz.
How to Choose the Right Island Shape and Layout
The shape of your island should match your kitchen’s footprint and support the way you actually cook and move through the space.
Rectangular islands are the most common and the most versatile, fitting naturally into galley, L-shaped, and U-shaped kitchens. Square islands work in smaller kitchens where a long rectangle would block traffic.
L-shaped islands are well suited to open-concept kitchen layouts because they help define the boundary between the kitchen and adjoining living or dining areas without closing the space off. The shape you choose should prioritize smooth traffic flow over visual impact.
Planning for Integrated Features
Adding a sink, cooktop, or dishwasher to the island changes your sizing requirements. Here are the key space needs for common island features:
- Prep sink: 15 to 24 inches of width, plus 18 to 24 inches of counter space on each side for staging and cleanup
- Full-size sink: 22 to 30 inches of width, plus clearance on both sides
- Cooktop: At least 30 inches of width, with proper ventilation via an overhead range hood or downdraft system
- Dishwasher: 24 inches of width, positioned adjacent to the sink for efficient workflow
If you plan to include a cooktop, the island should be at least 7 feet long to accommodate both the cooking zone and a separate prep or seating zone. Shorter islands with cooktops feel cramped, and the proximity of open flame or hot surfaces to seated guests raises safety concerns.
For help choosing the right sink style for an island installation, see our guide to choosing the right kitchen sink.
Why Hire a Licensed Professional
- Licensed & insured — protects you from liability
- Warranty coverage — manufacturers require pro installation
- Code compliance — avoids permit issues
- Faster completion — pros finish in days, not weeks
Storage Planning
Islands are prime territory for storage, and the right combination of cabinet types keeps everything accessible without cluttering the design. Common island storage options include:
- Standard base cabinets: Best for large items like mixing bowls, baking sheets, and small appliances
- Deep drawers: Ideal for pots, pans, and lids, with easier access than lower cabinets
- Pull-out trash and recycling bins: Keeps waste hidden and frees up floor space elsewhere
- Open shelving: Works well for cookbooks, decorative items, or frequently used serving pieces
- Built-in wine racks or beverage coolers: Adds entertaining functionality without taking counter space
For more ideas on maximizing storage, see our kitchen storage ideas guide.
When planning storage layout, remember that cabinets on the seating side are only accessible when stools are pulled out. Place your most-used storage on the working side of the island.
How Much Does It Cost to Add a Kitchen Island?
A custom kitchen island costs $3,000 to $6,000 on average, with prefab options starting under $1,000 and high-end builds exceeding $10,000.
The total cost depends on whether you choose a prefabricated island, a semi-custom build, or a fully custom design. Material choices for the countertop and cabinetry make up the largest share of the budget, followed by labor and any plumbing or electrical work.
| Island Type | Typical Cost Range | Best For |
|---|---|---|
| Rolling cart or portable island | $100-$500 | Renters, small kitchens, temporary setups |
| Prefabricated (stock cabinets + countertop) | $800-$2,500 | Budget-conscious homeowners, simple designs |
| Semi-custom | $3,000-$6,000 | Most homeowners, moderate customization |
| Fully custom | $6,000-$10,000+ | High-end finishes, integrated appliances |
DIY vs. Professional: At a Glance
Cost Factors
Several variables determine where your project falls within these ranges. The three biggest cost drivers are countertop material, plumbing and electrical additions, and cabinetry quality.
Countertop Material
Countertop material is the single largest variable in island cost. Laminate costs $10 to $40 per square foot installed, while granite runs $50 to $200 per square foot and quartz falls in the $50 to $150 range.
Marble and quartzite sit at the top of the price scale. Material choice also affects long-term maintenance costs, so weigh durability alongside the upfront price.
Plumbing and Electrical
Adding a sink, dishwasher, or new electrical outlets typically adds $500 to $2,000 or more to the project total. If the island location requires routing supply lines through the floor, expect plumbing costs to be higher than if lines run through an adjacent wall.
Cabinetry
Cabinet costs vary based on material and construction quality. Stock cabinets from home improvement stores are the most affordable, while custom hardwood cabinets with soft-close hardware and specialty inserts command a premium.
Learn more about cabinet material options before making a decision. If you are working within a tight budget, our guide to kitchen remodeling on a budget offers strategies for getting the most impact from limited spending.
How Can You Extend an Existing Kitchen Island?
You can extend an existing island by adding cabinetry, installing a larger countertop with bracket support, or attaching a table extension.
If your current island is functional but just a bit too small, a full replacement is not always necessary. Several extension methods can add prep space, seating, or storage without the cost and disruption of a complete rebuild.
Spring and summer are the busiest seasons for home improvement projects — top-rated contractors book up fast. Lock in your estimate now before demand peaks.
Check Availability in Your Area →Extend the Countertop With a Cantilever
A cantilevered countertop extension adds one to two feet of surface area beyond the existing cabinet base. The extended section is supported by hidden brackets or legs, creating space for stools underneath.
This is one of the most popular extension methods because it adds seating without altering the existing cabinetry. The challenge is matching the countertop material, since natural stone like granite has unique slab patterns that are nearly impossible to replicate exactly.
Some homeowners embrace this by using a contrasting material, such as butcher block alongside a stone surface, to create a deliberate two-tone look. This approach can actually enhance the island’s visual appeal rather than looking like a mismatch.
Add Cabinetry to One End
Building additional base cabinets onto one end of the island increases both counter space and storage. This approach works best when the new cabinetry matches the existing island’s style, finish, and hardware.
A cabinet builder or kitchen designer can help ensure the extension blends with the original. After adding cabinetry, you will need a new, larger countertop that spans the full length of the extended island, since piecing together two separate slabs rarely produces a clean result.
Attach a Table Extension
A table-height extension adds a dining or workspace surface at a slightly lower height than the island counter. This creates a natural visual break between the working surface and the eating area.
The table section attaches to the island base at one end and rests on one or two support legs at the other. This method is one of the more affordable options and can even be a DIY kitchen project if you are comfortable with basic carpentry.
Use leg styles that match the island’s existing architecture. Turned legs suit traditional kitchens, while tapered or hairpin legs complement modern spaces.
Ready to Move Forward?
Tell us about your project and get matched with up to 3 pre-screened contractors. Compare quotes, check reviews, and hire with confidence.
Add a Second Island
If your floor plan supports it, adding a second island can be more practical than extending the first. Dual islands work well in large kitchens and open-concept layouts where one island handles cooking and prep while the other serves as a seating and serving zone.
Expect to pay $3,000 to $5,000 for professional installation of a second island. This is typically the most expensive extension option, but it provides the most additional functionality.
Before extending any island, confirm that the expanded footprint still maintains at least 36 inches of clearance on all sides. An extension that looks great on paper can create a traffic problem if it narrows the walkway between the island and the nearest counter or wall. Measure twice, including with appliance doors open.
What Permits and Professional Help Do You Need?
Most cosmetic island additions do not require a building permit, but any project involving plumbing, gas lines, or electrical wiring likely does.
If your island extension or new installation includes a sink, dishwasher, gas cooktop, or new electrical outlets, check with your local building department before starting work. Running plumbing through a concrete slab foundation typically requires both a permit and a licensed plumber.
Electrical work, including adding outlets or under-cabinet lighting, should be handled by a licensed electrician in most jurisdictions. For purely cosmetic changes like adding a butcher block extension with legs or a portable island, permits are generally unnecessary.
If the project involves structural modifications to the floor or surrounding cabinetry, consult a contractor to confirm what your municipality requires. When hiring professionals, get at least three detailed quotes that break out materials, labor, and any subcontractor work for plumbing or electrical.
A well-planned remodeling budget helps prevent cost surprises once work is underway.
How Should You Plan Your Kitchen Island Project?
A well-sized kitchen island turns wasted floor space into the most functional surface in your home, combining cooking, storage, and seating.
Whether you are choosing dimensions for a new build, evaluating overhang support for a countertop replacement, or figuring out how to squeeze more function from an island that’s slightly too small, the principles stay the same. Measure the available space honestly, maintain at least 42 inches of clearance for comfort, support your overhang properly, and plan storage and seating around how your household actually uses the kitchen.
If your island project is part of a larger renovation, pairing the island upgrade with backsplash updates or new lighting can create a more cohesive result without doubling the disruption.
Ready to start your kitchen remodeling project? MyHomePros connects you with experienced kitchen contractors in your area who can help you design, build, or extend an island that fits your space and budget.
Connect with top-rated local contractors who can help you with siding, roofing, HVAC, windows, and more. Get free quotes from verified professionals in your area today.