A neglected HVAC system does not just run harder. It circulates dust, mold spores, and allergens through every room in your house, driving up energy costs while quietly degrading the air your family breathes. The U.S. Department of Energy estimates that routine HVAC maintenance, including coil and drain line cleaning, can reduce energy bills by 20% to 30%. This guide walks you through how to clean evaporator coils, condenser coils, and condensate drain lines yourself, and explains when to call a professional instead.
Why Does Cleaning Your HVAC System Matter?
Routine HVAC cleaning prevents efficiency loss, reduces allergens, and protects against water damage from clogged condensate lines.
Your HVAC system recirculates indoor air five to seven times per day. Every cycle pulls dust, pet dander, pollen, and other particles through the system. Over time, this debris coats your evaporator and condenser coils, restricts airflow, and settles inside your ductwork. The result is a system that works harder to reach the temperature you set on the thermostat, consumes more electricity, and wears out faster.
Dirty coils are one of the most common causes of reduced cooling performance. When grime builds up on coil surfaces, the heat exchange process slows down. Your AC runs longer cycles, your compressor works under greater strain, and your utility bills climb. In severe cases, a coated evaporator coil can freeze over entirely, shutting the system down.
Beyond efficiency, there is a direct connection between HVAC cleanliness and indoor air quality. The EPA notes that indoor air can be two to five times more polluted than outdoor air, and a dirty HVAC system is a major contributor. Mold, bacteria, and algae thrive in the damp environment around evaporator coils and condensate drain pans, and every cooling cycle pushes those contaminants into your living space.
What Is the Difference Between Evaporator and Condenser Coils?
Evaporator coils absorb heat from indoor air inside your air handler, while condenser coils release that heat outside through your outdoor unit.
Understanding which coil does what helps you know where to focus your cleaning efforts. Both coils are part of the refrigeration cycle that cools your home, but they sit in different locations and face different types of contamination.
Actual costs depend on your location, project scope, and materials. The best way to know what you'll pay is to get quotes from local contractors.
Get Your Free Estimate →Evaporator Coils (Indoor)
The evaporator coil sits inside or near your air handler or furnace, typically on the side where air enters the system. As warm air passes over this coil, the liquid refrigerant inside absorbs heat and converts to gas. That process also pulls moisture from the air, which drips into the condensate drain pan below.
Because evaporator coils operate in a dark, damp environment, they are prone to mold growth, bacterial buildup, and heavy dust accumulation. These coils are harder to access than condenser coils, and most HVAC manufacturers recommend leaving deep evaporator coil cleaning to a professional technician. Improper handling can damage the delicate fins or void your warranty.
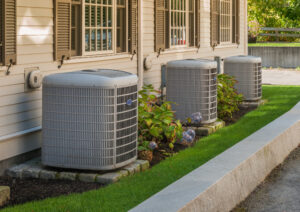
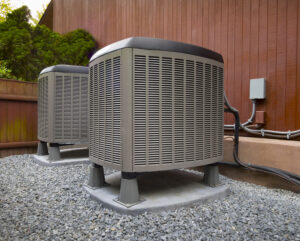
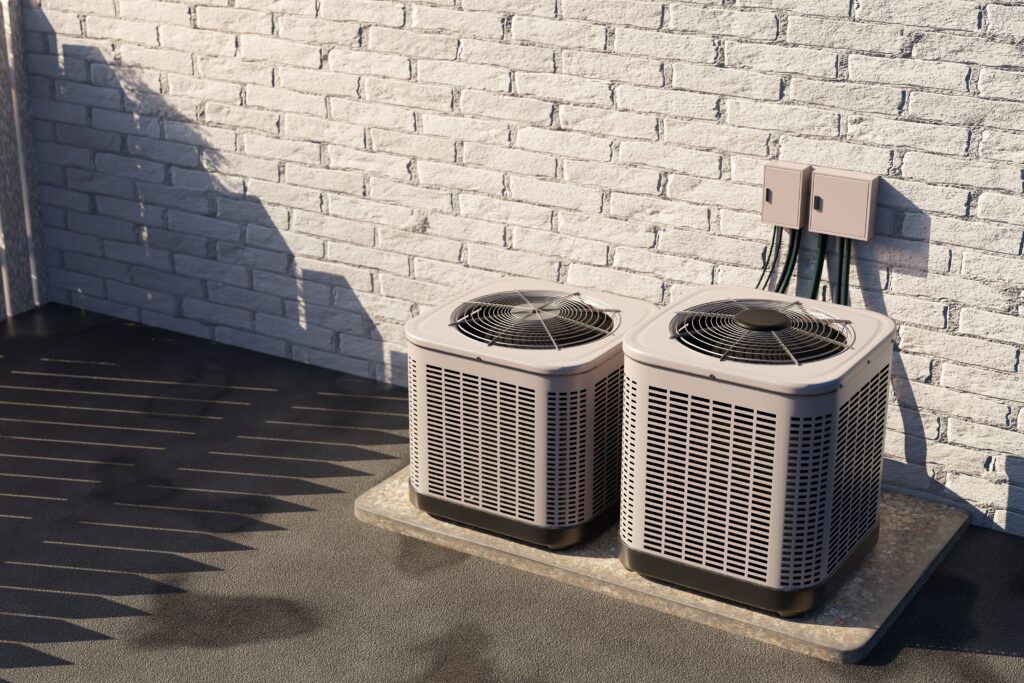
Condenser Coils (Outdoor)
The condenser coil sits inside your outdoor unit. It releases the heat that the refrigerant absorbed indoors, allowing the refrigerant to cool and cycle back to the evaporator. A fan blows air across the condenser coil to help dissipate heat.
Because the condenser unit sits outside, these coils collect leaves, grass clippings, dirt, cottonwood fuzz, and pollen. Blocked condenser fins restrict airflow and force the system to work harder, which raises refrigerant pressure and increases the risk of compressor failure.
| Feature | Evaporator Coil | Condenser Coil |
|---|---|---|
| Location | Indoor air handler or furnace | Outdoor condensing unit |
| Function | Absorbs heat from indoor air | Releases heat outdoors |
| Common contaminants | Dust, mold, bacteria | Leaves, dirt, grass, pollen |
| DIY cleaning feasibility | Limited, surface cleaning only | Moderate, with garden hose and coil cleaner |
| Recommended cleaning frequency | Annually during professional tune-up | At least once per year, spring preferred |
"We matched with a great contractor the same day. The whole process was easy and completely free."
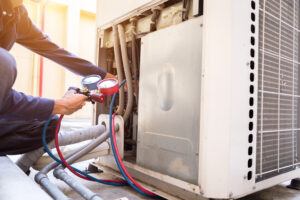
How Do You Clean Condenser Coils?
Clean condenser coils by turning off power, removing debris, applying a foaming coil cleaner, and rinsing gently with a garden hose.
Condenser coil cleaning is the most accessible DIY HVAC maintenance task. The outdoor unit is easy to reach, and the process requires only basic tools. Here is how to do it safely.
Tools You Will Need
Gather a garden hose with a spray nozzle, foaming coil cleaner (available at most hardware stores), a soft-bristle brush, a fin comb, work gloves, and safety glasses.
Step-by-Step Cleaning Process
- Turn off power. Shut off the system at the thermostat and flip the breaker that feeds the outdoor unit. Never work on the condenser while it is energized.
- Clear the area. Remove leaves, branches, and other debris from around the unit. Trim any plants or shrubs back to at least two feet on all sides to maintain adequate airflow.
- Remove the outer panels. Use a screwdriver or nut driver (typically 1/4″ or 5/16″) to remove the casing and access the coil. Be careful not to stretch or damage any fan wiring.
- Brush off loose debris. Use a soft-bristle brush to remove dirt, dead insects, and broken aluminum fins from the coil surface. Work gently to avoid bending the fins.
- Apply coil cleaner. Spray foaming coil cleaner evenly across the coil fins. Let it sit for the time specified on the product label, usually 5 to 10 minutes.
- Rinse with a garden hose. Spray from the inside out to push debris away from the coil, not deeper into it. Professional technicians typically rinse three times for a thorough clean.
- Straighten bent fins. Use a fin comb matched to your coil’s fins-per-inch count. Start at the bottom and work upward carefully.
- Reassemble and restore power. Reattach panels, restore power at the breaker, and test the system.
Warning: Never use a pressure washer on condenser coils. High-pressure water bends fins, damages coil surfaces, and can push debris deeper into the unit.
How Do You Clean Evaporator Coils?
Clean evaporator coils by vacuuming loose dust with a soft brush attachment and applying a no-rinse foaming cleaner to dissolve grime.
Evaporator coil cleaning is more limited as a DIY task because accessing the coil requires removing panels from your air handler. If your coil is severely dirty or you are uncomfortable working near high-voltage components, schedule an HVAC inspection with a licensed technician.
For light maintenance cleaning, follow these steps.
- Turn off power at the breaker. Do not rely on the thermostat alone.
- Remove the access panel. Locate the panel on your air handler that covers the evaporator coil. This may require a screwdriver or may have clips.
- Vacuum loose dust. Use a shop vacuum with a soft brush attachment to gently remove surface dust and debris. Avoid aggressive scrubbing.
- Apply a no-rinse coil cleaner. Spray evenly and let the cleaner drip into the drain pan. These products are self-rinsing through the condensation process during normal operation.
- Inspect the drain pan. While you have access, check for standing water, mold, or algae in the pan. Clean it with mild soap or a vinegar solution.
- Reassemble and restore power. Make sure all panels are secured before turning the system back on.
Pro Tip: Changing your air filter every one to three months is the single most effective way to keep your evaporator coil clean between professional tune-ups. A clogged filter forces dirt past the filtration barrier and directly onto the coil surface.
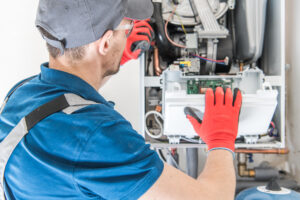
Why Hire a Licensed Professional
- Licensed & insured — protects you from liability
- Warranty coverage — manufacturers require pro installation
- Code compliance — avoids permit issues
- Faster completion — pros finish in days, not weeks
How Do You Clean a Condensate Drain Line?
Flush your condensate drain line with one cup of distilled white vinegar, let it sit for 30 minutes, then rinse with clean water.
The condensate drain line is a PVC pipe that carries moisture away from the evaporator coil and drain pan to the outside of your home. Over time, algae, mold, and sludge build up inside the line and form clogs. A blocked drain line can cause water to back up into the drain pan, overflow onto surrounding surfaces, and create conditions for mold growth in your home.
Many newer systems have a float switch in the drain pan that shuts the entire air conditioner off when water levels get too high. If your AC suddenly stops running, a clogged condensate drain line is one of the first things to check.
Signs Your Drain Line Is Clogged
Look for standing water in the drain pan, musty odors coming from supply vents, visible algae or slime around the drain opening, water stains on ceilings or walls near the air handler, or elevated indoor humidity that your AC cannot seem to control.
DIY vs. Professional: At a Glance
Step-by-Step Drain Line Cleaning
- Turn off the system. Power down at the thermostat and the breaker.
- Locate the drain line access point. This is usually a T-shaped PVC vent near the indoor air handler. Some systems also have an access point at the outdoor end of the line.
- Clear the drain pan. If you see standing water, remove it with rags or a wet/dry vacuum. Clean the pan with mild soap.
- Flush the line. Pour one cup of distilled white vinegar into the access point. Let it sit for 30 minutes to break down algae and biological growth. Then flush with several cups of clean water.
- Verify drainage. Go outside and confirm that water is flowing freely from the exit point. If flow is still restricted, use a wet/dry vacuum on the outdoor end to pull out stubborn clogs.
- Repeat monthly. A monthly vinegar flush during cooling season prevents buildup before it becomes a problem.
Pro Tip: Avoid using compressed air to clear condensate line clogs. Excessive pressure can crack PVC fittings, separate pipe joints, and push debris deeper into the system.
What Air Quality Steps Should You Take Beyond Coil Cleaning?
Upgrade your air filter, maintain proper humidity levels, and schedule annual professional HVAC maintenance to protect indoor air quality.
Cleaning coils and drain lines covers the mechanical side of HVAC maintenance, but indoor air quality depends on several additional factors that should be part of your seasonal home maintenance routine.
Spring and summer are the busiest seasons for home improvement projects — top-rated contractors book up fast. Lock in your estimate now before demand peaks.
Check Availability in Your Area →Upgrade Your Air Filter
Standard 1-inch fiberglass filters capture large particles but miss finer allergens. A MERV 11 or MERV 13 filter traps pollen, mold spores, dust mite debris, and some bacteria without significantly restricting airflow in most residential systems. Check your system’s specifications before upgrading, as some older units cannot handle higher-MERV filters without airflow modifications.
Control Indoor Humidity
The EPA recommends keeping indoor humidity between 30% and 50%. Humidity above 50% encourages mold growth, dust mite reproduction, and bacterial contamination on evaporator coils and in ductwork. If your AC alone cannot maintain these levels, a whole-house dehumidifier integrated into your HVAC system provides consistent control.
Ready to Move Forward?
Tell us about your project and get matched with up to 3 pre-screened contractors. Compare quotes, check reviews, and hire with confidence.
Schedule Annual Professional Maintenance
A licensed technician can deep-clean components you cannot safely access, check refrigerant levels, test electrical connections, and inspect your ductwork for leaks or damage. Annual tune-ups are best scheduled in early spring before cooling season begins.
Consider Duct Cleaning
Professional duct cleaning is recommended every three to five years, or sooner if you notice visible dust buildup in registers, musty smells when the system runs, or recent construction or renovation work in your home.
How Often Should You Clean Your HVAC System?
Clean condenser coils and flush condensate lines at least once per year, ideally in spring before heavy cooling season begins.
The right cleaning frequency depends on your local environment, how many pets you have, and whether anyone in the household has allergies or respiratory conditions. Here is a general schedule to follow.
| Task | Frequency | DIY or Professional |
|---|---|---|
| Replace or clean air filter | Every 1 to 3 months | DIY |
| Clean condenser coils | Once per year (spring) | DIY |
| Flush condensate drain line | Monthly during cooling season | DIY |
| Clean evaporator coils | Annually | Professional recommended |
| Full system tune-up | Annually (spring for AC, fall for heating) | Professional |
| Duct cleaning | Every 3 to 5 years | Professional |
Homes with pets, heavy pollen exposure, or nearby construction may need more frequent cleaning. If you notice your system cycling more often, producing weak airflow, or generating unusual odors, do not wait for the next scheduled maintenance. Those are signs that your AC may need repair or at minimum an early cleaning.
Before winter arrives, take the time to properly winterize your outdoor AC unit after a final cleaning to protect it from off-season debris and weather damage.
Schedule your annual HVAC tune-up before summer demand peaks. Professional technicians book quickly in late spring. An early appointment ensures your system is clean, charged, and ready to handle the hottest months without breakdowns.

Anna has over six years of experience in the home services and journalism industries and serves as the Content Manager at MyHomePros.com, specializing in making complex home improvement topics like HVAC, roofing, and plumbing accessible to all. With a bachelor’s degree in journalism from Auburn University, she excels in crafting localized, comprehensive guides that cater to homeowners’ unique needs. Living on both coasts of the United States has equipped her with a distinctive perspective, fueling her passion for turning any house into a cherished home through informed, personalized decision-making.
Connect with top-rated local contractors who can help you with siding, roofing, HVAC, windows, and more. Get free quotes from verified professionals in your area today.