

Old brick that has seen better days or cracked stucco that looks tired from the street can make even a solid house feel outdated. If you have been thinking about a fresh exterior without the expense and mess of tearing everything off first, you are not alone. Thousands of homeowners cover existing brick or stucco with new siding every year, and the results can be dramatic.
The short answer is yes, siding can go over both brick and stucco. The longer answer involves preparation, the right materials, and a clear understanding of moisture management. Get those details wrong and you risk trapping water behind your new walls, which leads to mold, rot, and costly repairs. This guide walks through the full process, the best materials for the job, realistic costs, and the situations where removal makes more sense than covering up.
Can Siding Be Installed Over Brick?
Siding can be installed over brick, but the uneven surface of brick requires furring strips or sheathing to create a flat nailing base.
Brick walls are not smooth enough for siding panels to attach directly. The mortar joints, varying brick depths, and surface irregularities prevent a flush connection. To solve this, contractors fasten vertical furring strips through the brick, spacing them 16 inches on center to align with the siding panel widths.
Brick Veneer vs. Solid Brick
Before any furring strips go up, you must identify whether your home has solid structural brick (common in homes built before 1950) or brick veneer (a single layer of brick sitting outside a standard wood-framed wall). This distinction is critical for structural safety:
- Brick Veneer Risks: Veneer walls rely on hidden metal wall ties to stay anchored to the interior wood framing. In older homes, these ties can rust out or may have been spaced too far apart originally.
- The Solution: If you anchor heavy siding to a failing veneer, you risk pulling the entire brick facade off the house. For veneer walls, structural masonry fasteners must pass completely through the brick and bite at least 1.25 to 1.5 inches directly into the structural wood studs behind it, rather than anchoring solely into the brick.
Before the project moves forward, look for cracked or crumbling mortar, loose bricks, and any signs of water intrusion. If the mortar joints are deteriorating, a mason should repoint the affected areas first.
Important: Brick adds significant weight to the wall assembly. Adding siding on top means even more load on the structure. Have a contractor evaluate whether the foundation and framing can handle the combined weight, especially on older homes.
Can Siding Be Installed Over Stucco?
Stucco provides a smoother starting surface than brick, making it somewhat easier to install siding over, though moisture control is still critical.
Because stucco is a cement-based coating applied directly to wall sheathing or masonry, it typically creates a flatter plane than brick. That said, stucco still requires furring strips for most siding installations. The strips provide an air gap that allows moisture to drain and prevents water from getting trapped between the old stucco and the new siding.
Stucco is highly porous, acting as a “reservoir cladding” that absorbs water readily during rainfall. If you skip the weather-resistant barrier between the stucco and the new siding, you are setting up conditions for mold growth and hidden rot. Contractors generally install house wrap or a permeable membrane over the stucco before attaching furring strips.
Cracks in stucco smaller than 1/8 inch can be patched with a standard repair compound. Anything larger, or cracks that appear to follow structural lines, must be evaluated by a structural professional before covering them up.
What Preparation Does the Existing Surface Need?
Both brick and stucco surfaces must be structurally sound, dry, and free of active moisture damage before new siding can be installed over them. Preparation is where this type of project either succeeds or fails. Covering a compromised surface with new siding does not fix the underlying problem; it simply hides it while the damage continues to spread.
Inspect for Moisture Intrusion
Check interior walls adjacent to the exterior for any signs of dampness, discoloration, or mold. Look in the attic for daylight coming through exterior walls or signs of water staining on the roof deck and rafters.
Actual costs depend on your location, project scope, and materials. The best way to know what you'll pay is to get quotes from local contractors.
Get Your Free Estimate →Repair Cracks and Structural Defects
Small stucco cracks get filled with elastomeric caulk or patching compound. Damaged brick mortar requires repointing. Any loose or bulging sections of either material must be completely removed and repaired before covering.
Clean the Surface
Power washing removes dirt, algae, and loose paint that could interfere with the adhesion of moisture barriers or the secure attachment of furring strips. Let the surface dry completely for at least 48 hours before proceeding.
Check for Lead Paint
Homes built before 1978 may have lead-based paint on exterior brick or stucco. Disturbing lead paint during furring strip installation creates a health hazard and may require certified lead abatement per EPA’s Renovation, Repair and Painting Rule.
"We matched with a great contractor the same day. The whole process was easy and completely free."
How Are Furring Strips Used in Siding-Over-Masonry Projects?
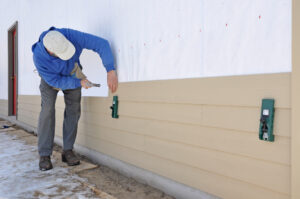
Furring strips create a flat, level surface over uneven brick or stucco while providing a drainage plane and ventilation gap behind the siding. This is the most important step in any siding-over-masonry installation. Proper sheathing and furring strip placement determines whether the siding hangs straight, sheds water correctly, and lasts as long as it should.
Contractors use pressure-treated wood strips, typically 1×3 or 1×4 lumber, secured vertically to the wall with specialized masonry anchors driven into the structural framing. Spacing follows the siding manufacturer’s nailing requirements, usually 16 inches on center.
The gap between furring strips gets filled with rigid foam insulation board, which serves double duty. It adds thermal resistance and creates a flat plane flush with the face of the furring strips so the siding panels sit evenly.
Critical Fastener Specifications
Standard siding nails will not work when securing a cladding system to masonry. The system requires dual-layer fastening hardware:
- Furring Strip Anchors: Heavy-duty 3/16-inch or 1/4-inch masonry screws (such as Tapcons) or concrete sleeve anchors. These must penetrate at least 1 to 1.5 inches into solid masonry or the underlying wood studs, spaced every 12 to 16 inches vertically.
- Siding Fasteners: Hot-dipped galvanized or stainless steel ring-shank siding nails. They must be long enough to pass through the siding panel and penetrate fully into the wood furring strip.
Avoiding the “Vapor Sandwich” with Proper Perm Ratings
Because brick and stucco hold moisture, solar vapor drive occurs when the sun hits the wet masonry, forcing water vapor inward toward the home. To prevent trapping this moisture against your wood framing—a disaster known as a vapor sandwich—you must use materials with correct permeability (perm) ratings:
- The Weather-Resistant Barrier (WRB): Must be highly breathable, featuring a high perm rating (typically over 10 perms) to let vapor escape outward.
- The Rigid Foam Insulation: Avoid vapor-impermeable options like foil-faced polyisocyanurate (polyiso). Instead, use vapor-permeable rigid foam, such as Unfaced Expanded Polystyrene (EPS), which allows the wall assembly to dry toward the exterior.
Component Overview
| Component | Purpose | Typical Specs |
|---|---|---|
| Furring strips | Create flat nailing base, ventilation gap | 1×3 or 1×4 pressure-treated lumber, 16″ on center |
| Masonry screws | Secure strips to wall or structural framing | 3/16″ or 1/4″ diameter, corrosion-resistant |
| Rigid foam board | Insulation, leveling between strips | 1/2″ to 1″ thick vapor-permeable EPS (R-2 to R-5) |
| Weather-resistant barrier | Prevent liquid water penetration while letting vapor escape | High-permeability house wrap (10+ perms) |
| Flashing | Direct water away from penetrations | Aluminum or galvanized steel at windows, doors, corners |
Proper flashing placement around windows, doors, and wall transitions is critical. Water that reaches the drainage plane behind the siding must have a clear path to exit via weep holes at the bottom of the wall.
Managing the “Deep Window” Dilemma
When you add furring strips (3/4-inch), rigid foam insulation (1/2-inch to 1-inch), and the thickness of new siding panels (1/2-inch), you extend the exterior wall profile outward by 1.5 to 2 inches. This structural build-out creates a significant architectural problem around your existing windows and doors, often referred to as the “tunnel effect.”
If left unaddressed, your windows will look sunken into the siding, and water will pool on top of the newly created ledge.
To solve this, contractors must perform extensive trim extensions before hanging the siding:
- Jamb Extensions: Custom wood extension jambs must be installed to bring the window and door frames out flush with the new siding plane.
- Custom Flashing Realignment: The newly extended window sills and casings must be completely wrapped in custom-bent aluminum coil stock.
- Z-Flashing: Heavy-duty metal Z-flashing must be installed above the window trim to capture water flowing down the WRB and direct it out past the face of the new siding.
What Siding Materials Work Best Over Brick and Stucco?
Vinyl, fiber cement, and engineered wood are the three most popular siding choices for covering brick or stucco exteriors. Not every siding product performs equally when installed over masonry. The material you choose affects weight, moisture behavior, maintenance requirements, and long-term performance.
Vinyl Siding
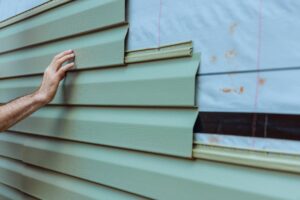
Vinyl is the lightest and most affordable option. It installs quickly over furring strips, resists rot and insect damage, and requires almost no maintenance beyond occasional washing. Insulated vinyl siding adds a foam backing that improves energy efficiency and panel rigidity.
The tradeoff is that vinyl can warp in extreme heat and crack in severe cold. It also does not have the same premium aesthetic or perceived quality as fiber cement or wood.
Why Hire a Licensed Professional
- Licensed & insured — protects you from liability
- Warranty coverage — manufacturers require pro installation
- Code compliance — avoids permit issues
- Faster completion — pros finish in days, not weeks
Fiber Cement Siding
Fiber cement (brands like James Hardie) is considered the best overall material for covering stucco by siding professionals. It resists fire, insects, and rot. It holds paint exceptionally well, does not warp, and mimics the look of real wood grain.
The primary downside is weight. Fiber cement weighs roughly 300 pounds per 100 square feet. Adding this to the weight of an existing brick facade demands a rigorous structural check of the home’s foundation and framing before installation begins. It also requires specialized cutting tools and higher labor costs.
Engineered Wood and Metal
Engineered wood (such as LP SmartSide) offers a natural wood appearance with better moisture resistance and lower weight than real wood. Metal siding provides excellent durability and weather resistance, but it is a heavier option and remains susceptible to denting.
Material Comparison
| Material | Cost Per Sq Ft (Installed) | Lifespan | Weight | Maintenance |
|---|---|---|---|---|
| Vinyl | $3 to $12 | 20 to 40 years | Light | Low |
| Fiber cement | $8 to $15 | 30 to 50 years | Heavy (300 lbs/100 sq ft) | Moderate |
| Engineered wood | $6 to $12 | 20 to 30 years | Medium | Moderate |
| Metal (aluminum/steel) | $5 to $15 | 30 to 50+ years | Heavy | Low |
DIY vs. Professional: At a Glance
How Much Does It Cost to Install Siding Over Brick or Stucco?
Installing siding over brick or stucco typically costs 5% to 10% more than standard siding installation due to added prep. The extra expense comes from furring strips, masonry fasteners, insulation board, high-perm moisture barriers, window/door jamb extensions, and the extended labor hours needed to drill into masonry substrates.
Covering stucco tends to cost slightly less than covering brick because stucco provides a more uniform starting surface. Brick requires more shimming and leveling during furring strip installation to achieve a flat plane, which adds labor time.
Project Scope Cost Estimates
| Project Scope | Estimated Cost Range |
|---|---|
| Siding over stucco (1,500 sq ft home) | $10,000 to $22,000 |
| Siding over brick (1,500 sq ft home) | $15,000 to $35,000 |
| Stucco removal before siding | Adds $1,500 to $3,000 |
| Brick removal before siding | Adds $4,000 to $10,000 |
Getting accurate siding cost estimates from at least three licensed contractors is essential. Ask each one explicitly whether their quote includes the masonry fasteners, vapor-permeable insulation, and the required window and door trim extensions. These line items are frequently left out of initial bids and can show up as costly change orders later.
What Are the Pros of Installing Siding Over Brick or Stucco?
Covering brick or stucco with siding saves on demolition costs, boosts insulation, and delivers a full exterior makeover.
The biggest financial advantage is avoiding removal. Demolishing brick can cost up to $10,000 or more, and removing stucco adds thousands before any new siding goes on. Covering the existing surface skips that expense entirely.
Beyond cost savings, siding over masonry delivers several practical benefits:
- Energy Efficiency: The added continuous insulation layer between the old wall and the new siding mitigates thermal bridging, potentially lowering heating and cooling costs. The U.S. Department of Energy recommends adding insulation wherever possible during exterior renovation projects to reduce long-term energy consumption.
- Low Maintenance: Modern siding materials require far less maintenance than aging brick mortar or cracking stucco.
- Aesthetic Variety: Siding offers a wide range of colors, textures, and profiles that masonry simply cannot match.
- Increased Property Value: New siding also increases home value. A siding replacement project typically recoups 60% to 70% of its cost at resale, climbing higher when the project resolves existing aesthetic or minor weathering defects.
Spring and summer are the busiest seasons for home improvement projects — top-rated contractors book up fast. Lock in your estimate now before demand peaks.
Check Availability in Your Area →What Are the Risks and Downsides?
Moisture trapping is the biggest risk when installing siding over masonry, followed by added structural weight and concealed damage. If the drainage plane is poorly designed or the moisture barrier has an improper perm rating, water can accumulate between the old wall and the new siding, leading to severe rot.
Trapped Moisture and Mold
Moisture problems behind siding are the number one reason these projects fail. Every transition point around windows, doors, corners, and roof lines must be properly flashed, sealed, and integrated into the drainage plane.
Added Structural Load
The combined weight of brick or stucco plus new siding, furring strips, and insulation board can strain older framing and foundations. Fiber cement over brick is the heaviest combination and demands a professional structural check before work starts.
Concealed Damage
Covering brick or stucco hides whatever is underneath. If there is active moisture infiltration, pest damage, or deteriorating framing behind the masonry, it will continue to worsen unseen beneath the new siding layer.
Ready to Move Forward?
Tell us about your project and get matched with up to 3 pre-screened contractors. Compare quotes, check reviews, and hire with confidence.
Reduced Future Access
Once siding covers the original masonry, accessing the underlying surface for utility repairs or structural updates becomes significantly harder. Homeowners who later decide they want to expose the original brick will also find it permanently scarred by masonry anchors.
Pro Tip: Always require that your contractor install clear weep holes or ventilation channels at the base of the wall and above window transitions. These small openings let trapped moisture escape and are one of the easiest ways to prevent long-term water damage.
When Should You Remove Brick or Stucco Instead of Covering It?
Removal is the better choice when the existing surface has active water infiltration, structural cracking, or extensive mold. Covering a failing surface with new siding is not a repair; it is a concealment. In certain situations, removal is the only responsible path forward, even though it costs significantly more.
If a home inspector or contractor finds water actively leaking through the brick or stucco into the home’s wall cavity, the leak source must be found and fixed. Siding installed over an actively leaking wall will trap that water and accelerate structural wood rot. Similarly, if structural cracks suggest foundation movement or wall settling, covering those cracks hides the warning signs of a severe structural issue.
Older homes with significant signs of siding or exterior damage should have the existing cladding removed entirely. This allows the sheathing, framing, and insulation underneath to be inspected, re-braced, and properly repaired before any new material goes on.
Should You Hire a Professional or DIY This Project?
Siding over brick or stucco is a professional-level project requiring specialty masonry fastening tools and precise moisture management expertise.
This is not a typical weekend DIY task. Drilling into brick or stucco requires specialized equipment, including commercial hammer drills and carbide-tipped masonry bits, along with the experience to avoid cracking the surrounding substrate. Incorrectly installed furring strips will result in a wavy appearance, causing siding panels to bow, buckle, or pull away from the wall over time.
Moisture barrier integration and flashing work are where the highest stakes lie. An improperly lapped house wrap or a missing kick-out flashing at a roof-to-wall junction can channel thousands of gallons of water directly into your wall cavity. These mistakes often do not become visible for months or years, by which point thousands of dollars in hidden structural damage has already occurred.
Get quotes from at least three licensed and insured siding contractors. Ask each one specifically about their experience with siding-over-masonry installations, and request references from similar completed projects. Understanding what to expect during a siding installation helps you evaluate whether a contractor’s proposed timeline, material specs, and ventilation strategies are realistic.
The Bottom Line
A well-executed siding-over-masonry project delivers a dramatic exterior upgrade while saving thousands in demolition costs. Both brick and stucco can serve as an excellent substrate for new siding, as long as the existing surface is structurally sound and the installation includes robust furring strips, a high-perm moisture barrier, proper fastener depths, and adjusted window casings. Skipping any of those technical steps turns a smart home improvement project into a future repair headache.
The most important decisions come down to material selection, contractor quality, and an honest assessment of the existing wall condition. If the brick or stucco is failing structurally, removal is the safer long-term investment. If it is structurally stable, covering it with modern siding is a proven, cost-effective way to modernize your home’s exterior while adding continuous insulation and long-lasting weather protection
Connect with top-rated local contractors who can help you with siding, roofing, HVAC, windows, and more. Get free quotes from verified professionals in your area today.