Laminate flooring ranks among the most popular DIY-friendly upgrades you can tackle in a weekend. A single room can go from bare subfloor to finished floor in under a day, and the click-lock systems on modern planks eliminate the need for nails, glue, or specialty fasteners. But there are a few critical steps that separate a floor that looks professionally installed from one that buckles, gaps, or chips at the edges.
This guide walks through every phase of the project. You will learn how to prepare your subfloor, cut planks cleanly, lay laminate over concrete, handle stair installations, and avoid the mistakes that send beginners back to the home improvement store for replacement materials.
What Tools Do You Need to Install Laminate Flooring?
A standard laminate installation requires basic hand tools, a few power tools, and an installation kit with spacers, a pull bar, and a tapping block.
The right tools make the difference between clean, tight seams and frustrating gaps that show through the finished floor. Most homeowners already own several of the items on this list, and a basic flooring installation kit typically costs between $20 and $40.
Essential Hand Tools
- Tape measure and pencil for marking cut lines on every plank
- T-square or speed square for drawing straight, perpendicular lines
- Utility knife for scoring underlayment and trimming vapor barriers
- Rubber mallet for tapping planks into place without damaging edges
Power Tools
- Miter saw or circular saw for straight crosscuts at the end of each row
- Jigsaw for curved cuts around pipes, door frames, and vents
- Table saw for rip cuts along the length of a plank (needed for the first and last rows)
- Oscillating multi-tool for undercutting door jambs and casings
Laminate Flooring Cutters
For a cleaner and quieter alternative to power saws, a manual guillotine-style laminate flooring cutter is highly effective for crosscuts. These tools operate without electricity, generate zero dangerous high-density fiberboard (HDF) airborne dust, and allow you to make cuts directly inside the room rather than walking back and forth to an outdoor saw station. You can find more insights on specialized DIY tool setups in the comprehensive Family Handyman guide to flooring tools.
Safety Gear
- Safety glasses to protect against laminate chips and sawdust
- Dust mask or respirator because laminate cutting produces fine HDF particles
- Knee pads since you will spend hours on the floor during installation
- Hearing protection when using power saws in enclosed spaces
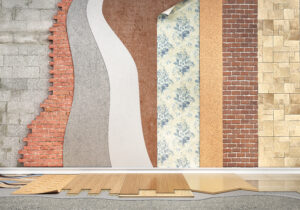
How Do You Prepare the Subfloor for Laminate Flooring?
A flat, clean, and dry subfloor is the most important factor in a successful laminate installation and prevents most flooring failures.
Laminate is a floating floor, which means the planks connect to each other rather than attaching to the surface beneath them. That design makes preparation even more critical. Any bump, dip, or debris under the planks will telegraph through the finished surface, create hollow spots that flex underfoot, and eventually damage the locking mechanisms.
Check for Level
Use a long straightedge or a 6-foot level to check the subfloor across multiple directions. The industry standard allows no more than 3/16 inch of variation over a 10-foot span. High spots on concrete can be ground down with an angle grinder. Low spots should be filled with a Portland cement-based self-leveling compound. On plywood subfloors, drive down any protruding screw heads and sand rough seams.
Actual costs depend on your location, project scope, and materials. The best way to know what you'll pay is to get quotes from local contractors.
Get Your Free Estimate →Clean the Surface
Sweep, vacuum, and remove every trace of dust, staples, tack strips, and adhesive residue. Even small particles under the underlayment can create noticeable bumps in the finished floor.
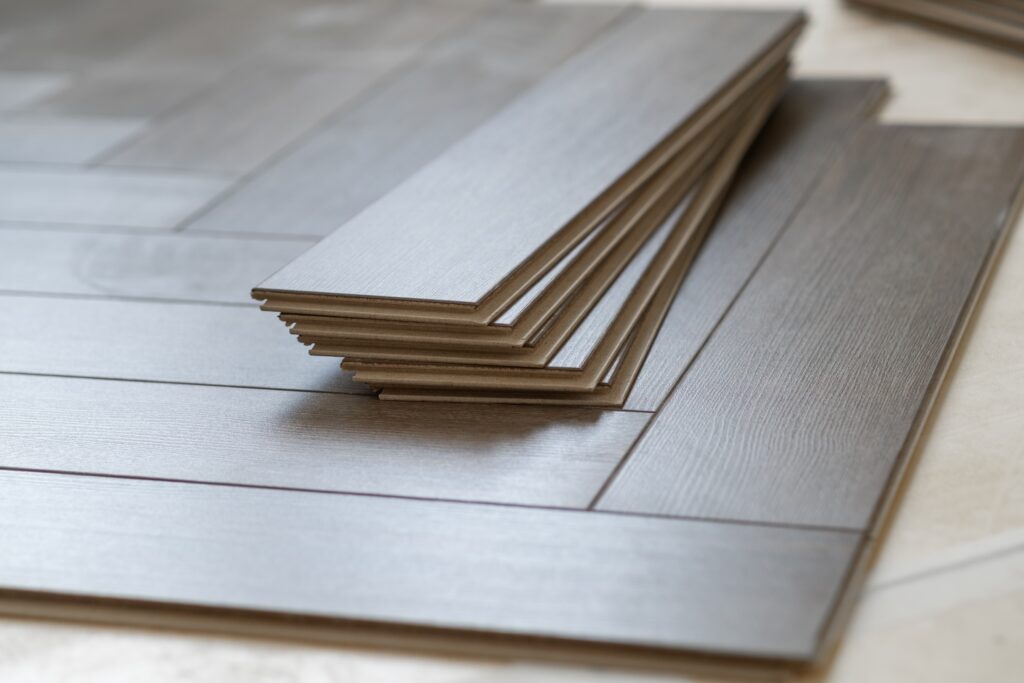
Acclimate the Flooring
Open the boxes and lay the planks flat in the room where they will be installed for at least 48 hours before starting. This allows the material to adjust to your home’s temperature and humidity levels, reducing the risk of expansion or contraction after installation. The North American Laminate Flooring Association recommends following the specific acclimation period listed on your product packaging, as some manufacturers require up to 72 hours.
Important: Never install laminate in a room where the temperature stays below 60°F or above 85°F. Humidity should remain between 30% and 60% during and after installation. These conditions prevent warping and protect the locking system integrity.
How Do You Cut Laminate Flooring Without Chipping?
Use a fine-tooth blade with 80 or more teeth per inch and apply painter’s tape along the cut line to prevent the decorative layer from chipping.
Laminate planks have a tough melamine wear layer on top of an HDF core. That top layer is durable against foot traffic, but it chips easily when cut with the wrong blade or technique. The key is understanding which direction your saw blade cuts so you can protect the visible surface.
| Cut Type | Best Tool | Decorative Side | Blade Recommendation |
|---|---|---|---|
| Crosscuts (end of row) | Miter saw | Face up | 80+ teeth, carbide-tipped |
| Rip cuts (width) | Table saw | Face up | 60–80 teeth, carbide-tipped |
| Curved/notch cuts | Jigsaw | Face down | Fine-tooth, downward-cutting |
| Door jamb undercuts | Oscillating multi-tool | N/A | Flush-cut blade |
Crosscuts (Cutting Planks to Length)
Crosscuts happen at the end of every row when the final plank needs trimming. A miter saw delivers the cleanest results for this type of cut. Place the plank with the decorative side facing up on a miter saw so the blade teeth enter the surface first, pushing the laminate down rather than tearing it upward.
Rip Cuts (Cutting Planks to Width)
The first and last rows almost always need to be ripped to a narrower width. A table saw handles these long, straight cuts best. Feed the plank through with the decorative side facing up and use a push stick to keep your fingers clear of the blade.
"We matched with a great contractor the same day. The whole process was easy and completely free."
Curved and Notch Cuts
Door frames, pipes, and vents require curved or notched cuts. A jigsaw with a fine-tooth, downward-cutting blade handles these shapes well. When using a jigsaw, flip the plank so the decorative side faces down, because jigsaw blades cut on the upstroke.
Pro Tip: Always make a test cut on a scrap piece before cutting your actual plank. This confirms your blade is sharp and your technique produces a clean edge. A dull blade is the leading cause of chipped laminate.
Understanding Locking Mechanisms
Modern laminate flooring lines generally utilize one of two distinct profiles to connect planks. Knowing which system your flooring uses is critical to prevent breaking the tongues during assembly.
- Angle-Angle Locking: This system requires you to insert the tongue into the groove at a 20 to 30 degree angle on both the long and short edges, then rotate the plank downward to lock it. Forcing these boards down flat without angling will strip the profiling.
- Drop-Lock or Tap-Down Locking: With this system, you engage the long edge at an angle first, then lower the plank flat. The short end joint aligns directly over the previous plank and snaps into place vertically from above using a gentle tap with a mallet and tapping block.
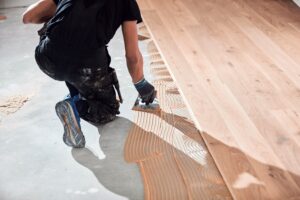
How Do You Install Laminate Flooring Step by Step?
Start in the left corner of the longest wall, lay planks toward the main light source, and maintain a 3/8-inch expansion gap on all sides.
Choosing the right direction to lay your flooring affects both the look of the room and the structural performance of the floor. Running planks parallel to the longest wall or toward the primary light source creates a more spacious appearance and reduces visible seams.
Step 1: Install the Underlayment
Roll out your flooring underlayment across the subfloor, butting seams together without overlapping. Tape seams with underlayment seam tape. If your laminate planks come with pre-attached padding, skip the separate underlayment layer to avoid creating a floor that is too soft and unstable.
Step 2: Lay the First Row
Place the first plank in the left corner with the tongue side facing the wall. Insert spacers between the plank and the wall to maintain a 3/8-inch expansion gap. Modern wider and thicker planks expand considerably, making this wider perimeter gap necessary to prevent seasonal buckling. Continue clicking planks end to end across the first row. Cut the last plank to fit, leaving the expansion gap at that wall as well.
Step 3: Start the Second Row
Use the cutoff piece from the first row to begin the second row, provided it is at least 12 inches long. This naturally staggers the end joints between rows. Stagger patterns should keep end joints at least 12 inches apart from row to row to maintain structural stability and protect the interlocking joints from separating under foot traffic.
Step 4: Click and Lock Planks Together
Angle the long side of each new plank at roughly 20 to 30 degrees and insert the tongue into the groove of the previous row. Lower the plank flat to engage the locking mechanism. Then slide the plank along the row to close the end joint and tap gently with a tapping block and rubber mallet.
Step 5: Work Around Obstacles
When you encounter a door jamb, use an oscillating multi-tool to undercut the casing so the laminate slides underneath. For pipes, drill a hole slightly larger than the pipe diameter, then cut a straight line from the hole to the nearest edge. Slide the plank around the pipe and glue the cutoff piece back into place.
Step 6: Install the Final Row
Measure the remaining width between the last installed row and the wall, subtract 3/8 inch for the expansion gap, and rip the final row of planks to that width on a table saw. Use a pull bar to click these last planks into place since there is no room to swing a mallet.
Why Hire a Licensed Professional
- Licensed & insured — protects you from liability
- Warranty coverage — manufacturers require pro installation
- Code compliance — avoids permit issues
- Faster completion — pros finish in days, not weeks
Step 7: Finish the Edges
Remove all spacers and install baseboards, quarter-round, or shoe molding to cover the expansion gaps. Attach trim to the wall, not to the floor, so the laminate can still move freely underneath. Install transition strips at doorways where laminate meets other flooring types.
Wet-Zone Installation Protocol
If you are installing water-resistant or waterproof laminate in high-exposure areas like kitchens, bathrooms, or entryways, standard floating methods are not enough to protect your subfloor. You must establish a watertight perimeter seal to satisfy modern product warranties, as detailed in the official Pergo installation standards.
- Maintain the required 3/8-inch expansion gap around the entire perimeter of the wet zone.
- Completely fill the expansion space by inserting a 3/8-inch compressible polyethylene (PE) foam backer rod into the gap.
- Apply a continuous bead of 100% premium waterproof silicone sealant directly over the backer rod, flush with the surface of the laminate.
- Apply a small bead of silicone sealant to the back of the baseboards or transition moldings where they make direct contact with the laminate flooring surface before fastening them to the wall.
How Do You Lay Laminate Flooring on Concrete?
Laminate installs well over concrete when you add a 6-mil polyethylene vapor barrier beneath the underlayment to block moisture from the slab.
Concrete is porous, and even slabs that look and feel dry can release enough moisture vapor to warp laminate planks over time. Basements and slab-on-grade homes face the highest risk because the concrete sits in direct contact with the soil below. Addressing moisture before installation is non-negotiable.
Test for Moisture First
Tape a 2-foot square of clear plastic sheeting to the concrete surface, sealing all edges with duct tape. Leave it in place for 48 hours. If condensation forms on the underside of the plastic or the concrete beneath it appears darker, your slab has a moisture problem that must be resolved before installing any flooring. You can also use a calcium chloride moisture test for a more precise measurement. The acceptable threshold is 3 pounds per 1,000 square feet over 24 hours.
Install the Vapor Barrier
Lay 6-mil polyethylene sheeting over the entire concrete surface. Overlap seams by at least 6 inches and seal them with moisture-barrier tape. Run the plastic up the walls by about 2 inches so it sits behind the baseboards once installed. This creates a continuous moisture shield beneath the floor.
DIY vs. Professional: At a Glance
Account for Concrete-Specific Challenges
New concrete slabs need a minimum of 30 days to cure before any flooring goes down. If your concrete has a drain or sump pump, do not install laminate in that area. A waterproof flooring option like luxury vinyl plank is a safer choice for areas with active water management features.
| Concrete Subfloor Checklist | Requirement |
|---|---|
| Levelness tolerance | 3/16″ per 10-foot span |
| Moisture test duration | 48 hours (plastic sheet method) |
| Maximum moisture reading | 3 lbs per 1,000 sq ft over 24 hours |
| Vapor barrier thickness | 6-mil polyethylene minimum |
| Seam overlap | 6 inches minimum |
| New slab cure time | 30 days minimum |
How Do You Install Laminate Flooring on Stairs?
Stair installation requires construction adhesive and stair nosing because the floating click-lock method used on flat surfaces won’t work on stairs.
Installing laminate on stairs is the most challenging part of any laminate project because each stair tread and riser must be individually cut, glued, and secured. Unlike flat floor installations where planks float freely, stair planks need permanent adhesion to handle the concentrated foot traffic and directional forces on each step.
Measure and Prepare Each Step
Remove any existing carpet, padding, and tack strips from the stairs. Scrape off old adhesive residue and make sure each tread is clean and flat. If the existing stair tread has a bullnose overhang, you have two options: cut it off flush with the riser below using a circular saw, or build it out with plywood to create a flat surface.
Cut Planks for Treads and Risers
Most stair treads are about 11 inches deep, while standard laminate planks run around 7 to 8 inches wide. That means each tread requires two planks glued together to cover the full depth. Glue the plank pieces together the night before installation using the locking system plus wood glue, and let them dry flat under weight. This makes installation day faster and more precise.
Install from Bottom to Top
Start at the bottom stair and work upward. Apply construction adhesive to the riser (the vertical face of the step) and press the laminate piece firmly into place. Hold it for at least two minutes to allow the adhesive to grab. Next, apply adhesive to the tread, press the plank assembly down, and secure the front edge with stair nosing.
Spring and summer are the busiest seasons for home improvement projects — top-rated contractors book up fast. Lock in your estimate now before demand peaks.
Check Availability in Your Area →Attach Stair Nosing
Stair nosing is a specially shaped molding that wraps over the front edge of each tread, providing a finished look and a safe, rounded edge to step on. Apply construction adhesive along the front of the tread and press the nosing into position. Drill pilot holes through the nosing and drive 1-1/4 inch No. 6 wood screws every 9 inches. Cover the screw heads with color-matched wood putty.
Safety Warning: Laminate can be slippery on stairs. Choose a textured laminate finish rather than a high-gloss product for stair applications. Improperly secured stair nosing is a serious fall hazard, so always use both adhesive and mechanical fasteners on every tread. The Consumer Product Safety Commission reports that stairway falls cause over one million injuries per year, making proper installation critical.
What Are the Most Common Laminate Flooring Mistakes?
Skipping acclimation, ignoring the expansion gap, and using the wrong blade are the three mistakes that cause the most laminate flooring failures.
Even experienced DIYers run into problems when they rush through preparation or cut corners on technique. Understanding these common installation mistakes before you start will save time, materials, and frustration.
Forgetting the Expansion Gap
Laminate planks expand and contract with changes in humidity. Without a 3/8-inch gap around all walls, fixed cabinets, and doorframes, the floor has nowhere to move. The result is buckling, peaking at the seams, or planks pushing apart. Spacers are cheap and essential.
Skipping Moisture Testing on Concrete
Laying laminate over a concrete slab without moisture testing is a gamble. Even a small amount of excess moisture will cause planks to swell, cup, or delaminate over the first few months. The plastic sheet test takes two days but can prevent thousands of dollars in replacement costs.
Ready to Move Forward?
Tell us about your project and get matched with up to 3 pre-screened contractors. Compare quotes, check reviews, and hire with confidence.
Forcing Planks Together
Hammering planks directly without a tapping block cracks the tongue-and-groove joints. Always use a tapping block against the edge of the plank and tap gently. If a plank will not click into place, check for debris in the groove or a slightly warped board.
Installing Over Uneven Subfloors
A floor that flexes or makes hollow sounds when you walk on it almost always traces back to a subfloor that was not properly leveled. Taking time to check for and fix subfloor issues before laying the first plank eliminates the most common source of post-installation complaints.
Not Staggering End Joints
Aligning the end joints in adjacent rows creates a visible grid pattern that looks unnatural and weakens the floor structurally. Stagger joints by at least 12 inches and vary the starting plank length for each row.
Troubleshooting Common Installation Issues
| Observed Symptom | Primary Root Cause | The Immediate Fix |
|---|---|---|
| Hollow sound or flexing underfoot | Subfloor low spot exceeding 3/16 inch over 10 feet. | Pull back planks in that area and fill the dip with Portland cement-based self-leveling compound. |
| Planks lifting or peaking at seams | Missing or pinched expansion gap against a wall or door casing. | Remove perimeter trim, inspect spacers, and use a pull-bar or oscillating tool to trim back the binding edge. |
| Micro-gaps appearing on short edges | Debris caught inside the locking groove during assembly. | Disassemble the row, vacuum out the tongue-and-groove channel, and re-engage the profiles. |
How Do You Care for Laminate Flooring After Installation?
Sweep or vacuum regularly, clean with a damp mop and a laminate-specific cleaner, and never use steam mops or excessive water on laminate surfaces.
Laminate floors are low-maintenance compared to hardwood, but the wrong cleaning products or techniques can damage the wear layer and void your warranty. Following a few simple care rules keeps your floor looking new for its expected lifespan of 15 to 25 years.
Use felt pads under all furniture legs to prevent scratches, and place mats at exterior entrances to catch grit and moisture before they reach the floor. Wipe up spills immediately, since standing water can seep into seams and cause the HDF core to swell. Avoid wax-based cleaners, abrasive pads, and polish products designed for hardwood, as these leave residue or dull the finish.
For deeper cleaning and stain removal, a microfiber mop dampened with a solution of warm water and a small amount of laminate floor cleaner handles most situations. If you notice scratches or minor damage over time, a laminate repair kit with color-matched putty can fill in surface imperfections without replacing entire planks.
The Bottom Line
A well-installed laminate floor transforms a room, holds up to daily wear, and costs far less than hardwood or tile when you do the labor yourself.
The tools are accessible, the click-lock systems are intuitive, and the finished product looks sharp when you follow proper preparation, cutting, and installation techniques. Concrete subfloors and stair installations add complexity, but both are manageable with the right materials and patience.
Start with your largest, simplest room to build confidence before tackling hallways, closets, or stairs. Plan your layout and material needs carefully, buy 10% extra material for waste and mistakes, and take your time with subfloor preparation. The effort you put into prep work shows in every seam, every transition, and every step you take across the finished floor.
Ready to start your laminate flooring project? Connect with a local flooring installer through MyHomePros to get a free estimate, or explore our complete guide to laminate flooring costs to budget your project.

Anna has over six years of experience in the home services and journalism industries and serves as the Content Manager at MyHomePros.com, specializing in making complex home improvement topics like HVAC, roofing, and plumbing accessible to all. With a bachelor’s degree in journalism from Auburn University, she excels in crafting localized, comprehensive guides that cater to homeowners’ unique needs. Living on both coasts of the United States has equipped her with a distinctive perspective, fueling her passion for turning any house into a cherished home through informed, personalized decision-making.
Connect with top-rated local contractors who can help you with siding, roofing, HVAC, windows, and more. Get free quotes from verified professionals in your area today.